

High-End Whole-House Customization from Foshan Download Catalog FAQs

How Do I Clean a Fabric Sofa​:Step by Step Guide

Fabric Sofa Care

A fabric sofa is often one of the most frequently used pieces of furniture in a home. It is where people relax after work, watch movies with family, spend time with pets, and gather with guests. Over time, however, everyday use can leave behind dust, food crumbs, body oils, pet hair, and accidental spills.

Cleaning a fabric sofa may seem as simple as wiping the surface, but the wrong approach can create new problems. Using too much water, choosing an unsuitable cleaner, or scrubbing stains too aggressively may cause discoloration, water marks, or damage to the fabric texture.

The best way to clean a fabric sofa is not about using the strongest cleaning method. It is about understanding your sofa material, removing dirt in the right order, treating stains properly, and allowing the fabric to dry completely.

This guide explains how to clean a fabric sofa step by step, what mistakes to avoid, and how to maintain your sofa so it stays comfortable and fresh for longer.

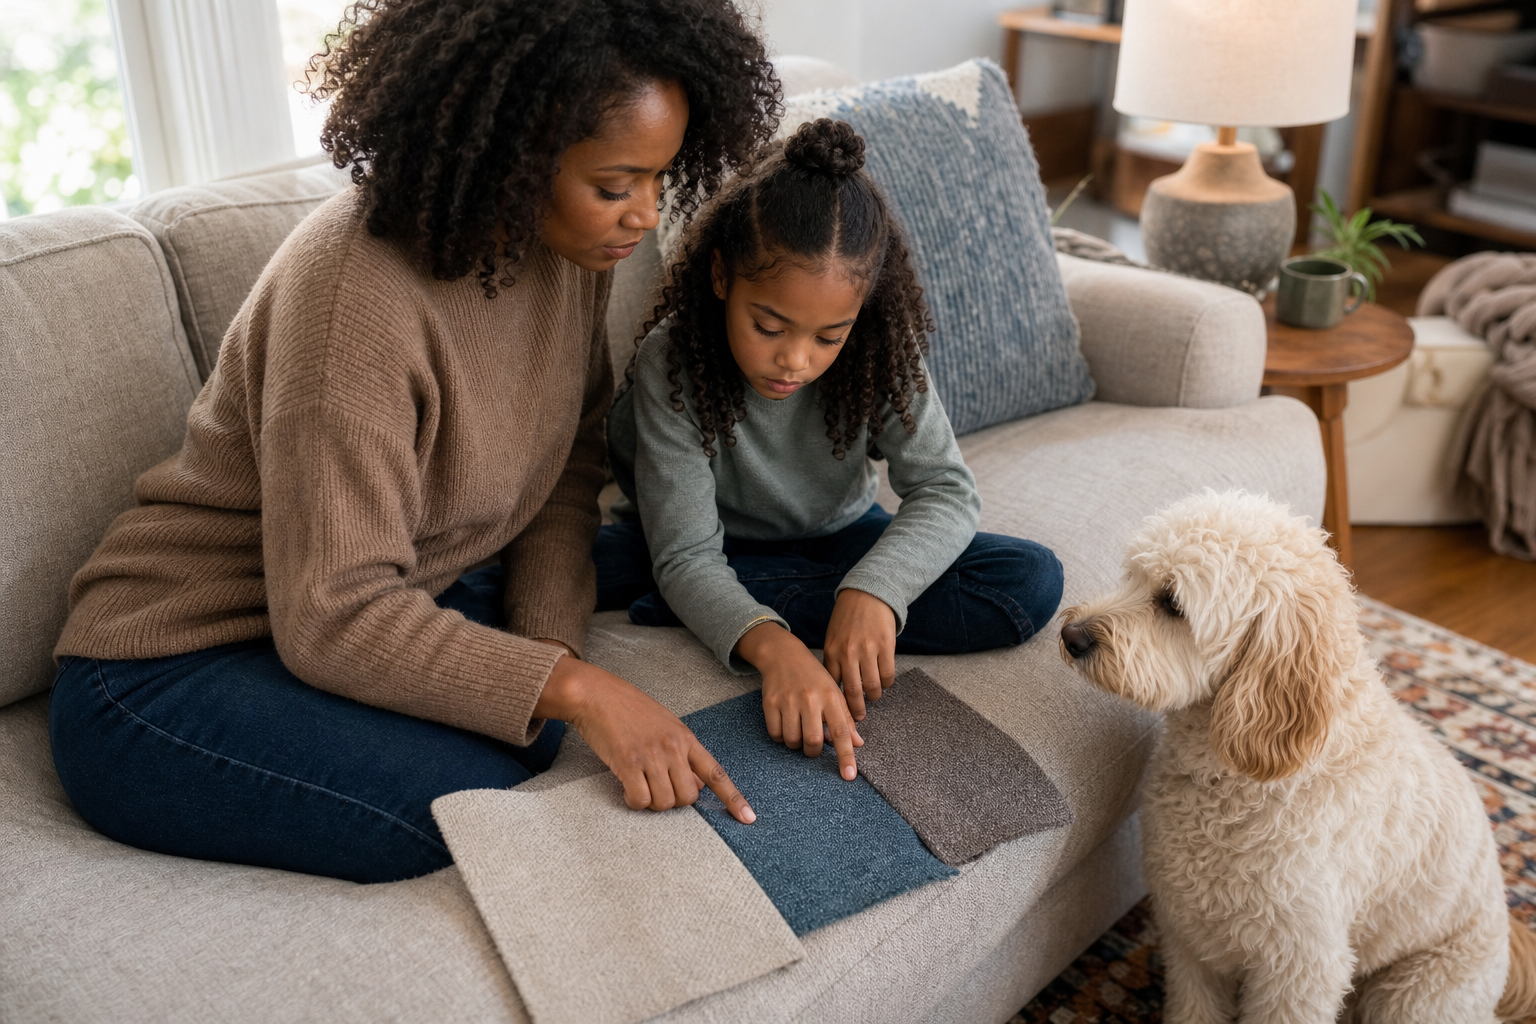
Family comparing practical fabric sofa upholstery swatches
Fabric type, household use, and the manufacturer’s care code should guide every cleaning decision.

Before Cleaning: Understand Your Fabric Sofa

Before reaching for a cleaner, take a moment to understand what type of fabric you are working with. A fabric sofa is not a single type of material. A durable polyester sofa, a soft linen sofa, and a delicate velvet sofa can react very differently to moisture and cleaning products. A method that works well on one sofa may leave marks or damage another.

Checking the fabric type before cleaning is the first step toward avoiding unnecessary problems.

Check the Sofa Care Label Before Using Any Cleaner

The cleaning label is usually the most reliable place to start because it shows what cleaning methods the manufacturer recommends. If your supplier provides a care and maintenance guide, keep it with the sofa’s purchase information so you can check the recommended method before using a new cleaner.

You may see codes such as:

W

means water-based cleaning products are generally suitable.

S

indicates that solvent-based cleaning methods are recommended instead of water-based solutions.

WS

means both water-based and solvent-based methods may be acceptable, although testing on a hidden area is still recommended.

X

means the sofa should generally only receive basic care, such as vacuuming, and may require professional cleaning for deeper stains.

Many cleaning mistakes happen because people assume all fabric sofas can be cleaned the same way. Checking the label takes only a few seconds but can prevent issues like fading, shrinkage, or damaged fibers.

Consider the Fabric Type and Its Cleaning Needs

Beyond the cleaning label, understanding the characteristics of your sofa fabric can help you choose a safer approach. If you are unsure how the upholstery was specified, the materials and finishes library can also help you compare common fabric options and their intended applications.

Polyester Fabric Sofas Are Usually Easier to Maintain

Polyester is commonly used in modern sofas because it offers good durability and resistance to everyday wear. For households with frequent sofa use, children, or pets, polyester upholstery is often easier to manage because it typically handles regular vacuuming and spot cleaning well. However, even durable fabrics should not be treated with harsh chemicals or excessive moisture.

Linen and Cotton Sofas Require More Careful Cleaning

Natural fabrics such as linen and cotton are popular because they provide a soft, breathable feel and a relaxed appearance. Their downside is that they can absorb liquids more quickly than some synthetic fabrics.

For these sofas:

  • Deal with spills as soon as possible;
  • Avoid soaking the fabric;
  • Test cleaning products before applying them widely.

Gentle care helps preserve the natural texture and appearance of the material.

Comparing woven upholstery and living room furniture materials
Different upholstery textures can react differently to moisture, friction, and cleaning products.

Velvet and Textured Fabrics Need a Gentler Approach

Velvet and other textured fabrics can add a premium look to a living room, but their surface structure makes them more sensitive to aggressive cleaning. Strong rubbing or incorrect brushing direction may affect the fabric appearance.

When cleaning these materials, focus on:

  • Gentle surface treatment;
  • Minimal moisture;
  • Following the fabric manufacturer’s recommendations.

How Do I Clean a Fabric Sofa Step by Step?

Once you understand your sofa fabric, the cleaning process becomes much easier. The goal is not to make the sofa as wet as possible or use the strongest cleaner available. A good cleaning routine focuses on removing dirt gradually while protecting the fabric underneath.

The safest approach is usually to remove dry dirt first, treat visible stains, clean the fabric carefully, and allow enough drying time. Following the right order helps prevent dirt from spreading deeper into the upholstery and reduces the risk of damaging the material.

Step 1: Vacuum the Sofa to Remove Dust and Loose Dirt

Many people start cleaning a fabric sofa by spraying a cleaner directly onto the surface. However, this often makes the process more difficult because loose dirt has not been removed yet.

Dust, crumbs, pet hair, and small particles can collect between fabric fibers and inside sofa seams. When moisture is added too early, these particles may become trapped and turn into residue that is harder to remove.

Start by vacuuming the entire sofa carefully, especially areas that are often overlooked:

  • Between cushions;
  • Along seams and edges;
  • Around armrests;
  • Under removable cushions.

For homes with pets, this step is even more important because pet hair and dander can become deeply embedded in fabric over time.

Removing dry dirt first creates a cleaner surface for the next steps and helps avoid unnecessary scrubbing.

Step 2: Identify and Treat Stains Before Deep Cleaning

After removing surface dirt, inspect the sofa for visible stains. Instead of cleaning the entire sofa immediately, focus on areas that actually need attention.

Different stains require different approaches, but the most important rule is simple:

Blot stains instead of rubbing them.

Rubbing may seem like it removes marks faster, but it can push liquid deeper into the fabric and spread the affected area.

Treat Fresh Liquid Spills Quickly

Coffee, juice, and other drinks are common accidents on fabric sofas.

When a spill happens:

Use a clean absorbent cloth to remove as much liquid as possible. Avoid wiping back and forth because this can spread the stain.

For better results:

  • Work from the outside of the stain toward the center;
  • Replace the cloth once it becomes saturated;
  • Allow the area to dry before deciding whether further cleaning is needed.

Quick action gives you a better chance of removing the stain before it settles into the fabric.

Handle Food and Grease Stains Carefully

Food and oil-based stains usually need a different approach.

First remove any solid residue from the surface. Do not immediately add large amounts of water, as moisture alone will not effectively break down grease and may spread the stain.

Instead, choose a fabric-safe cleaner suitable for the material and test it on a hidden area before applying it.

Step 3: Deep Clean the Fabric Without Over-Wetting

Once loose dirt and visible stains have been addressed, you can decide whether the sofa needs deeper cleaning.

A common misunderstanding is that more water means a cleaner sofa. In reality, excessive moisture is one of the main causes of cleaning problems.

Too much water can:

  • Extend drying time;
  • Create unpleasant odors;
  • Affect fabric texture;
  • Reach the inner filling.

The right method depends on the sofa condition.

For lightly used sofas, spot cleaning may be enough. For heavily used furniture, steam cleaning or professional upholstery cleaning may be more appropriate if the fabric allows it.

Step 4: Dry the Sofa Completely After Cleaning

Drying is an important part of the cleaning process, not just the final step.

A fabric sofa may appear clean on the outside while still holding moisture inside. If the interior remains damp for too long, it can lead to unwanted smells and fabric issues.

After cleaning:

  • Improve airflow around the sofa;
  • Open windows if possible;
  • Use fans to support drying;
  • Avoid sitting on damp areas.

Allowing the sofa to dry completely helps preserve the fabric’s texture and keeps your living room feeling fresh.

How to Remove Common Fabric Sofa Stains

Even with regular cleaning, fabric sofas will eventually face unexpected spills and marks. The best way to handle stains is to identify the cause quickly and use a method that protects the fabric rather than aggressively removing the mark.

Remove Coffee and Drink Stains Quickly

Coffee, tea, and other liquid spills are common on fabric sofas. The longer they remain on the surface, the more likely they are to penetrate deeper into the fibers. Start by gently blotting the liquid with a clean cloth instead of rubbing it. Rubbing can spread the stain and push it further into the fabric.

For stubborn marks, use a cleaner suitable for your sofa material and always test it on a hidden area first.

Handle Food, Grease, and Pet Stains Carefully

Food residue and grease stains require more attention because they may contain oils that are harder to remove with simple wiping. Remove solid particles first, then choose a cleaning method based on the fabric type. Avoid adding excessive water or using strong chemicals, as these can create larger problems.

For homes with pets, regular vacuuming and quick treatment of accidents can help prevent odors and buildup inside the upholstery.

Take Extra Care With Difficult Stains

Ink, dye transfer, and other stubborn stains can be difficult to remove without affecting the fabric. Before trying any cleaning method:

Check the care label;

Test products on an inconspicuous area;

Avoid unverified cleaning solutions.

For delicate fabrics or severe stains, professional upholstery cleaning may be the safer choice.

How to Maintain a Fabric Sofa After Cleaning

A clean sofa stays fresh longer when regular care becomes part of your routine. Small maintenance habits can prevent dirt buildup and reduce the need for frequent deep cleaning.

Vacuum Regularly to Prevent Dirt Buildup

Dust, crumbs, and pet hair can gradually settle into fabric fibers, especially around cushions and seams. Regular vacuuming helps keep the sofa cleaner and prevents everyday dirt from becoming harder to remove later.

Reduce Sunlight and Uneven Wear

Long-term exposure to sunlight can cause fabric colors to fade over time. Positioning your sofa away from strong sunlight or using window coverings can help protect the upholstery. If you are still arranging the room, a practical living room furniture layout can also help reduce prolonged sun exposure while maintaining comfortable circulation around the seating area.

If your cushions are removable, rotating them occasionally can also help distribute wear more evenly and maintain their shape.

Follow Fabric-Specific Care Instructions

Different fabrics respond differently to cleaning and maintenance. Continuing to follow the manufacturer’s care recommendations helps protect the sofa’s appearance and prevents accidental damage.

If repeated staining or difficult maintenance is making you reconsider the upholstery itself, cleanability, household use, and material durability are also useful factors when you choose living room furniture.

How Often Should You Clean a Fabric Sofa?

There is no single cleaning schedule that works for every fabric sofa. How often you need to clean your sofa depends on how frequently it is used, whether you have pets or children, and how much dust or dirt collects in your home.

For most households, regular maintenance is more important than frequent deep cleaning. Removing dust, crumbs, and surface dirt before they build up can keep your sofa looking fresh and reduce the need for intensive cleaning. Sofas are often among the most frequently used pieces of living room furniture, so cleaning frequency should reflect the actual traffic the seating receives.

A practical schedule is:

Usage SituationRecommended Cleaning Frequency
Regular household useVacuum weekly and deep clean every 6–12 months
Homes with petsVacuum more frequently and treat stains as soon as possible
Homes with children or heavy useClean visible stains immediately and schedule deeper cleaning when needed

In addition to a regular routine, pay attention to signs that your fabric sofa needs cleaning, such as:

  • A noticeable odor;
  • Darkened or dull-looking fabric;
  • Increased dust or pet hair buildup;
  • Stains that become harder to remove.

Cleaning your fabric sofa at the right time helps maintain its appearance while avoiding unnecessary wear caused by overly frequent deep cleaning. The goal is not to clean as often as possible, but to keep the upholstery in good condition with the right level of care.

Common Mistakes When Cleaning a Fabric Sofa

Even with the right cleaning tools, some common mistakes can damage fabric upholstery or make stains harder to remove.

Using Too Much Water

Excess moisture is one of the biggest risks when cleaning a fabric sofa. Water can soak into the padding, making the sofa harder to dry and potentially causing unwanted odors.

Skipping the Fabric Care Instructions

Different fabrics require different cleaning methods. Always check the care label before applying any cleaner to avoid discoloration or fabric damage.

Scrubbing Stains Too Hard

Aggressive rubbing can spread stains and affect the texture of the upholstery. Blotting and gentle treatment are usually safer and more effective.

Using Unsuitable Cleaning Products

Strong household cleaners may damage fabric fibers or change the sofa’s color. Choose products designed for upholstery and test them before full application.

If the existing upholstery is already heavily worn, permanently stained, or no longer suitable for the way the room is used, it may be more practical to compare upholstery and configuration options for custom sofas and couches rather than relying on increasingly aggressive cleaning methods.

Conclusion

Cleaning a fabric sofa does not require complicated methods, but it does require the right approach. Understanding your sofa material, removing dust before adding moisture, treating stains properly, and allowing enough drying time can help protect the upholstery and maintain its appearance.

Regular maintenance is just as important as deep cleaning. Simple habits like vacuuming regularly, addressing spills quickly, and following fabric care instructions can keep your sofa comfortable and fresh for years. A well-maintained fabric sofa not only looks better but also creates a cleaner and more comfortable living space for everyday life.

FAQ About Cleaning a Fabric Sofa

Can I use water to clean a fabric sofa?

It depends on the sofa fabric and care label. Some fabrics allow water-based cleaning, while others require solvent-based products or professional care. Always check the manufacturer’s instructions first.

How often should I deep clean a fabric sofa?

Most fabric sofas benefit from deep cleaning every 6–12 months, depending on usage. Homes with pets, children, or heavy daily use may need more frequent cleaning.

What is the best way to remove stains from a fabric sofa?

The best approach depends on the type of stain. In general, blot spills quickly instead of rubbing, then use a fabric-safe cleaner suitable for your sofa material.

Can I use a steam cleaner on a fabric sofa?

Steam cleaning may work for some fabric sofas, but not all materials are suitable. Check the care label before using steam and avoid excessive moisture.

How do I remove odors from a fabric sofa?

Regular vacuuming, proper ventilation, and cleaning the source of the odor can help. For persistent smells, use a fabric-safe odor treatment or consider professional upholstery cleaning.

How can I keep my fabric sofa clean longer?

Regular vacuuming, quick stain treatment, avoiding direct sunlight, and following the recommended care instructions can help maintain your sofa between deep cleanings.

How Can I Clean a Leather Sofa Without Damaging It?

The safest way to clean a leather sofa is to follow its manufacturer instructions, remove dust gently, and use only a method approved for that specific leather. The wrong household cleaner can alter the color, remove a protective finish, or leave the surface dry and uneven.

Use the steps below for basic cleaning. If the sofa has soft, absorbent leather, suede-like leather, peeling areas, or a stain you cannot identify, stop and ask the seller or a leather cleaner for help.

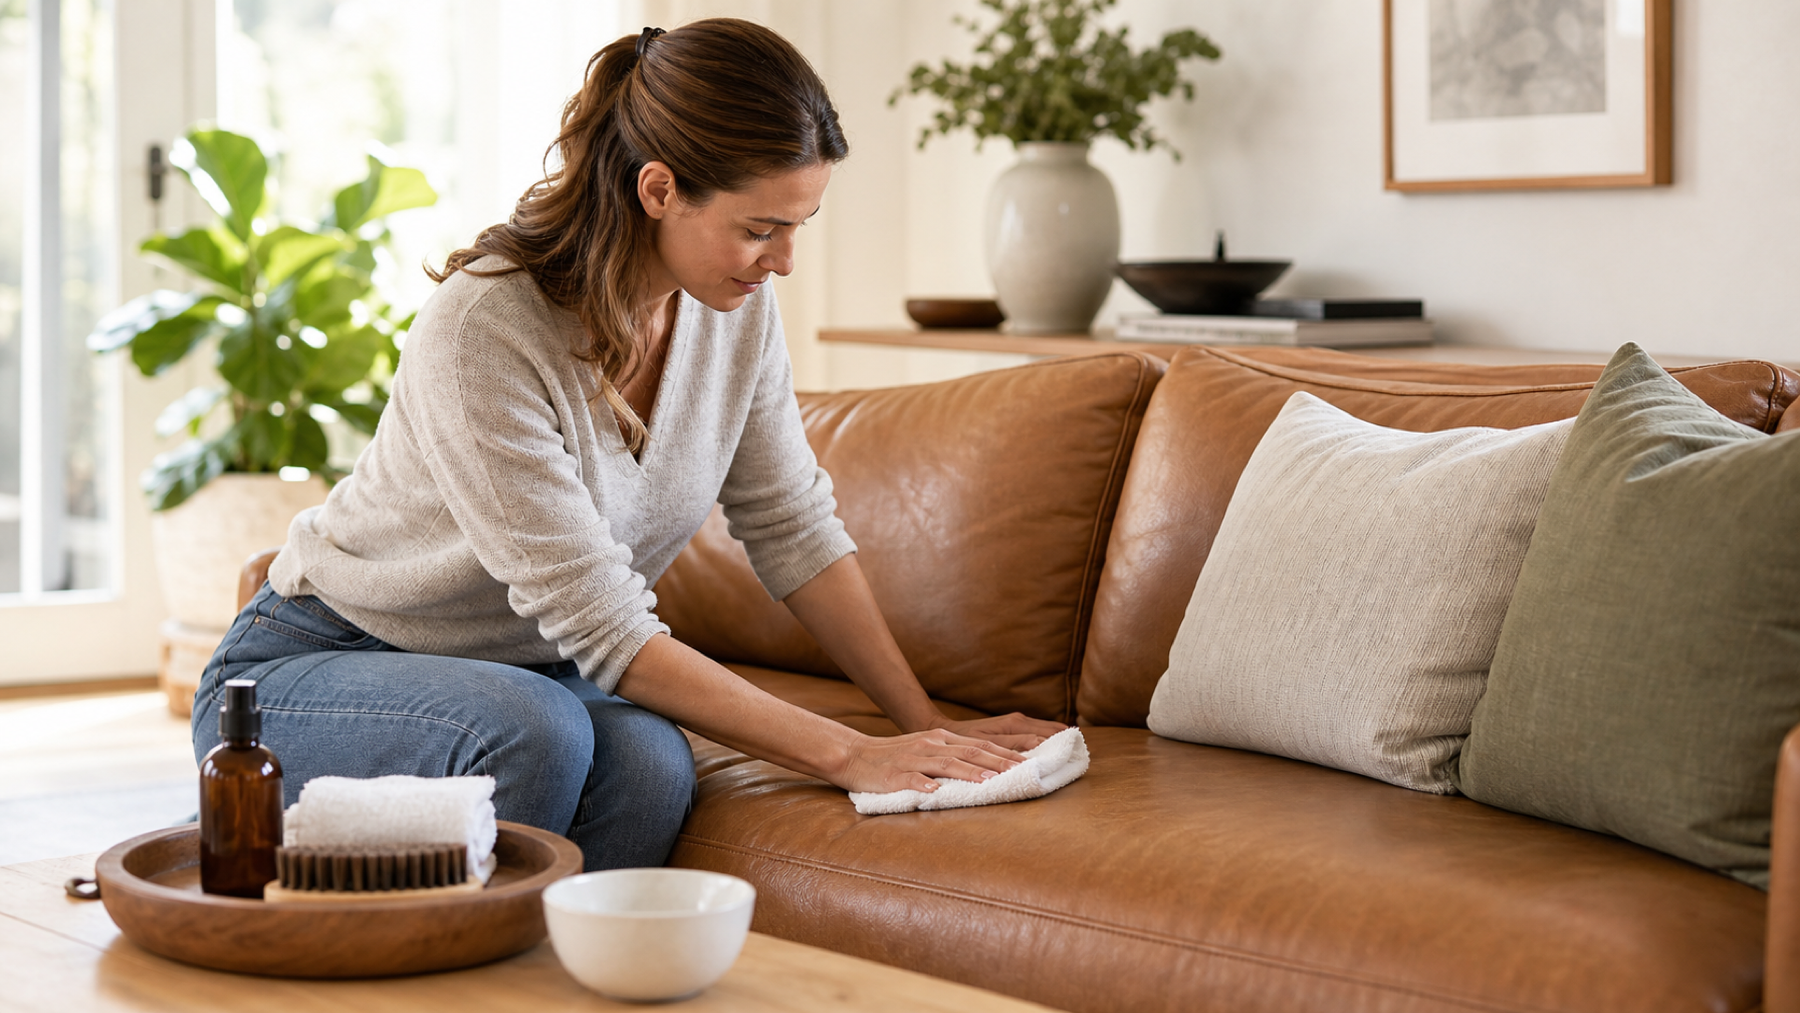
Homeowner gently cleaning a tan leather sofa with a white microfiber cloth
Gentle tools, a suitable leather cleaner, and a hidden-area test reduce the risk of damaging the sofa finish.

Read the Care Label Before You Clean

Look under the cushions, under the sofa, in the purchase documents, or on the product page. Find the leather name and cleaning instructions. If you are still identifying the upholstery, Avrelahome’s materials and finishes library provides a reference for its fabric and leather options. Always follow the sofa manufacturer’s care instructions instead of a general online recipe.

Not all leather sofas can be cleaned in the same way:

  • Protected leather: has a coating over the color. It is often easier to clean, but you still need to follow the maker’s instructions.
  • Aniline leather: looks more natural and can soak up liquid or turn darker more easily.
  • Nubuck and suede: feel soft and slightly fuzzy. They usually need special cleaning.
  • Faux or bonded leather: has a man-made surface. The leather conditioner will not fix peeling or rebuild this surface.

If you do not know the leather type, ask the seller or maker before using liquid. Stop if a hidden test area becomes darker, loses color onto the cloth, or feels different.

Couple comparing leather and upholstery materials in a living room
Leather type, finish, texture, and manufacturer instructions determine which cleaning method is appropriate.

What You Need Before Cleaning a Leather Sofa

Before starting, prepare the right tools and cleaning products. You will typically need:

Soft microfiber cloths;

A vacuum cleaner with a soft brush attachment;

Leather cleaner;

Leather conditioner;

A small bucket of clean water;

Soft-bristle brush (for textured leather).

Avoid using harsh household cleaners such as:

  • Bleach;
  • Ammonia-based products;
  • Strong detergents;
  • Abrasive cleaning tools.

These products can damage the leather finish and cause discoloration. However, unless the manufacturer’s instructions explicitly approve them, avoid:

Disinfecting wipes, bleach, alcohol, and ammonia

All-purpose cleaners and dishwashing degreasers

Furniture polish and silicone products

Saddle soap intended for other leather uses

Olive, coconut, or other household oils

Baking soda, toothpaste, and abrasive powders

Steam cleaners and excessive water

Hard brushes and scrubbing pads

The risk is not limited to an immediate stain. An unsuitable product may weaken a topcoat, change sheen, create sticky residue, or cause uneven aging that becomes visible later. If you are choosing a sofa rather than cleaning an existing one, a broader custom furniture materials guide explains why upholstery, frame, foam, seams, and cleaning requirements should be considered together.

How to Clean Your Leather Sofa Step by Step

Cleaning a leather sofa does not require complicated equipment or professional skills. The key is to follow the right order and use gentle techniques to protect the leather surface. The following steps will walk you through the cleaning process, from removing surface dust to conditioning the leather after cleaning.

Step 1: Check the Leather Type and Test the Cleaner

Before applying any cleaning product, identify the type of leather and check the manufacturer’s care instructions.

Different leather finishes may react differently to cleaning products.

Common leather types include:

  • Finished leather: More resistant and easier to clean;
  • Aniline leather: More natural but more sensitive to moisture and stains;
  • Semi-aniline leather: A balance between natural appearance and protection.

Before cleaning the entire sofa, test the product on a small hidden area. This helps ensure the cleaner does not affect the color or texture.

Step 2: Remove Dust and Loose Dirt

Start by removing surface dust before applying any cleaner.

Use:

  • A vacuum cleaner with a soft brush attachment;
  • A dry microfiber cloth.

Pay special attention to:

  • Seams;
  • Cushion gaps;
  • Corners;
  • Areas where dust collects easily.

Removing loose dirt first prevents particles from spreading across the leather surface during cleaning.

Step 3: Wipe the Sofa With a Suitable Leather Cleaner

After removing dust, clean the leather surface.

Follow these steps:

  • Apply a small amount of leather cleaner to a microfiber cloth;
  • Gently wipe the surface in circular motions;
  • Work on small sections at a time;
  • Avoid soaking the leather with excessive liquid.

Do not scrub aggressively. Leather is a natural material, and excessive friction may damage the finish. For regular maintenance, gentle cleaning is usually more effective than deep cleaning too frequently.

Step 4: Clean Stains Carefully

Different stains require different approaches.

Water-Based Spills

For coffee, water, or other liquid spills:

  • Blot the spill immediately with a clean cloth;
  • Avoid rubbing, which can spread the stain;
  • Allow the area to dry naturally.

Oil or Grease Stains

For oily marks:

  • Gently remove excess oil;
  • Avoid applying strong cleaners immediately;
  • Follow leather-specific cleaning instructions.

Ink or Dye Stains

Ink stains can be difficult to remove and may require professional treatment. Avoid experimenting with aggressive chemicals, as they may create permanent damage.

Step 5: Apply Leather Conditioner

After cleaning, conditioning helps maintain the leather’s softness and appearance.

Leather conditioner can help:

  • Reduce dryness;
  • Maintain flexibility;
  • Protect the surface from everyday wear.

Apply conditioner using a clean cloth and follow the product instructions.

Avoid applying too much product, as excessive conditioner can leave a greasy surface.

Step 6: Allow the Sofa to Dry Naturally

After cleaning and conditioning:

  • Let the sofa air dry naturally;
  • Keep it away from direct sunlight;
  • Avoid using heat sources such as hair dryers.

High heat can dry out leather and affect its finish.

How Often Should You Clean a Leather Sofa?

The ideal cleaning frequency depends on how often the sofa is used. A general maintenance schedule:

Weekly

  • Remove dust;
  • Vacuum seams and cushions;
  • Wipe visible dirt.

Monthly

  • Perform a deeper surface cleaning;
  • Check for stains or signs of dryness.

Every 3–6 Months

  • Apply leather conditioner if needed.

Homes with children, pets, or heavy daily use may require more frequent cleaning.

How to Protect Your Leather Sofa After Cleaning

Cleaning your leather sofa removes dirt and stains, but proper protection is what helps maintain its appearance and durability over time. After cleaning, a few simple care habits can help prevent dryness, fading, and unnecessary wear, keeping your leather sofa comfortable and looking its best for years.

Keep Your Leather Sofa Away From Direct Sunlight

Direct sunlight can gradually affect the appearance of leather furniture. Prolonged exposure to strong sunlight may cause the leather surface to fade, dry out, or lose some of its natural softness.

To protect your sofa:

  • Place it away from windows with strong sunlight;
  • Use curtains or blinds to reduce UV exposure;
  • Rearrange cushions occasionally to help maintain even wear.

Keeping your leather sofa away from excessive sunlight can help preserve its color and overall condition. If sofa placement is part of a wider room refresh, this living room furniture guide also covers placement, household use, and material selection.

Avoid Excess Moisture and Spills

Although leather is durable, too much moisture can affect its surface and may lead to marks or changes in texture.

For better protection:

  • Wipe spills as soon as they happen;
  • Use a clean, dry cloth to absorb liquids;
  • Avoid leaving damp items on the sofa;
  • Do not use excessive water during cleaning.

Quick action is especially important for liquids that may leave visible marks, such as coffee, juice, or other colored drinks.

Apply Leather Conditioner Regularly

Leather conditioner helps maintain the flexibility and appearance of the material after cleaning.

Regular conditioning can help:

  • Reduce dryness;
  • Maintain a smooth texture;
  • Support long-term leather care.

The frequency of conditioning depends on the leather type, room environment, and how often the sofa is used. Always follow the product instructions and avoid applying more conditioner than recommended.

Keep Your Sofa Clean With Regular Maintenance

Small cleaning habits can reduce the need for frequent deep cleaning. A simple maintenance routine includes:

Removing dust regularly with a soft cloth;

Vacuuming seams and gaps where dirt collects;

Cleaning spills promptly;

Checking the leather surface for dryness or wear.

Consistent care helps prevent dirt buildup and keeps your leather sofa looking better between deeper cleanings.

Protect the Sofa From Scratches and Heavy Wear

Leather surfaces can be affected by sharp objects, pet claws, and repeated friction. To reduce unnecessary damage:

Avoid placing sharp items directly on the sofa;

Keep pets’ nails trimmed if they frequently use the furniture;

Use blankets or protective covers when needed.

These small precautions can help maintain the sofa’s appearance while allowing it to remain part of your everyday living space. If the upholstery or structure is already beyond routine care, you can compare replacement and customization options under custom sofas and couches.

Maintain a Suitable Indoor Environment

The surrounding environment can also influence leather conditions. Very dry air may contribute to leather becoming stiff, while excessive humidity may affect the material over time.

Maintaining a comfortable indoor environment and avoiding extreme conditions can support better long-term leather care.

Common Mistakes When Cleaning a Leather Sofa

Cleaning a leather sofa may seem simple, but using the wrong products or techniques can damage the surface and affect its appearance over time. Many common cleaning mistakes happen because leather is treated like other materials, even though it requires more gentle care.

Understanding what to avoid can help you protect the leather finish, maintain its texture, and extend the lifespan of your sofa.

Using Regular Household Cleaners

One of the most common mistakes is using general household cleaners that are not designed for leather.

Products such as bleach, strong detergents, or ammonia-based cleaners may remove dirt, but they can also damage the leather surface, cause discoloration, or remove protective finishes.

Instead, use a cleaner specifically formulated for leather furniture and always test it on a small hidden area before applying it to the entire sofa.

Applying Too Much Water During Cleaning

Leather should not be treated like fabric that can be soaked and washed.

Using too much water can cause problems such as:

  • Water marks;
  • Uneven drying;
  • Changes in leather texture.

When cleaning your sofa, use a slightly damp microfiber cloth instead of pouring water directly onto the surface. Remove excess moisture quickly and allow the leather to dry naturally.

Scrubbing the Leather Too Hard

Aggressive scrubbing can damage the surface finish and create uneven areas, especially on softer leather types.

Instead of applying heavy pressure:

  • Wipe gently in circular motions;
  • Clean small sections at a time;
  • Repeat the process if needed.

A gentle cleaning approach is usually more effective and safer for maintaining leather quality.

Skipping the Conditioning Step

Some homeowners focus only on removing dirt and forget that leather also needs regular care after cleaning.

Cleaning removes unwanted buildup, but conditioning helps maintain the leather’s softness and flexibility.

Skipping conditioning for long periods may contribute to a dry or less comfortable surface, especially in environments with low humidity or frequent use.

Ignoring Spills and Stains for Too Long

Waiting too long to clean spills can make stains harder to remove.

When accidents happen:

  • Blot liquids as soon as possible;
  • Avoid rubbing the stain deeper into the leather;
  • Use appropriate leather cleaning products.

Quick action can help prevent permanent marks and reduce the need for stronger cleaning methods.

Placing the Sofa in Harsh Conditions

Even a well-cleaned leather sofa can deteriorate faster if it is placed in an unsuitable environment.

Avoid positioning your sofa:

  • In direct sunlight for long periods;
  • Near strong heat sources;
  • In areas with extreme humidity changes.

Proper placement is an important part of long-term leather sofa maintenance.

Frequently Asked Questions

Can I clean a leather sofa with soap and water?

Only if the manufacturer permits that method for the specific leather. Some protected finishes allow a carefully diluted mild soap process; other leathers may darken or lose finish. Pretest and avoid saturation.

Can I use disinfecting wipes or alcohol on leather?

Do not use them unless the furniture manufacturer explicitly approves them. Alcohol and disinfecting chemicals can damage color, finish, and protective coatings.

How often should I clean a leather sofa?

Dust and vacuum it as needed for the household, often weekly in a frequently used room. Deeper cleaning and conditioning do not have one universal schedule; follow the product instructions and respond to visible soil rather than applying products automatically.

Why did my leather become darker after cleaning?

The leather may have absorbed moisture or cleaner, especially if it has a natural or worn finish. Allow the test area to dry fully. If the color does not return or the edge remains visible, stop and contact the manufacturer or a leather specialist.

Can peeling faux leather be repaired by cleaning or conditioner?

No. Cleaning can remove dirt, but it cannot rebuild a peeling man-made surface. A repair professional can check a small damaged area. Heavy peeling often means the cover or sofa needs to be replaced.

How to Polish Wood Furniture Without Damaging It

To polish wood furniture, first remove dust and surface dirt, identify the existing finish, and apply a small amount of suitable furniture polish or wax with a soft cloth. Work with the wood grain, let the product settle as directed, and buff the surface until it feels smooth and no longer looks streaky.

The right method depends on whether the furniture is sealed, waxed, oiled, veneered, painted, or unfinished. Using the wrong product can create a sticky film, uneven shine, or permanent discoloration.

What Is the Best Way to Polish Wood Furniture?

For most sealed wood furniture, the safest method is:

Dust the surface.

Clean away fingerprints and residue.

Test the polish in a hidden area.

Apply a thin layer with a microfiber cloth.

Wipe in the direction of the grain.

Buff with a separate clean cloth.

Avoid pouring polish directly onto the furniture. Applying it to the cloth gives you better control and reduces the risk of oversaturation.

Cleaning vs. Polishing Wood Furniture

Cleaning and polishing are not the same process.

Cleaning removes dust, grease, fingerprints, food residue, and other surface dirt.

Polishing improves the appearance of the finish and may leave a temporary protective layer.

A polish will not repair deep scratches, faded stain, peeling varnish, water damage, or worn-through finish. Furniture with those problems may need touch-up work or refinishing instead.

  • What You Need

Prepare:

  • Soft microfiber cloths
  • Mild dish soap
  • Warm water
  • Small bowl
  • Furniture polish or paste wax
  • Soft-bristle brush for detailed areas
  • Cotton swabs for corners
  • Protective gloves

Use separate cloths for cleaning, applying polish, and buffing. A dirty cloth can move grit across the surface and create fine scratches.

Step 1: Identify the Furniture Finish

Before applying any product, determine how the wood is protected.

  • Sealed Wood

Sealed furniture has a protective coating such as polyurethane, varnish, lacquer, or shellac. Most modern tables, cabinets, dressers, and chairs fall into this category.

These surfaces can usually be cleaned with a lightly damp cloth and polished with a product intended for finished wood.

  • Waxed Wood

Waxed furniture often has a soft, low-sheen appearance. It should normally be maintained with a compatible furniture wax rather than oily spray polish.

  • Oiled Wood

Oiled furniture may require occasional reapplication of the oil recommended by the manufacturer. General furniture polish can interfere with the oil finish or leave uneven patches.

  • Wood Veneer

Veneer is a thin layer of real wood applied over another material. It should be treated gently because excess moisture, heat, and aggressive rubbing can loosen or damage the surface.

  • Unfinished Wood

Do not apply standard furniture polish to raw, unfinished wood. The product may absorb unevenly and create dark or oily areas.

When the finish is uncertain, test the cleaning and polishing method on a hidden section first.

Step 2: Remove Dust

Use a clean, dry microfiber cloth to remove loose dust.

Wipe gently in the direction of the grain. For carved furniture, seams, and corners, use a soft brush or cotton swab.

Do not begin with polish while dust is still present. Small particles can act like abrasives when rubbed across the wood.

Step 3: Clean the Surface

Add a few drops of mild dish soap to warm water. Dampen a soft cloth and wring it out thoroughly.

The cloth should be slightly damp, not wet.

Wipe a small section at a time, paying attention to:

  • Fingerprints
  • Grease
  • Food residue
  • Sticky spots
  • Old polish buildup

Immediately dry the area with another cloth. Water should not remain on the wood or collect around joints, edges, veneer seams, or decorative details.

Step 4: Choose the Right Wood Polish

Different products create different results.

  • Liquid Furniture Polish

Liquid polish is easy to apply and works well for routine maintenance on many sealed wood surfaces. Some formulas leave more residue than others, so use a small amount.

  • Paste Wax

Paste wax can create a durable, low-gloss protective layer. It is often used on traditional furniture, but application takes more time and too much wax can cause cloudy buildup.

  • Oil-Based Polish

Oil-based products may temporarily deepen the color of wood. However, they are not suitable for every finish and may attract dust or leave a greasy surface when overapplied.

  • Homemade Polish

Some homeowners use diluted vinegar or mixtures containing oil. These recipes can produce inconsistent results and may not be compatible with lacquer, wax, shellac, veneer, or specialty finishes.

A product specifically labeled for the furniture’s existing finish is generally the safer choice.

Step 5: Test the Product

Apply a very small amount of polish to a hidden area, such as:

  • The back of a cabinet
  • The underside of a table
  • The inside of a door
  • A concealed section near the floor

Wait for the area to dry, then check for:

  • Color changes
  • Cloudiness
  • Softening
  • Stickiness
  • Uneven shine

Stop using the product when the test area reacts poorly.

Step 6: Apply a Thin Layer

Place a small amount of polish on a clean cloth instead of directly on the furniture.

Apply it using light, overlapping strokes in the direction of the wood grain. Cover a manageable section before moving to the next area.

More polish does not create a better finish. Excess product is one of the main causes of smears, fingerprints, dull patches, and sticky buildup.

For detailed furniture, apply the product carefully around carvings, grooves, handles, and panel edges. Do not allow polish to collect in corners.

Step 7: Let the Polish Set

Follow the instructions on the product label.

Some liquid polishes can be buffed almost immediately, while paste wax may need several minutes to become slightly hazy.

Do not leave the product on longer than recommended. Dried excess polish can become difficult to remove.

Step 8: Buff the Surface

Use a fresh, dry microfiber cloth to buff the furniture.

Work with the grain and continue until:

  • Streaks disappear
  • The surface feels dry
  • The shine looks even
  • No residue transfers to your fingers

Turn the cloth frequently so you are not spreading removed residue back across the furniture.

How to Polish a Wood Table

Tables often collect grease, drink rings, crumbs, and repeated hand contact.

Before polishing:

Remove all objects.

Clean the complete tabletop.

Dry it thoroughly.

Check for sticky residue.

Apply polish in thin sections.

Buff under good lighting.

View the surface from different angles to identify missed streaks.

Polishing can improve dullness, but it will not remove deep water stains, burns, dents, or worn finish.

How to Polish Carved Wood Furniture

Carved furniture requires more careful application because polish can accumulate in grooves.

Use:

  • A soft brush for dust
  • Cotton swabs for narrow details
  • A small cloth around raised edges
  • Minimal product

After applying the polish, inspect the carvings and remove any visible residue before it dries.

How to Polish Wood Veneer Furniture

Use as little moisture as possible and avoid aggressive rubbing.

For veneer furniture:

Dust with a soft cloth.

Clean with a barely damp cloth.

Dry immediately.

Test the polish in a concealed area.

Apply only a thin layer.

Avoid soaking seams and edges.

Do not use abrasive pads, steam cleaners, or strong solvents. Damaged or lifting veneer should be repaired before polishing.

How Often Should You Polish Wood Furniture?

Most furniture does not need to be polished every week.

A practical schedule is:

  • Dust weekly or as needed
  • Clean spills immediately
  • Polish every few months
  • Wax only when the finish begins to look dry or uneven

Frequently handled furniture may need attention sooner, while decorative pieces may need polishing less often.

Excessive polishing can create product buildup rather than improving the surface.

How to Remove Polish Buildup

Old polish may leave furniture looking cloudy, greasy, or unusually dark.

Start with the mildest method:

Dust the furniture.

Wipe it with a lightly damp cloth and diluted mild soap.

Dry the surface immediately.

Repeat gradually if residue remains.

Buff with a clean cloth.

Do not use strong solvents unless you know the furniture finish and the product is safe for it. Solvents can remove or soften the protective coating.

Valuable antiques or heavily coated furniture should be assessed by a professional.

Common Wood Polishing Mistakes

  • Applying Polish Directly to the Wood

Direct spraying can create concentrated wet spots and uneven coverage. Spray or place the product on the cloth first.

  • Using Too Much Product

A thick layer is harder to buff and attracts more dust. Thin coats usually produce a cleaner result.

  • Polishing a Dirty Surface

Dust and grease become trapped under the polish, leaving the surface dull or streaky.

  • Using Abrasive Materials

Paper towels, rough sponges, and scrubbing pads may leave fine scratches. Use soft, clean cloths.

  • Ignoring the Existing Finish

A product designed for one finish may be unsuitable for another. Always check the label and test first.

  • Trying to Polish Away Damage

Polish cannot restore missing finish or repair deep damage. Scratches, peeling coatings, discoloration, and water damage may require a different treatment.

How to Keep Wood Furniture Shiny Longer

To maintain the finish:

Remove spills quickly.

Use coasters and placemats.

Keep hot cookware off the surface.

Avoid direct sunlight when possible.

Maintain stable indoor humidity.

Dust with a soft cloth.

Do not use all-purpose cleaners unless approved for wood.

Avoid repeated layers of polish.

Protecting the existing finish is easier than restoring it after damage develops.

  • When Should Wood Furniture Be Refinished?

Consider refinishing when the furniture has:

  • Widespread scratches
  • Peeling or cracked coating
  • Deep water stains
  • Faded color
  • Bare wood showing through
  • Sticky finish that cannot be cleaned
  • Extensive heat or moisture damage

Refinishing generally involves removing or preparing the old coating, correcting surface damage, applying stain when needed, and adding a new protective finish.

Polishing is intended for routine appearance and maintenance, not major restoration.

Frequently Asked Questions

Can you polish wood furniture with olive oil?

Olive oil is not recommended for routine furniture care. It may remain sticky, attract dust, develop an odor, or leave uneven residue.

Can vinegar damage wood furniture?

Undiluted vinegar is acidic and may dull or damage some finishes. Do not use it unless the furniture manufacturer or finish instructions confirm it is safe.

Can furniture polish remove scratches?

Polish may make very light marks less noticeable, but it cannot repair deep scratches or missing finish.

Why is my wood furniture sticky after polishing?

Too much product, incompatible polish, or old residue can leave a sticky film. Remove excess with a clean cloth and use a mild cleaning method suitable for the finish.

Should wood furniture be waxed or polished?

Use wax when the furniture already has a wax finish or the manufacturer recommends it. Liquid polish is generally used for lighter routine maintenance on compatible sealed finishes.

Can I polish painted wood furniture?

Only use products approved for the specific painted finish. Standard wood polish may create an oily layer or change the sheen.

Conclusion

The safest way to polish wood furniture is to clean the surface first, identify the existing finish, test the product, and apply only a thin layer.

Work with the grain and use a separate cloth to buff away all residue. Polishing can restore a cleaner, more even appearance, but it cannot repair deep scratches, peeling finishes, or structural damage.

For long-term care, avoid excess moisture, harsh cleaners, direct heat, and repeated polish buildup.