

High-End Whole-House Customization from Foshan Download Catalog FAQs

Bathroom Vanity Dimensions: Standard Sizes for Small, Standard & Large Bathrooms

Bathroom vanities come in a wide range of sizes, but most fall between 18 and 72 inches wide, about 20 to 22 inches deep, and roughly 30 to 36 inches high. Smaller vanities are typically used in powder rooms and compact bathrooms, while 36- to 60-inch models work well in many standard bathrooms, and 60-inch or larger vanities are more common in primary bathrooms and double-sink layouts.

The right size, however, depends on more than the available wall width. You also need to account for walking space, door and drawer clearance, nearby toilets or showers, plumbing locations, and whether you want one sink or two.

This guide breaks down small, standard, and large bathroom vanity dimensions, explains how much space different vanity sizes require, and shows you how to measure your bathroom before choosing one.

Typical width18–72+ in
Typical depth20–22 in
Typical height30–36 in
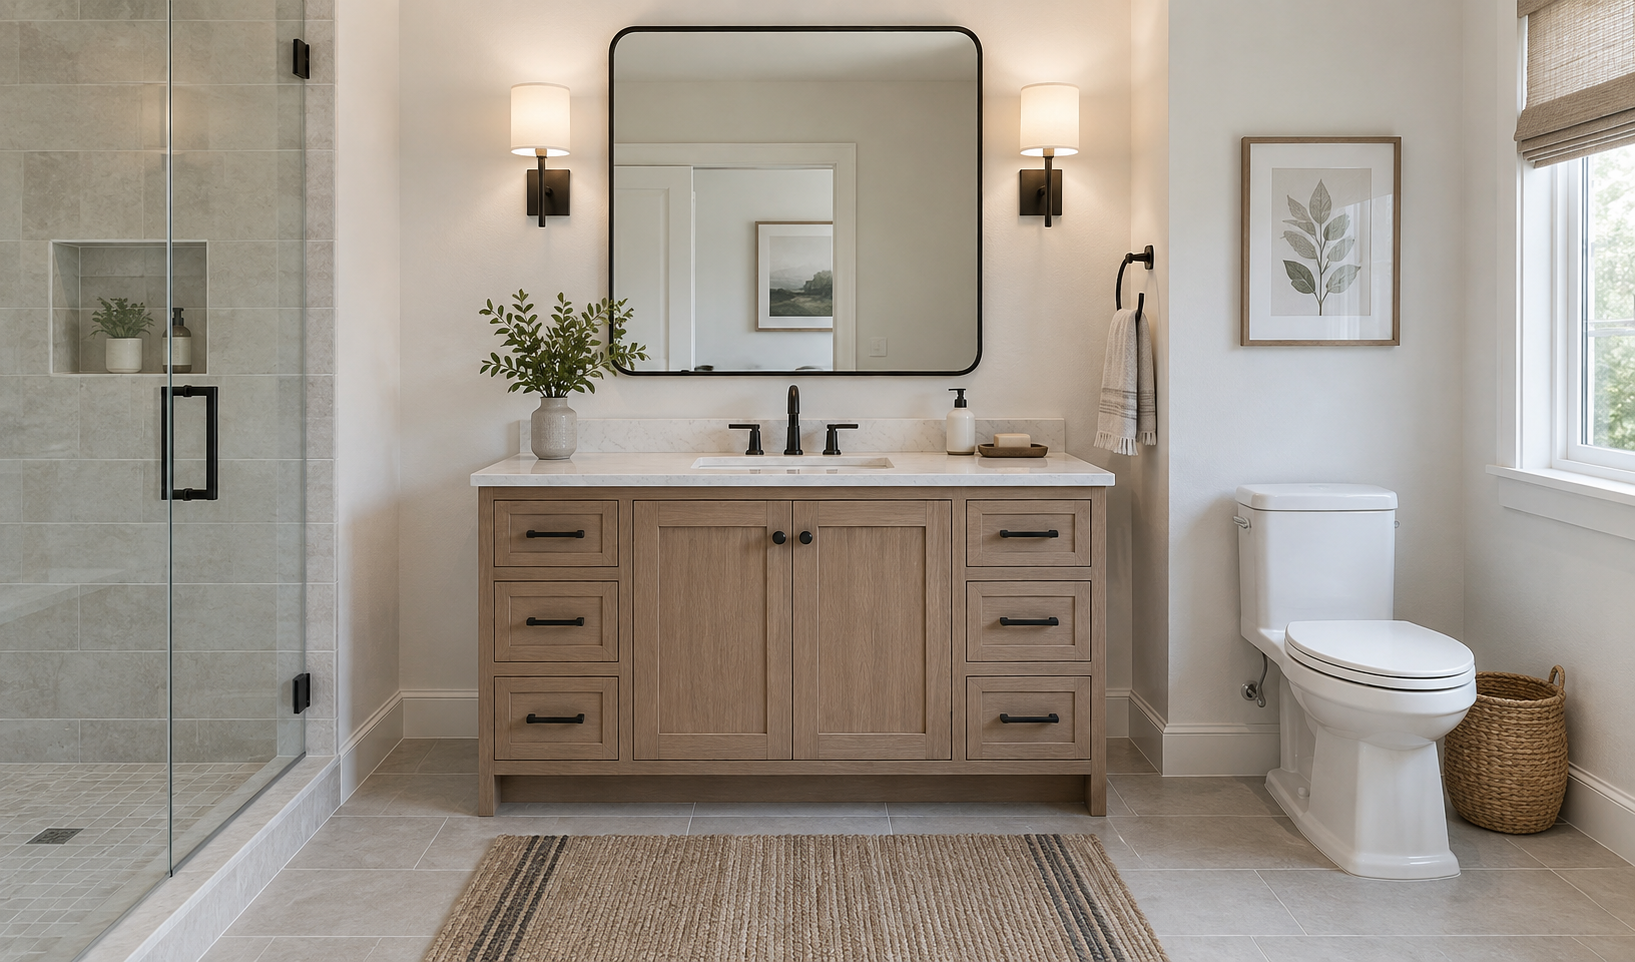
Double-sink bathroom vanity showing cabinet width, counter space, and mirror alignment

What Are the Standard Bathroom Vanity Dimensions?

Standard bathroom vanities typically range from 18 to 72 inches wide, about 20 to 22 inches deep, and approximately 30 to 36 inches high. The width varies the most because it depends on bathroom size, storage needs, and whether the vanity has one sink or two.

Vanity SizeTypical WidthTypical DepthTypical HeightCommon Use
Small Vanity18–36 in16–21 in30–36 inPowder rooms and small bathrooms
Standard Vanity36–60 in20–22 in32–36 inMost full bathrooms
Large Vanity60–96+ in20–24 in34–36 inPrimary bathrooms and double-sink layouts

A 24- to 36-inch vanity is usually enough for a compact bathroom, while 36- to 48-inch vanities are common for standard single-sink setups. Vanities around 60 inches can work with either one large sink or two sinks, while 72 inches and above provide more comfortable space for double vanities.

These measurements are useful starting points, but the best bathroom vanity size should still leave enough room for doors, drawers, plumbing, nearby fixtures, and comfortable movement around the bathroom.

Bathroom Vanity Sizes for Small, Standard, and Large Bathrooms

What Size Vanity Is Best for a Small Bathroom?

For a small bathroom, a vanity between 18 and 36 inches wide usually works best, with 24-, 30-, and 36-inch vanities being the most common choices. The right size depends on your available wall space, walking clearance, and how much countertop and storage you need.

If the bathroom is very tight, such as a powder room or half bath, an 18- to 24-inch vanity is often the best fit. It provides the basics without taking up too much floor space, although countertop and cabinet storage will be limited.

For a small full bathroom, a 30-inch vanity is often a good middle ground. It gives you more usable counter space and storage than a 24-inch model without making the room feel overly crowded.

If the wall space and clearance allow, a 36-inch vanity can be more comfortable to use and provides more room for daily toiletries and storage. Before choosing one, make sure the vanity depth, drawer clearance, and space in front of the cabinet still allow for easy movement.

A simple rule of thumb is:

18–24 inchesBest for very small bathrooms and powder rooms
30 inchesA practical balance of size and storage
36 inchesBetter when you have a little more room and want more counter and cabinet space

In a small bathroom, the goal is not to choose the largest vanity that will technically fit. It is to choose one that gives you enough function without making the room feel cramped.

What Size Vanity Works Best in a Standard Bathroom?

For a standard full bathroom, a vanity between 36 and 60 inches wide is usually the most practical range. The best size depends on how much wall space you have, whether you want one sink or two, and how much counter and storage space you need.

A 36-inch vanity works well for a compact full bathroom or guest bath. It provides enough room for a single sink and basic storage without taking over the room.

A 42- to 48-inch vanity is a good choice when you want more countertop space and larger drawers or cabinets. This size often works especially well in a standard bathroom because it adds useful storage while still leaving comfortable clearance around the vanity.

A 60-inch vanity gives you even more flexibility. It can be used as a spacious single-sink vanity with generous counter space, or it may accommodate two sinks if the layout, plumbing, and sink spacing allow.

As a general guide:

36 inchesGood for compact full bathrooms
42–48 inchesA balanced choice for most standard bathrooms
60 inchesBest when you want more storage, more counter space, or the option for two sinks

The right vanity should fit the wall comfortably while still leaving enough room for doors, drawers, nearby fixtures, and everyday movement. This room-first approach also works well for whole-home custom interior planning, where cabinetry and furniture are considered in relation to the space rather than as isolated pieces. A slightly smaller vanity that is easier to use is usually a better choice than a larger one that makes the bathroom feel crowded.

What Size Vanity Is Best for a Large or Primary Bathroom?

For a large or primary bathroom, vanities between 60 and 96 inches wide are common, with 72 inches being a popular size for double-sink layouts. The best size depends on how many people use the space, how much storage you want, and whether you prefer one large sink or two separate sinks.

A 60-inch vanity can work as a generous single-sink setup or a compact double vanity. It is a good option when you want more counter space without using too much wall length.

A 72-inch vanity is often a more comfortable choice for a shared primary bathroom. It provides better separation between two sinks and usually leaves more room for drawers, cabinets, and countertop space.

For very large bathrooms, 84- to 96-inch vanities can provide more storage and more comfortable two-person use. They also give you more flexibility for larger mirrors, wider drawer banks, and additional counter space.

A simple guide is:

60 inchesGood for a large single vanity or compact double vanity
72 inchesA comfortable choice for most double vanities
84–96 inchesBest for larger primary bathrooms with more storage and counter-space needs

A larger bathroom does not automatically need the widest vanity possible. The goal is to choose a size that fits the room proportionally while still leaving comfortable clearance around nearby fixtures and walking areas.

Single Vanity vs. Double Vanity: How Much Space Do You Need?

Choosing between a single and double vanity is about more than whether the cabinet physically fits. The better choice depends on how many people use the bathroom, how much counter space you want, and how the sinks affect storage and plumbing.

A single vanity usually works better for one person or for couples who do not use the bathroom at the same time. With only one sink, you typically get more uninterrupted counter space and more flexibility for wider drawers, cabinets, and everyday storage.

A double vanity makes more sense in a primary or shared bathroom where two people regularly get ready at the same time. The key is not just fitting two sinks, but leaving enough space between them so both users can comfortably use the vanity without feeling crowded.

You also need to think about what happens below the countertop. Two sinks usually require more plumbing space, which can limit the size and placement of drawers or cabinets. And while a double vanity may be wider overall, two sinks can reduce the amount of continuous counter space you actually have.

What to ConsiderSingle VanityDouble Vanity
Number of usersBest for one personBetter for two people
Counter spaceMore continuous surface areaSplit between two sinks
Storage layoutMore flexibleMore affected by plumbing
Mirror setupOne large mirror works wellTwo mirrors or one wide mirror
PlumbingSimplerMore complex
Best forCounter space and storageTwo-person use

If two people use the bathroom at the same time every morning, a double vanity can make the routine much easier. If your schedules are different, a single vanity may give you more useful counter space and more flexible storage.

The better question is not simply whether you have room for two sinks. It is whether you actually need two separate sink stations and whether the remaining counter and storage space will still work for your daily routine.

How Do You Measure for a Bathroom Vanity?

To measure for a bathroom vanity, start by measuring the usable wall space, then check the depth, height, plumbing, and clearance around nearby fixtures. The goal is to make sure the vanity not only fits the opening, but also works comfortably once the doors and drawers are in use.

  1. Measure the Usable Wall Width

    First, measure the available wall width from one side of the installation area to the other. Do not assume the full wall is usable. Account for door trim, baseboards, outlets, switches, toilets, showers, and anything else that could interfere with the cabinet or countertop.

  2. Check How Far the Vanity Can Project

    Next, measure how far the vanity can project into the room. A deeper cabinet may provide more storage, but it can also narrow the walkway or make the space between the vanity and other fixtures feel tight. Remember that the countertop may extend slightly beyond the cabinet box.

  3. Confirm the Available Height

    Then check the available height, especially if there is a window, wall-mounted light, outlet, mirror, or medicine cabinet above the vanity. Make sure the finished countertop height works with the rest of the wall layout.

  4. Locate Plumbing Before Choosing the Cabinet

    You should also locate the drain and hot and cold water lines before choosing the cabinet. If the plumbing does not line up with the sink base, drawers or interior dividers may need to be adjusted.

  5. Test the Surrounding Clearance

    Finally, test the surrounding clearance before ordering or approving the vanity.

Make sure:

  • Vanity doors and drawers can open fully.
  • The bathroom door does not swing into the vanity.
  • The shower door has enough room to open.
  • The toilet remains easy to use.
  • There is comfortable standing and walking space in front of the vanity.

For the most accurate fit, measure the space in more than one place. Walls and floors are not always perfectly square, so using only a single measurement can lead to problems during installation. For larger cabinetry projects, these measurements also become part of the broader whole-house customization process before drawings and production are finalized.

Before ordering, record the maximum wall width, available depth, finished height, plumbing locations, and nearby clearances. These measurements will give you a much better picture of what vanity size will actually work in the room.

How Much Clearance Do You Need Around a Bathroom Vanity?

A bathroom vanity should have enough clearance for standing, walking, and opening doors or drawers comfortably.

30 inGeneral minimum target

In general, aim for at least 30 inches of clear space in front of the vanity. In a primary bathroom or a space used by two people at once, 36 inches or more will feel more comfortable.

Also make sure:

  • Drawers and cabinet doors can open fully.
  • The bathroom door and shower door do not hit the vanity.
  • There is still enough usable space around the toilet.

If the bathroom feels tight, it is usually better to choose a slightly narrower or shallower vanity than to sacrifice everyday clearance.

Bathroom Vanity Size Checklist Before You Buy

Before buying a bathroom vanity, make sure you have checked the key dimensions and installation details:

Available wall width

Make sure both the cabinet and countertop will fit.

Available depth

Avoid choosing a vanity that makes the walkway feel too tight.

Finished height

Check that the countertop height is comfortable and works with the mirror and lighting.

Single or double sink

Choose based on the number of users and available width.

Plumbing location

Make sure the drain and water lines work with the cabinet layout.

Door and drawer clearance

Confirm that everything can open fully.

Bathroom and shower doors

Make sure they will not hit the vanity.

Toilet location

Leave enough room for comfortable use.

Mirror and lighting size

Check that they are proportionate to the vanity.

Outlets and switches

Make sure they will not be blocked by the cabinet, countertop, or mirror.

Once these measurements are confirmed, it is much easier to choose a vanity that fits properly and avoids installation or clearance problems.

Frequently Asked Questions

Can You Put Two Sinks in a 60-Inch Vanity?

Yes, a 60-inch vanity can fit two sinks, but the layout will be tighter than a 72-inch double vanity. Sink size, spacing, plumbing, and drawer placement all matter, so make sure there is enough usable counter space between and around the sinks.

What Should You Do If There’s a Gap Between the Vanity and the Wall?

A small gap can usually be finished with caulk, a filler strip, or a side splash, depending on the size and location. Larger or uneven gaps may require a custom filler panel or countertop adjustment, especially if the wall is not perfectly straight.

Does the Sink Need to Be Centered on the Vanity?

No. A sink can be offset if that creates better counter space, storage, or plumbing access. What matters most is that the sink placement works with the faucet, mirror, lighting, and cabinet layout.

Should the Bathroom Mirror Be Centered Over the Sink or the Vanity?

In most cases, the mirror should align with the sink or the main grooming area rather than automatically centering on the full vanity. For an off-center sink, centering the mirror over the sink usually looks more intentional and works better for everyday use.

Conclusion

Choosing the right bathroom vanity size comes down to balancing fit, function, and everyday comfort. Start with the available wall space, then consider the vanity depth and height, sink configuration, plumbing, and clearance around doors, drawers, the toilet, and shower.

Small bathrooms usually benefit from more compact vanities, while larger or primary bathrooms can accommodate wider single- or double-sink layouts. The best vanity is not simply the largest one that fits—it is the size that gives you enough counter space and storage without making the bathroom feel crowded or difficult to use.

How Much Do Custom Kitchen Cabinets Cost? A 2026 U.S. Budget Guide

Custom kitchen cabinets commonly cost about $500 to $1,200+ per linear foot installed in the United States. A complete cabinet package may range from roughly $15,000 to $50,000+, but kitchen size alone does not determine the final price. Cabinet quantity, construction, finish, hardware, installation and local labor conditions all matter.

Use these figures to test whether a custom kitchen is financially realistic—not as a substitute for a project quote. This guide explains what changes the price, what should appear in a quote and how to reduce cost without creating expensive corrections later.

Homeowners reviewing custom kitchen cabinet costs and budget plans with a kitchen designer
A useful cabinet budget starts with a defined scope, not one headline price.

How Much Do Custom Kitchen Cabinets Cost?

For early budgeting, most homeowners need two numbers: the estimated price of the cabinets and the complete installed cost. Confirm what the published range includes before using it. Some estimates cover the cabinet package only, while others include delivery and installation.

Cabinet category Typical installed cost per linear foot What the category usually means
Stock cabinets $100–$400 Fixed sizes, limited finishes and standard configurations
Semi-custom cabinets $150–$700 More sizes, finishes and selected modifications
Custom cabinets $500–$1,200+ Made for the room, appliance plan, storage needs and finish specification

These are broad U.S. planning ranges, not Avrelahome prices. Regional labor rates and project scope can move a quote below or above them. The current ranges are consistent with the 2026 cabinet-cost data published by HomeAdvisor.

What does “per linear foot” mean?

A linear foot measures the horizontal length of a cabinet run. It is useful for an early feasibility check, but suppliers do not always count it the same way. One estimate may combine base and wall cabinets; another may cover only base cabinets. Islands, tall pantry units, appliance towers and decorative panels may be separate.

Once the layout is available, replace the linear-foot allowance with a cabinet-by-cabinet quote. Twelve feet of door cabinets will not cost the same as twelve feet containing drawer banks, an appliance garage and a tall oven unit.

Define What the Cabinet Budget Includes

Cabinet cost is not the same as the cost of a complete kitchen renovation. A cabinet quote may include boxes, doors, drawers, shelves and standard hardware while excluding countertops, appliances, demolition, plumbing, electrical work, flooring, backsplash and painting.

Delivery and installation also need clear definitions. Check whether the price includes unloading, carrying the cabinets into the home, installation, fillers, trim, handle fitting, adjustments, cleanup and final punch-list work.

For a broader comparison outside the kitchen, see the assumptions used in our custom furniture cost guide.

What Factors Affect Custom Kitchen Cabinet Cost?

Kitchen size and cabinet quantity

More cabinets require more material, hardware, finishing and installation time. Count base, wall and tall cabinets separately. Treat the island as its own assembly, including finished backs, seating panels and service access.

A smaller kitchen is not automatically inexpensive. A compact layout containing several drawer stacks, a difficult corner, integrated appliances and custom panels can cost more per foot than a larger run of simple door cabinets.

Cabinet box construction

Box material, thickness, back construction, shelf specification, edge treatment and interior finish all affect price. Plywood, furniture board, MDF and moisture-resistant panels can each be appropriate when the grade and intended use are clearly specified.

Ask for the complete construction specification instead of relying on one material name. Frameless, face-frame and inset construction also require different manufacturing and installation tolerances.

Doors, drawer fronts and finishes

Slab doors generally require fewer operations than detailed frame-and-panel fronts, curved pieces, fluted surfaces or matched veneer. High-gloss finishes, specialty paint, natural wood matching and hand-applied details can add sampling and finishing work.

Natural wood varies in grain and color. Approve a representative range instead of expecting every door to look identical. For painted cabinetry, record the color reference, sheen and approved sample.

Drawers, hardware and accessories

A drawer bank often costs more than a two-door cabinet of the same width because it requires additional fronts, drawer boxes, slides and assembly. Hinges, full-extension slides, handles and soft-close systems should be identified by brand or performance level when comparing quotes.

Pullout pantries, corner systems, appliance garages, waste sorting, lift mechanisms, lighting channels and custom dividers add convenience, but they should be assigned to named cabinets. A general accessory allowance does not show what will actually arrive.

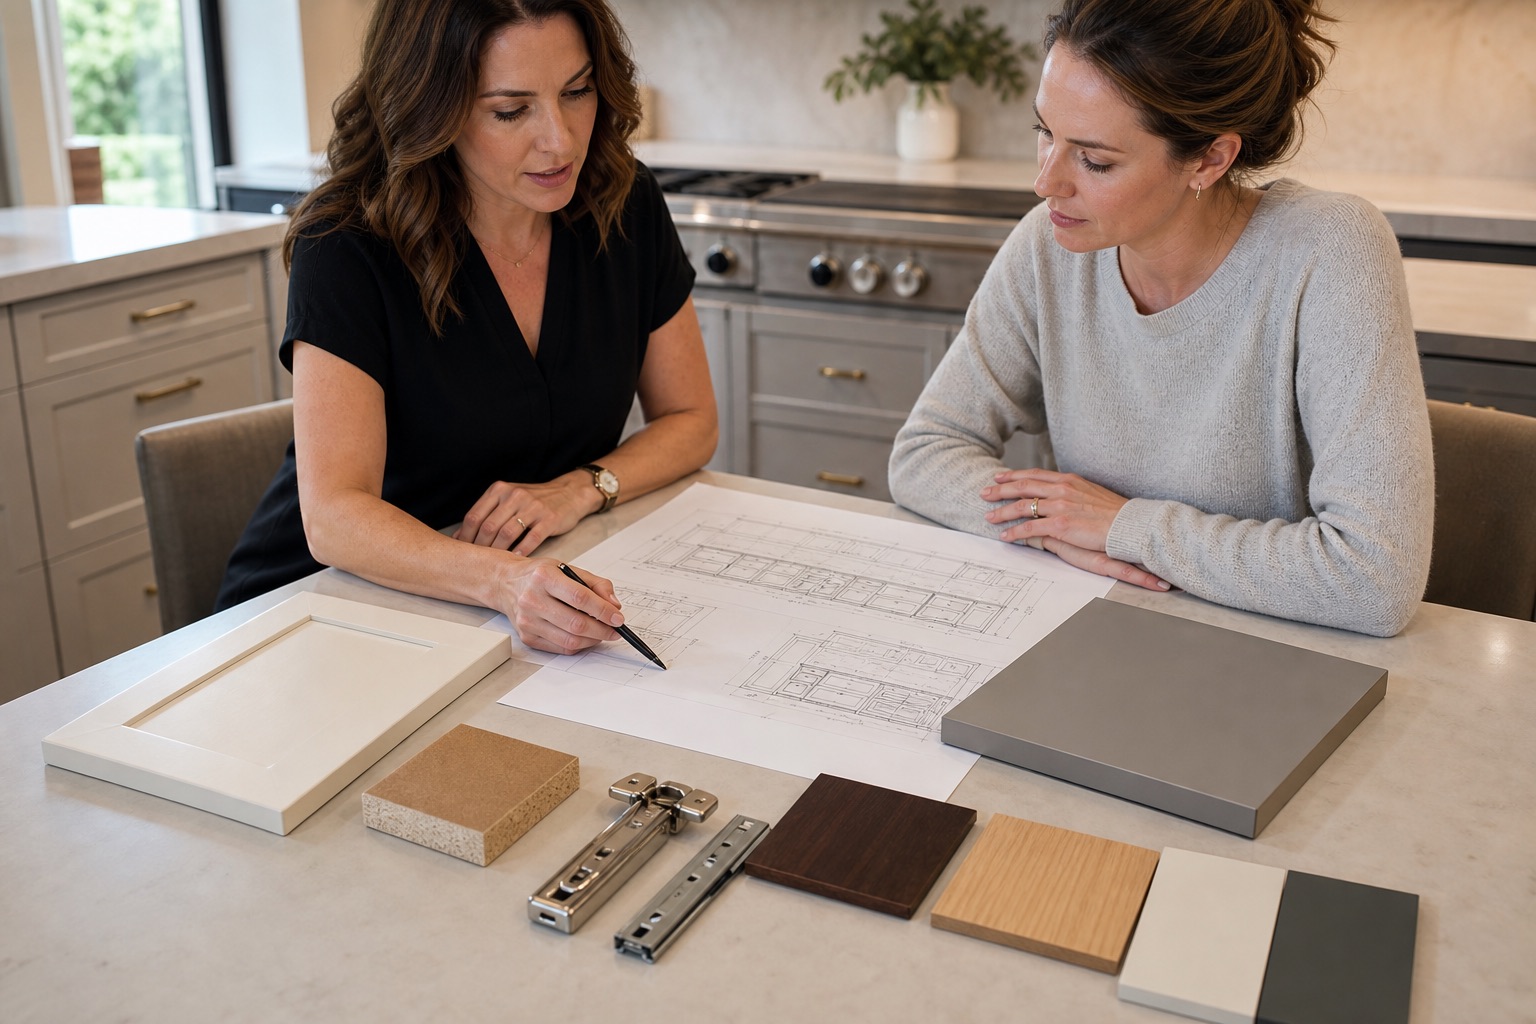
Custom kitchen cabinet drawings, door samples, hardware and finish options used to compare quotes
Samples, hardware schedules and drawings reveal what a headline cabinet allowance leaves out.

What Should Be Included in a Custom Cabinet Quote?

A useful quote should show enough detail for you to compare the same scope across suppliers. If one price includes appliance panels and installation while another excludes both, the totals are not directly comparable.

Quote item What to look for Possible exclusions or upgrades
Design and drawings Measurements, layout, elevations and production drawings Additional revisions, renderings or site measurement
Cabinet construction Boxes, doors, drawers, shelves, visible panels and trim Special sizes, curved work or upgraded materials
Hardware and accessories Hinges, slides, handles and named organizers Premium mechanisms, lighting and specialty storage
Finish Material, color, sheen, sample and exposed surfaces Matched veneer, specialty paint or hand finishing
Delivery Packing, freight, unloading and room delivery Storage, difficult access and final-mile charges
Installation Cabinet setting, fillers, trim, hardware and adjustments Demolition, wall repair, plumbing and electrical work

Anything shown in a rendering but missing from the written scope should be clarified before approval. The custom kitchen cabinet page can help you organize the cabinet types and functional elements that belong in the request.

Custom vs. Semi-Custom vs. Stock Cabinets

Decision Custom Semi-custom Stock
Dimensions Developed for the room and appliances Standard system with selected modifications Fixed sizes
Finish options Project-specific specification Manufacturer’s available range Limited range
Storage flexibility Interior planned by cabinet and user need Selected accessories and configurations Standard interiors
Best fit Unusual layouts, integrated appliances and specific design requirements Standard rooms needing additional choice Conventional layouts and cost-led projects

Choose custom cabinets when unusual dimensions, appliance integration, ceiling conditions, storage requirements or finish continuity justify the additional design and coordination. Semi-custom can be effective when the room fits the manufacturer’s system. Stock cabinetry is most appropriate when standard sizes work and minimizing product cost is the main priority.

How Installation and Site Conditions Change the Price

Installation cost depends on cabinet quantity, ceiling height, trim complexity, appliance panels, site access and the condition of the room. Floors and walls that are out of level or plumb require shimming, scribing, fillers and adjustment. Demolition, disposal and wall repairs may be separate.

Confirm who takes the final measurements and who carries responsibility if the site differs from the approved drawings. Even a small appliance-opening or ceiling-height error can require expensive field changes after delivery.

For imported cabinetry, compare the landed and installed cost:

Factory cabinet cost + packing and international logistics + local delivery and installation

Freight, duties, tariffs, brokerage and destination charges can change. Obtain current written estimates instead of applying an old percentage to the factory price.

How Can You Reduce Custom Kitchen Cabinet Costs?

Keep the existing layout when it works

Moving plumbing, electrical points, windows or major walls can add costs outside the cabinet package. Retaining a functional layout allows more of the budget to remain focused on cabinetry and storage.

Standardize hidden cabinet dimensions

Use special widths and shapes where they solve a real fit problem. Repeating practical cabinet sizes in less visible areas can reduce drawing, production and installation complexity.

Prioritize daily-use hardware

Reliable hinges, drawer slides and durable work surfaces usually provide more value than filling every cabinet with a specialty mechanism. Add organizers where the stored items and user reach genuinely justify them.

Limit finish complexity

A controlled material palette can reduce sampling and finishing work. Matched grain, multiple specialty colors, curved panels and hand-applied details should be concentrated where they materially change the design.

Lock critical decisions before production

Finalize appliance models, door swings, plumbing points, outlets, ventilation, lighting and finish samples before releasing the cabinets. Preventing a production change is often more valuable than downgrading a material later.

How to Compare Custom Cabinet Suppliers

A low opening price does not automatically represent better value. Give each supplier the same room dimensions, cabinet list, appliance models, material direction, hardware requirements, delivery location and installation scope.

Compare:

  • Cabinet and door construction
  • Materials, thicknesses and visible finishes
  • Hardware brands or performance levels
  • Included panels, fillers, trim and accessories
  • Sample and drawing approval stages
  • Packing, delivery and installation responsibilities
  • Change pricing, payment milestones and exclusions

The questions in our pre-order checklist also help expose differences that a total price alone cannot show.

Frequently Asked Questions

How much do custom kitchen cabinets cost per linear foot?

Custom kitchen cabinets commonly cost about $500 to $1,200+ per linear foot installed in the United States. The range varies with construction, finish, cabinet mix, accessories, location and installation scope.

Does a linear-foot price include upper and lower cabinets?

Not always. Some suppliers combine a basic base-and-wall configuration, while others price only one cabinet category. Ask for the counting method and an itemized cabinet schedule.

Is installation included in custom cabinet pricing?

Only when the proposal says so. Confirm unloading, room delivery, fastening, fillers, trim, handles, adjustments, cleanup and punch-list work instead of assuming “installation” includes every task.

Are countertops and appliances included?

Usually not. They should be treated as separate scope unless the written quote lists them. Plumbing, electrical work, backsplash, flooring and demolition are also commonly separate.

Are custom cabinets more expensive than semi-custom cabinets?

Usually, because they add project-specific dimensions, finishes, engineering and production coordination. However, the gap can narrow when a semi-custom order requires many modifications, fillers and upgraded accessories.

Are custom kitchen cabinets worth the cost?

They can be when the room has unusual dimensions, integrated appliances, specific storage requirements or a finish that standard cabinet systems cannot provide. In a conventional layout with modest design requirements, semi-custom may offer better value.

Can imported custom cabinets cost less?

They can, but factory price is only one part of the comparison. Add packing, freight, insurance, duties or tariffs, brokerage, local delivery and installation before comparing with a domestic installed quote.

What should I approve before cabinet production?

Approve the cabinet schedule, dimensioned drawings, appliance models, box and door construction, materials, finish samples, visible panels, trim, hardware, accessories, packing, delivery scope and installation responsibility.

Plan the Cabinet Package You Will Actually Buy

A national price range can tell you whether custom cabinetry belongs in the budget. It cannot tell you whether a supplier’s quote is complete. Build the comparison around the cabinet schedule, construction, finish, hardware, delivery, installation and exclusions.

You can begin with the information already available: a floor plan, approximate dimensions, appliance ideas, inspiration images, budget level and project location. For a broader kitchen scope, review Avrelahome’s custom kitchen planning service or send your project details.

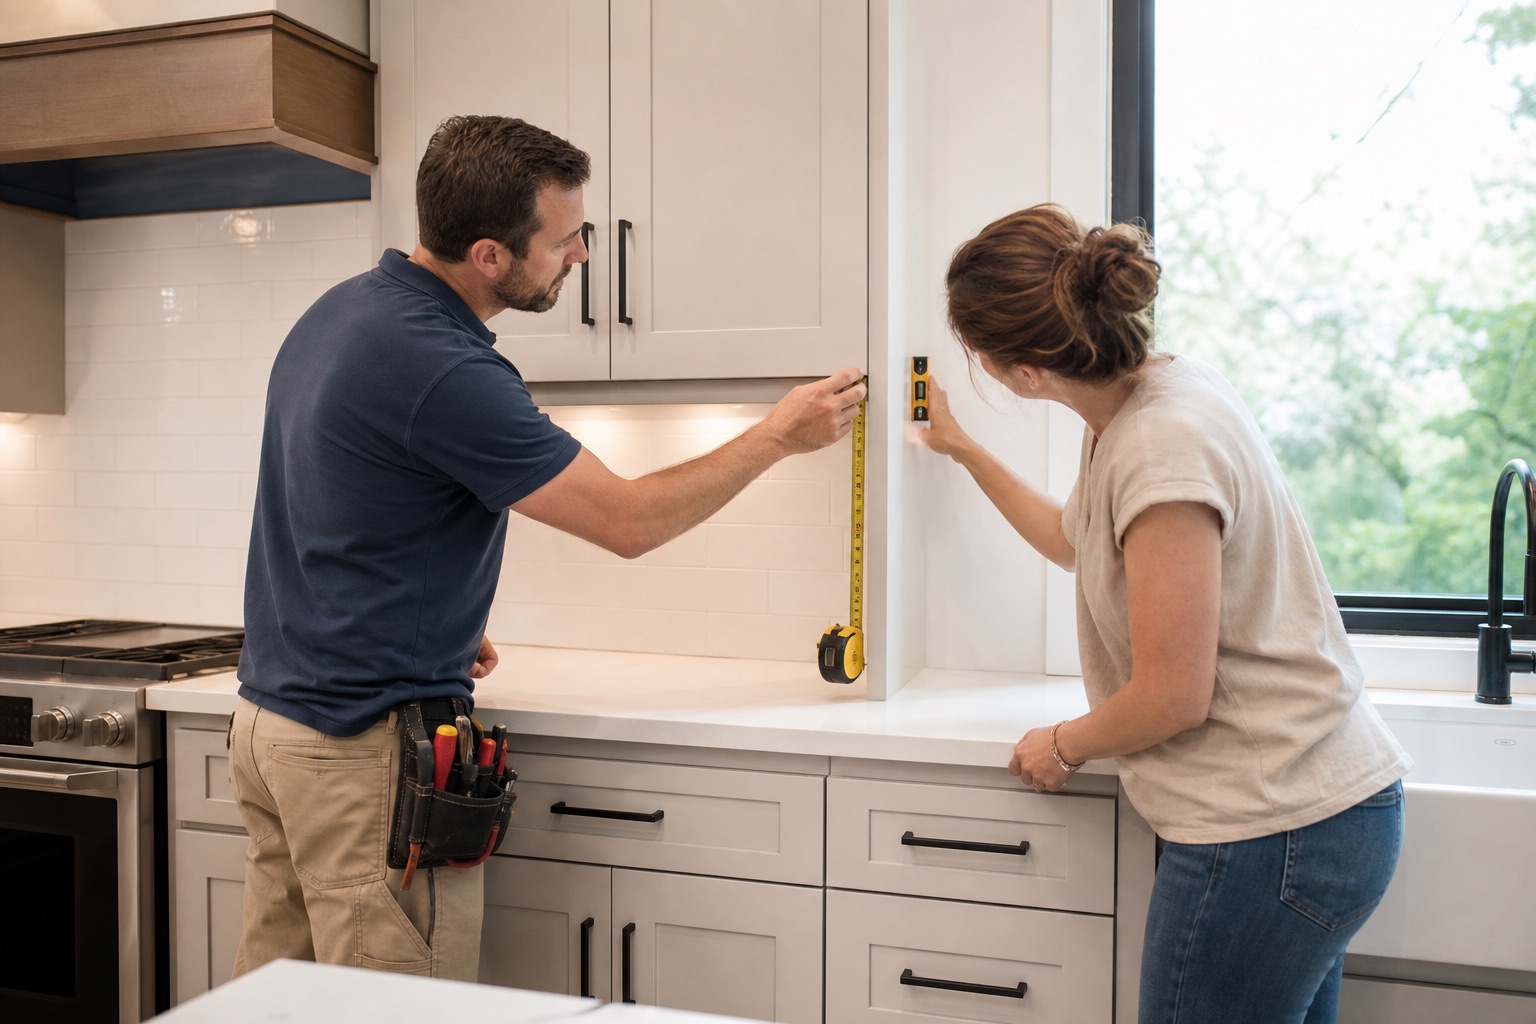
Installer checking custom kitchen cabinet alignment, fillers and installation measurements
Final measurements and installation responsibilities should be confirmed before production.

Whole House Customization Process: A Step-by-Step Guide

The whole house customization process usually includes project planning, site measurement, design development, material selection, quotation, production, quality inspection, delivery, installation, and final acceptance.

Unlike purchasing ready-made furniture, whole house customization requires multiple products to fit the same property, interior style, construction schedule, and functional needs. Kitchens, wardrobes, vanities, wall panels, TV units, and other built-in furniture must be designed as one coordinated system.

A clear process helps prevent measurement errors, missing products, unexpected costs, and installation delays. This is especially important when custom furniture is manufactured in China and delivered to an overseas project.

What Is Whole House Customization?

Whole house customization is a service that designs and manufactures furniture or interior products according to the dimensions and requirements of a specific property.

Depending on the supplier and project scope, it may include:

  • Kitchen cabinets
  • Bedroom wardrobes
  • Walk-in closets
  • Bathroom vanities
  • Entryway storage
  • TV cabinets
  • Bookshelves
  • Laundry cabinets
  • Home office furniture
  • Wall panels
  • Interior doors
  • Loose furniture
  • Stone countertops
  • Other interior materials

Some projects focus only on built-in cabinetry. Others combine furniture, doors, wall finishes, bathroom products, and decorative materials into one complete package.

Because the scope varies, the first stage should always define exactly what the supplier is responsible for.

Whole House Customization Process Overview

A typical whole house customization project follows these stages:

  • Initial consultation
  • Project information collection
  • Site measurement
  • Space planning
  • Initial design proposal
  • Material and finish selection
  • Quotation and budget adjustment
  • Detailed shop drawings
  • Sample approval
  • Order confirmation
  • Production
  • Quality inspection
  • Export packaging
  • Shipping and delivery

Installation

  • Final inspection
  • After-sales service

The exact sequence may vary. For example, a local project may be measured by the supplier’s own team, while an overseas project often relies on measurements provided by the owner, architect, contractor, or local installer.

Step 1: Initial Consultation

The process begins with a discussion about the property, project scope, expected style, budget, and delivery schedule.

At this stage, the supplier needs to understand:

  • Property type
  • Project location
  • Total floor area
  • Number of rooms
  • Required products
  • Preferred interior style
  • Target budget
  • Expected installation date
  • Whether local installation is available
  • Whether the project includes renovation or new construction

This first conversation does not need to resolve every product detail. Its purpose is to determine whether the supplier’s services, production capability, and price level match the project.

For overseas buyers, logistics should also be discussed early. The destination country, nearest port, construction schedule, and local installation conditions may affect the product design and delivery plan.

Step 2: Collect Project Information

Accurate design work depends on accurate project information.

The buyer should provide as many of the following documents as possible:

  • Architectural floor plan
  • Dimensioned room drawings
  • Ceiling plan
  • Door and window schedule
  • Electrical plan
  • Plumbing plan
  • Appliance specifications
  • Reference images
  • Interior design drawings
  • Material preferences
  • Room-by-room product list

A basic floor plan is often enough for an initial proposal. Detailed production drawings, however, require confirmed dimensions and information about walls, ceilings, appliances, plumbing, and electrical points.

Missing information can be marked as pending during the early design stage, but it must be confirmed before production.

Step 3: Site Measurement

Measurement is one of the most important stages in the whole house customization process. Even a well-designed cabinet may not fit if the dimensions are inaccurate.

Key measurements normally include:

  • Wall width and height
  • Ceiling height
  • Floor level
  • Wall thickness
  • Door and window positions
  • Column dimensions
  • Beam locations
  • Plumbing points
  • Electrical outlets
  • Switch positions
  • Air-conditioning vents
  • Skirting boards
  • Appliance dimensions

Walls should also be checked for uneven surfaces, non-square corners, or unexpected structural elements.

Measurement for Local Projects

For nearby projects, the supplier may send a designer or measurement technician to the property. This allows the team to inspect the actual conditions and record potential installation problems.

  • Measurement for Overseas Projects

When the manufacturer cannot visit the property, measurements may be completed by:

  • The homeowner
  • An architect
  • An interior designer
  • A contractor
  • A local cabinet installer
  • A professional measurement company

The Chinese manufacturer should provide a measurement checklist or drawing template. Photos and videos of each room can provide additional context, but they should not replace dimensioned drawings.

For new construction projects, a final measurement should be completed after the walls, floors, ceilings, windows, and main utilities are in their confirmed positions.

Step 4: Define the Room-by-Room Scope

A whole-house project becomes easier to manage when it is divided by room.

A typical scope may look like this:

  • Area
  • Customized Products
  • Entryway
  • Shoe cabinet, bench, coat storage
  • Living room
  • TV cabinet, wall panels, display shelves
  • Dining room
  • Sideboard, wine cabinet, storage
  • Kitchen
  • Base units, wall units, tall cabinets, island
  • Main bedroom
  • Wardrobe, bedside units, dresser
  • Other bedrooms
  • Wardrobes, desks, shelving
  • Walk-in closet
  • Hanging storage, drawers, shoe shelves
  • Bathrooms
  • Vanities, mirror cabinets, linen storage
  • Laundry room
  • Utility cabinets, sink unit, countertop
  • Home office
  • Desk, bookshelves, storage cabinets

This room-by-room list becomes the foundation for the design proposal, quotation, production schedule, packing list, and installation plan.

It also prevents products from being missed when the project contains many customized areas.

Step 5: Space Planning and Functional Design

Before selecting colors or decorative finishes, the designer should first solve the functional layout.

The design team considers:

  • Storage capacity
  • Walking space
  • Door opening direction
  • Drawer clearance
  • Appliance positions
  • Worktop height
  • Hanging rail height
  • Shelf spacing
  • Lighting locations
  • Plumbing access
  • Electrical access
  • Cleaning and maintenance

A kitchen, for example, must account for refrigerators, ovens, dishwashers, sinks, cooktops, and ventilation equipment. A wardrobe should reflect the owner’s clothing types and preferred storage habits.

Good customization is not simply about filling an empty wall with cabinets. The storage layout should support how the room is actually used.

Step 6: Develop the Initial Design Proposal

Once the basic layout is confirmed, the supplier prepares an initial design proposal.

This may include:

  • Floor plans
  • Cabinet elevations
  • 3D renderings
  • Preliminary dimensions
  • Suggested materials
  • Suggested finishes
  • General product configuration

The first proposal helps the buyer understand the design direction and identify major changes before detailed engineering begins.

At this stage, feedback should focus on the main issues:

  • Is the layout practical?
  • Is there enough storage?
  • Does the style match the property?
  • Are important appliances included?
  • Are the room proportions correct?
  • Does the design fit the expected budget?

Small construction details can be addressed later in the shop drawing stage.

Step 7: Select Materials, Finishes, and Hardware

Material selection has a direct effect on appearance, durability, maintenance, and cost.

Cabinet Carcass Materials

Common cabinet body materials include:

  • Particleboard
  • MDF
  • Plywood
  • Solid wood
  • Stainless steel
  • Aluminum

The best option depends on the room, budget, moisture conditions, and local requirements.

  • Door Finishes

Common door and panel finishes include:

  • Melamine
  • Laminate
  • PET
  • PVC membrane
  • Lacquer
  • Wood veneer
  • Solid wood
  • Glass
  • Metal-framed doors

A project may combine several finishes. For example, melamine can be used inside wardrobes, while lacquer or veneer is reserved for visible feature areas.

  • Cabinet Hardware

The hardware schedule should specify:

  • Hinges
  • Drawer slides
  • Handles
  • Lift-up systems
  • Wardrobe accessories
  • Pull-out baskets
  • Lighting accessories
  • Soft-close systems

The brand, model, finish, and quantity should be recorded in the quotation or specification sheet.

  • Countertops

Kitchen and bathroom countertop options may include:

  • Quartz
  • Sintered stone
  • Granite
  • Marble
  • Solid-surface material
  • Stainless steel

Thickness, edge details, cutouts, backsplash design, and joint positions should be confirmed before production.

Step 8: Prepare the Quotation

After the initial design and material direction are defined, the supplier prepares a quotation.

A complete quotation should identify:

  • Room or product name
  • Product dimensions

Quantity

  • Unit price
  • Material

Finish

  • Hardware
  • Countertop
  • Accessories

Packaging

  • Delivery terms
  • Installation scope
  • Payment terms
  • Estimated lead time

A single total price without a detailed breakdown is difficult to verify. It may also hide missing countertops, accessories, internal fittings, or packaging costs.

For easier comparison, ask each supplier to quote the same room list and material level.

Step 9: Review and Adjust the Budget

The first quotation may be above or below the expected budget. Adjustments should be made systematically rather than reducing quality across the entire project.

Possible cost-control methods include:

  • Simplifying decorative details
  • Reducing unnecessary accessories
  • Using standard cabinet sizes
  • Replacing premium finishes in secondary rooms
  • Keeping high-end materials in visible areas
  • Choosing a more economical hardware range
  • Removing low-priority furniture
  • Separating essential items from optional items

This stage should protect the products that matter most. Kitchen hardware, heavily used drawers, bathroom materials, and structural components are usually more important than decorative upgrades in low-use areas.

Step 10: Create Detailed Shop Drawings

After the layout, materials, and budget are approved, the supplier prepares detailed shop drawings.

Shop drawings normally include:

  • Overall dimensions
  • Cabinet dimensions
  • Panel thickness
  • Door divisions
  • Shelf positions
  • Drawer sizes
  • Hardware locations
  • Internal cabinet structure
  • Handle positions
  • Lighting channels
  • Countertop dimensions
  • Appliance openings
  • Plumbing openings
  • Electrical access
  • Installation details

These drawings translate the visual design into manufacturing instructions.

The buyer, designer, contractor, and installer should review the shop drawings together when possible. This helps identify conflicts between the furniture, construction, plumbing, electrical work, and appliances.

No production should begin until the critical dimensions and drawings are approved.

Step 11: Approve Samples

Renderings can show the general appearance, but physical samples provide a more reliable view of color, texture, gloss, and material quality.

The approval package may include:

  • Board samples
  • Door finish samples
  • Edge-banding samples
  • Veneer samples
  • Paint samples
  • Handle samples
  • Hardware samples
  • Countertop samples
  • Glass samples
  • Fabric or leather samples

Colors can appear different under natural light, warm lighting, and cool lighting. Reviewing samples in lighting similar to the final property can reduce unexpected differences.

Approved samples should be labeled and recorded so the factory can use them as the production standard.

Step 12: Confirm the Order and Contract

Before the deposit is paid, the contract should clearly state:

  • Final product scope
  • Approved quotation
  • Material specifications
  • Hardware specifications
  • Finish codes
  • Drawing approval procedure
  • Sample approval procedure
  • Production lead time
  • Payment schedule
  • Delivery terms
  • Packaging requirements
  • Quality standards
  • Warranty
  • Replacement process
  • Responsibilities of each party

For overseas orders, the agreed trade term should also be included.

Common terms include:

  • EXW
  • FOB
  • CIF
  • DDP

The buyer should understand which shipping, customs, tax, and delivery costs are included under the selected term.

Step 13: Production Planning

Once the order is confirmed, the factory prepares the production plan.

The production team converts approved drawings into:

  • Material lists
  • Cutting lists
  • Hardware schedules
  • Production instructions
  • Packaging lists
  • Room and cabinet codes

Large whole-house projects may be divided into production batches based on room, material, color, or installation sequence.

A clear coding system is particularly important. Every panel, cabinet, accessory box, and hardware package should be linked to a specific room and product.

Step 14: Custom Furniture Manufacturing

The exact manufacturing process depends on the material and product type. Panel-based cabinetry commonly goes through the following stages:

Panel Cutting

Large boards are cut according to the approved production dimensions.

Edge Banding

Exposed board edges are sealed with matching edge material. Proper edge banding improves appearance and helps protect the panel edges.

Drilling and Machining

Machines create holes, grooves, connectors, hinge positions, and other required details.

Door and Finish Production

Doors may require laminating, painting, veneering, polishing, glass installation, or metal-frame assembly.

Cabinet Trial Assembly

Some products may be assembled or partially assembled in the factory to verify dimensions, door alignment, hardware movement, and component compatibility.

Cleaning and Labeling

Finished components are cleaned and labeled according to the room, cabinet number, and installation sequence.

Products made from stone, metal, glass, upholstery, or solid wood may follow separate production lines.

Step 15: Quality Inspection

Quality inspection should take place before products are packed and shipped.

The inspection team may check:

  • Product dimensions
  • Material consistency
  • Finish color
  • Surface defects
  • Edge quality
  • Hole positions
  • Door alignment
  • Drawer operation
  • Hardware quantity
  • Accessory quantity
  • Countertop dimensions
  • Glass condition
  • Product labeling
  • Drawing compliance

Photos or videos can be provided for remote approval. For larger orders, buyers may also appoint an independent inspection company.

Any issues found before shipping are usually easier and less expensive to correct than problems discovered after delivery.

Step 16: Export Packaging

Whole-house products may travel long distances and pass through several loading, unloading, and storage stages. Export packaging therefore needs to protect the products from impact, moisture, scratches, and missing parts.

Packaging may include:

  • Protective film
  • Foam sheets
  • Corner protectors
  • Reinforced cartons
  • Wooden crates
  • Pallets
  • Moisture-resistant wrapping
  • Glass protection
  • Stone crates

Each package should show:

  • Project name
  • Room name
  • Product code
  • Cabinet number
  • Package number

Quantity

  • Handling instructions

Hardware should be packed by cabinet or room rather than placed into one mixed box. This makes installation faster and reduces the risk of missing components.

Step 17: Loading and Shipping

Before loading, the supplier should prepare:

  • Packing list
  • Commercial invoice
  • Product list
  • Container loading plan
  • Shipping documents
  • Installation documents

Cabinets and large panels are usually loaded according to product size, weight, and unloading sequence.

Heavy products should not damage painted doors, glass, or decorative panels during transportation. Stone, mirrors, and fragile products may require separate crates or loading positions.

For overseas projects, the buyer should also confirm:

  • Destination port
  • Customs requirements
  • Import duties
  • Local taxes
  • Port charges
  • Final delivery arrangements
  • Storage conditions at the property

The construction site should be ready to receive the goods when the shipment arrives.

Step 18: Prepare the Site for Installation

Installation should not begin until the property is sufficiently complete and protected.

The following work should normally be confirmed:

  • Walls are finished
  • Floors are installed or final floor levels are known
  • Ceilings are complete
  • Doors and windows are installed
  • Plumbing points are confirmed
  • Electrical points are confirmed
  • The site is dry
  • Access routes are clear
  • Products can be stored safely
  • Final appliances are available or dimensions are confirmed

Installing cabinets too early can expose them to moisture, dust, paint, impact, or later construction changes.

Step 19: Install the Customized Products

The installation sequence depends on the project, but built-in furniture is normally completed room by room.

A typical cabinet installation includes:

  • Checking the room dimensions
  • Identifying packages and cabinet codes
  • Positioning cabinet units
  • Leveling and connecting the cabinets
  • Fixing cabinets to the wall
  • Installing fillers and end panels
  • Fitting doors and drawers
  • Adjusting hinges and slides
  • Installing handles and accessories
  • Installing countertops
  • Connecting lighting
  • Sealing required joints
  • Cleaning and protecting finished surfaces

Local electrical, plumbing, gas, and stone work should be completed by qualified professionals where required.

Installation drawings, labeled packaging, and an organized hardware schedule are especially valuable when the factory does not send its own installation team.

Step 20: Final Inspection and Acceptance

After installation, the buyer and installer should inspect every room.

The final checklist may include:

  • Cabinets are level
  • Doors are aligned
  • Drawers move smoothly
  • Hinges close correctly
  • Handles are secure
  • Panels are undamaged
  • Gaps are consistent
  • Countertop joints are acceptable
  • Appliances fit the openings
  • Plumbing access remains available
  • Electrical access remains available
  • Lighting works correctly
  • Accessories are complete
  • Sealant is clean
  • The products match approved drawings

Any issue should be recorded with photos, measurements, product codes, and a clear description.

A written defect list is more effective than reporting problems through separate messages.

Step 21: After-Sales Service

After-sales support may involve:

  • Replacement panels
  • Additional hardware
  • Missing accessories
  • Installation guidance
  • Adjustment instructions
  • Color repair materials
  • Warranty claims
  • Future product additions

The supplier should explain how replacement parts are requested and how quickly they can be produced.

Buyers should keep the following documents after project completion:

  • Final drawings
  • Approved specifications
  • Material codes
  • Finish codes
  • Hardware models
  • Packing list
  • Installation guide
  • Warranty information

These records are useful if a door, drawer slide, handle, or panel needs to be replaced later.

How Long Does the Whole House Customization Process Take?

A complete project may take several weeks or several months, depending on its size and complexity.

  • Project Stage
  • Typical Time Range
  • Initial planning
  • 1–2 weeks
  • Measurement and information collection
  • 1–2 weeks
  • Design development
  • 2–6 weeks
  • Material and sample approval
  • 1–3 weeks
  • Shop drawings
  • 1–3 weeks
  • Production

4–10 weeks

  • Quality inspection and packing
  • 1–2 weeks
  • International shipping
  • 2–8 weeks

Installation

  • 1–6 weeks

These stages may overlap. Delays commonly occur when measurements, material decisions, appliance models, or construction conditions are not confirmed on time.

Luxury villas and multi-material projects generally require longer design, sampling, production, and installation periods than standard apartment cabinetry.

Common Mistakes During Whole House Customization

  • Starting Production Before Final Measurement

Early drawings can be used for planning, but production should rely on confirmed dimensions. Changes to floors, walls, ceilings, or plumbing can affect cabinet fit.

  • Choosing Materials Only From Renderings

Renderings cannot accurately reproduce every color, gloss level, grain pattern, or texture. Physical samples should be approved before production.

  • Comparing Quotations by Total Price Alone

A cheaper quote may exclude countertops, internal accessories, branded hardware, packaging, or shipping. Product scope and specifications must be compared line by line.

  • Ignoring Appliance Requirements

Kitchen cabinets should be designed around confirmed appliance models whenever possible. Small differences in refrigerator, oven, cooktop, or dishwasher dimensions can affect the final fit.

  • Leaving Installation Planning Until Delivery

The installer should review drawings before production, not only after the products arrive. Early feedback can reveal issues with access, wall fixing, service openings, and local installation methods.

  • Making Late Design Changes

Changes after materials have been ordered or production has begun may cause extra charges, material waste, and delivery delays.

How to Make the Process More Efficient

A smooth whole house customization process depends on clear communication and timely decisions.

The following practices can help:

  • Assign one project decision-maker
  • Keep drawings and specifications in one shared folder
  • Use consistent room and product names
  • Confirm appliance models early
  • Approve samples before production
  • Record every design change
  • Review quotations by room
  • Include the installer in technical reviews
  • Avoid changing finishes late
  • Confirm site readiness before delivery

Regular progress updates can also help identify delays before they affect the construction schedule.

How to Choose a Whole House Customization Supplier

A qualified supplier should be able to manage more than furniture manufacturing.

Important capabilities include:

  • Space planning
  • Cabinet engineering
  • Material sourcing
  • Sample preparation
  • Detailed shop drawings
  • Production management
  • Quality inspection
  • Export packaging
  • International shipping support
  • Installation documentation
  • After-sales service

Ask potential suppliers to provide examples of projects with a similar property type, design style, product scope, and delivery market.

The supplier should also be able to explain its measurement requirements, drawing approval process, quality-control standards, and replacement procedure clearly.

Frequently Asked Questions

What is the first step in whole house customization?

The first step is defining the property information, required rooms, preferred style, budget, and expected delivery schedule. A floor plan is usually needed before design work begins.

Do I need complete interior drawings before contacting a manufacturer?

No. A manufacturer can often prepare an initial proposal from a floor plan and reference images. Confirmed dimensions and technical information will be required before production.

Can a Chinese manufacturer measure an overseas property?

Some manufacturers may provide overseas measurement services for large projects, but many projects use dimensions supplied by a local architect, contractor, or professional measurement team.

When should the final measurement be completed?

Final measurement should take place after the main walls, floor levels, ceilings, windows, plumbing points, and electrical positions are confirmed.

Can production begin before all materials are approved?

It is not recommended. Materials, finishes, hardware, dimensions, and shop drawings should be approved before production to reduce mistakes and remanufacturing.

Does whole house customization include installation?

Installation terms vary by supplier. Some provide installation drawings and remote support, while others can arrange an installation team. Local labor, travel, accommodation, and related costs may be quoted separately.

  • How are products identified during installation?

Each cabinet, panel, hardware box, and accessory package should be labeled with the project, room, cabinet number, and package code.

  • What happens if a product is damaged during shipping?

The buyer should photograph the packaging and damaged item immediately, record the product code, and contact the supplier. The replacement process depends on the contract, insurance, and warranty terms.

Conclusion

The whole house customization process connects design, manufacturing, logistics, and installation into one coordinated project.

A typical project begins with consultation and measurement, followed by space planning, material selection, quotation, shop drawings, sampling, and production. After quality inspection, the products are packed, shipped, installed, and checked against the approved drawings.

The most important decisions happen before production starts. Accurate measurements, clear specifications, confirmed appliance models, approved samples, and detailed shop drawings can prevent many of the problems that appear later.

For overseas projects, packaging, labeling, shipping, site preparation, and local installation planning should also be included from the beginning. With a clear process and defined responsibilities, whole house customization can deliver a consistent interior across every room while keeping the project easier to manage.