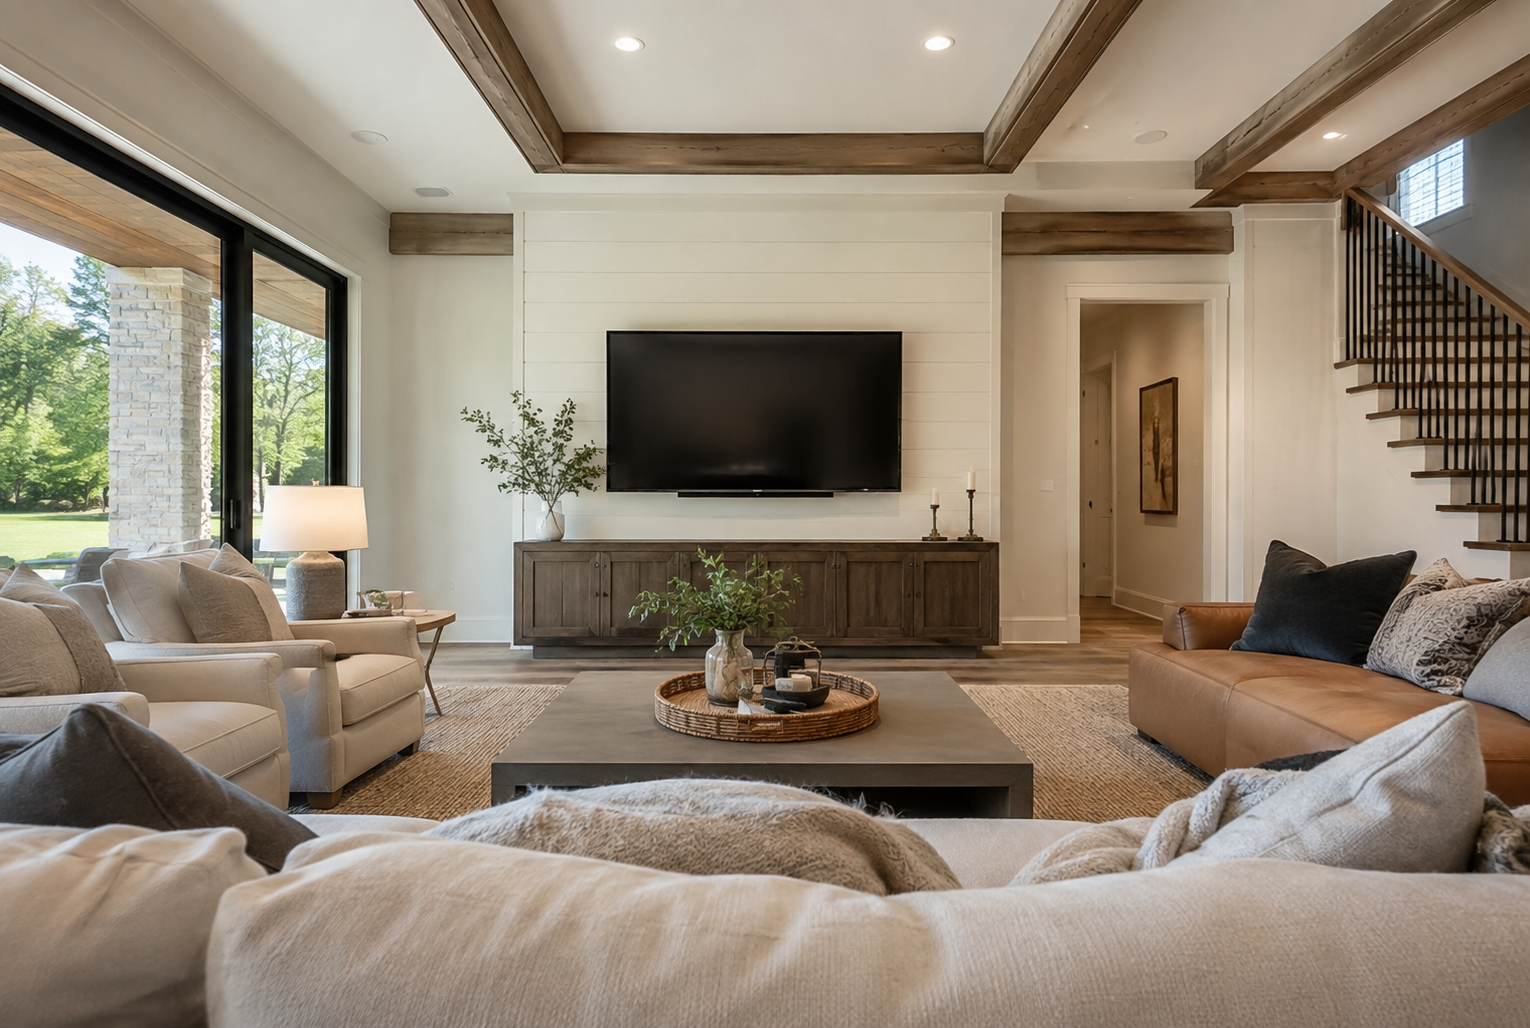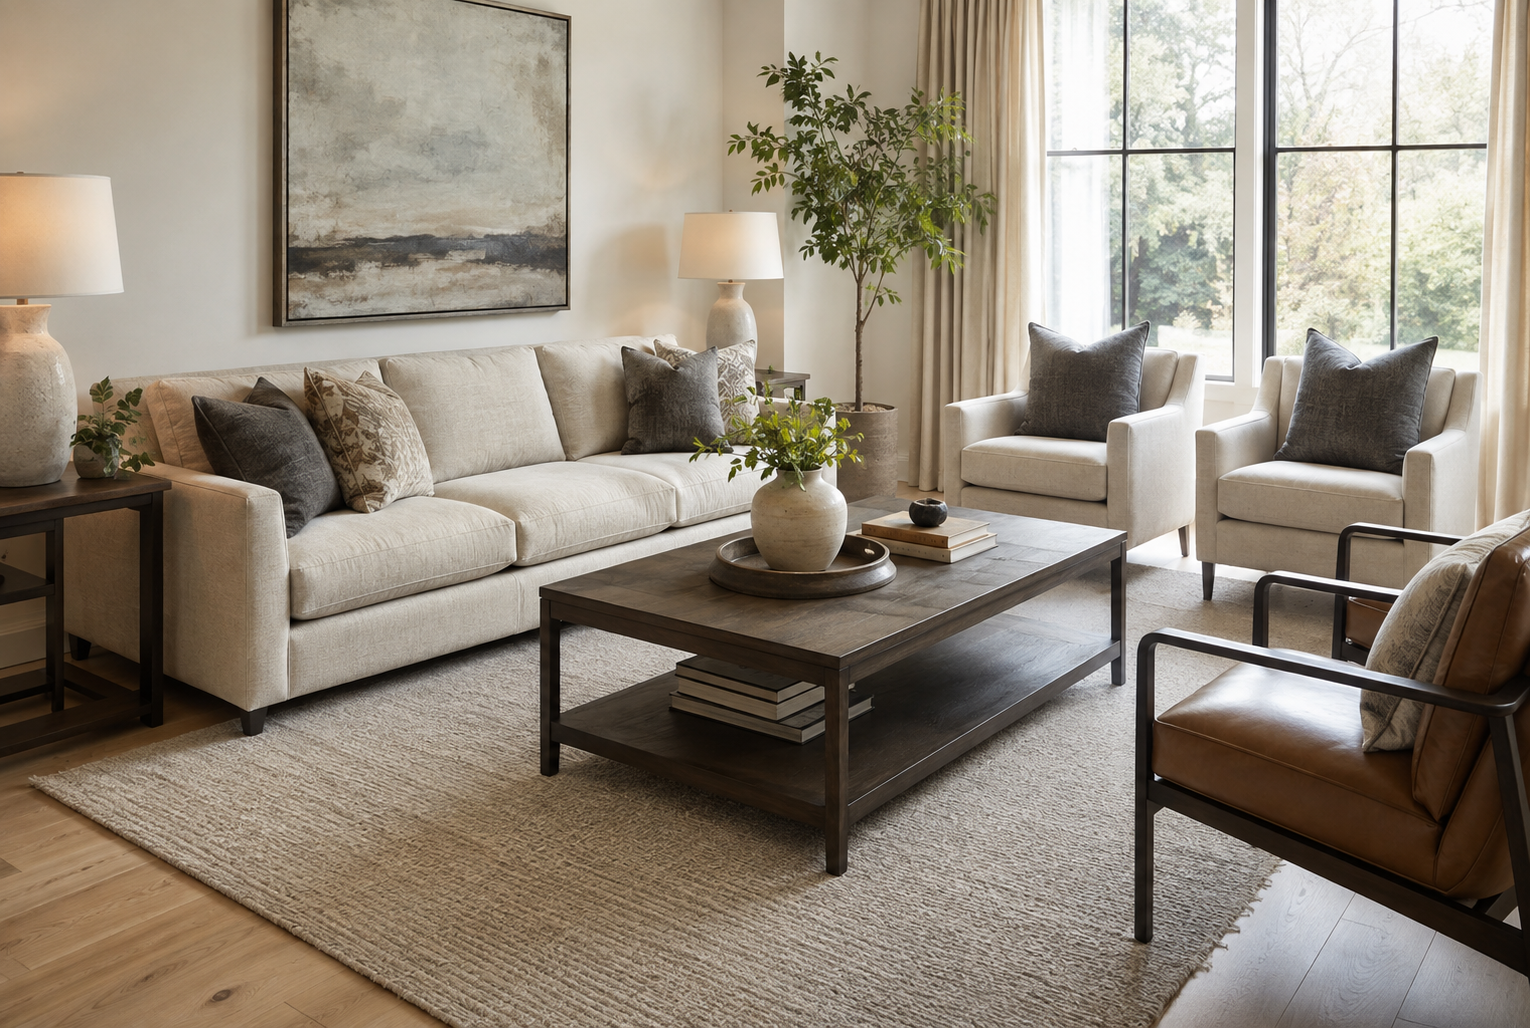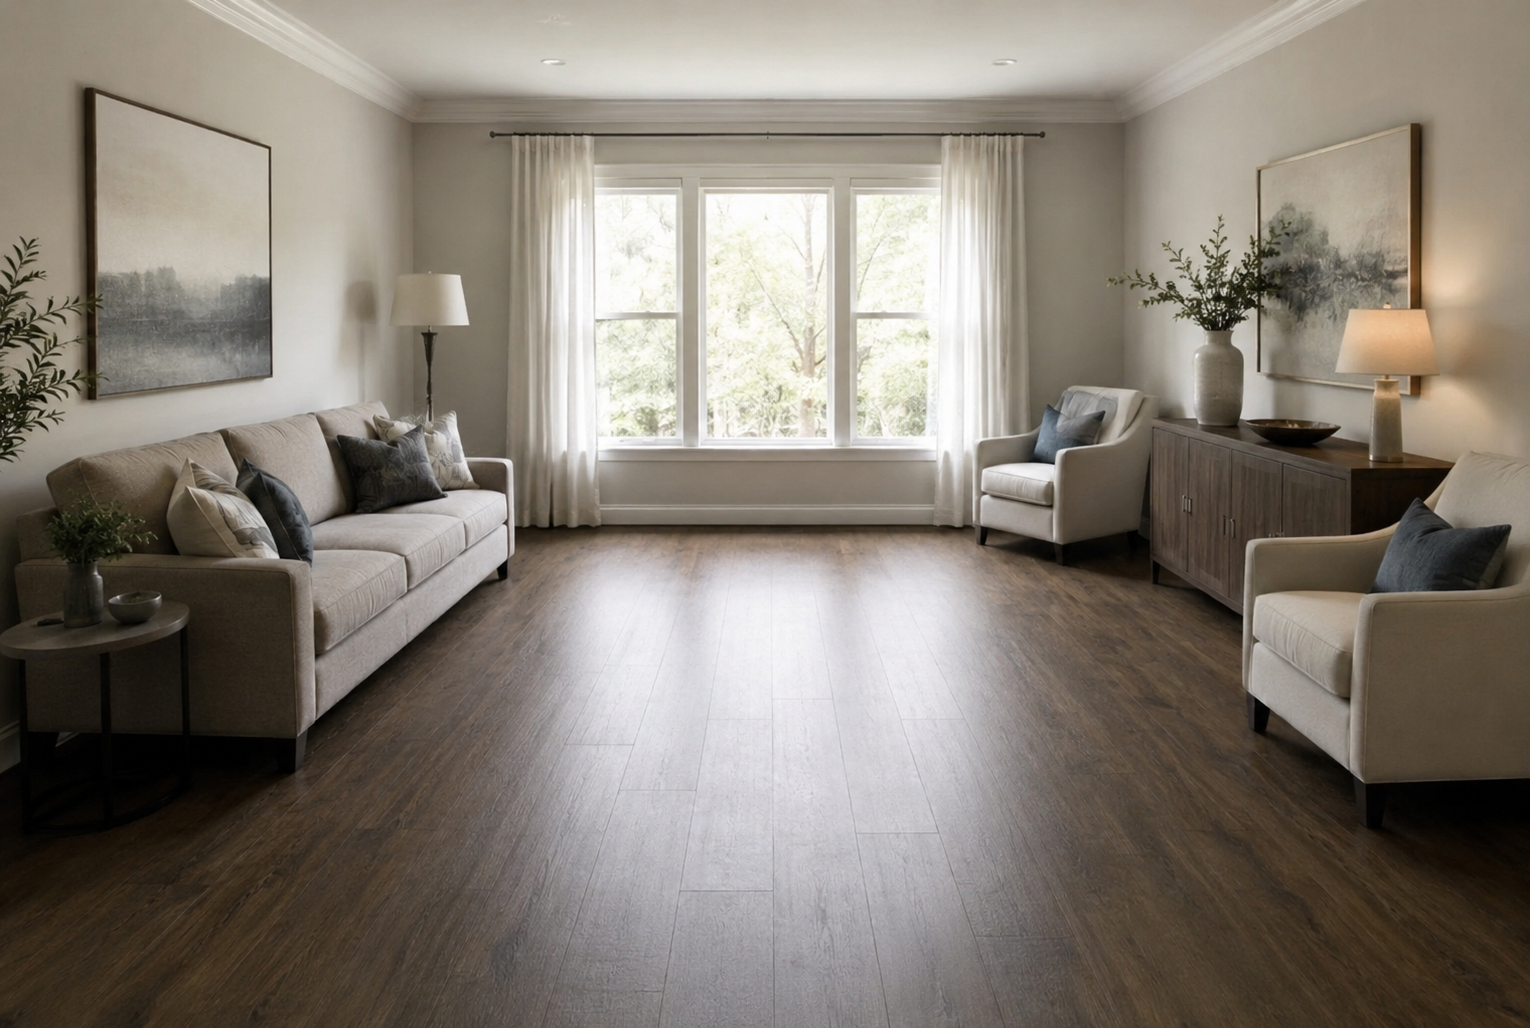
High-End Whole-House Customization from Foshan Download Catalog FAQs

Should Bedroom Furniture Match? A Practical Guide to Matching and Mismatched Pieces

A bedroom can feel coordinated without looking like every piece came from the same carton. It can also look disjointed even when the bed, nightstands, and dresser belong to one collection. The difference is usually not “matching” versus “mismatched” by itself. It is whether the furniture fits the room, supports the people who use it, and repeats a small number of deliberate visual cues.

Matching sets reduce decisions and make finishes easier to coordinate. Mixed pieces offer more control over size, function, price, and the furniture you already own. Many American bedrooms benefit from a hybrid approach: match the pieces that establish the room, then vary the pieces that need to solve different storage or space problems.

This guide compares all three approaches and gives you a practical way to choose before you order.
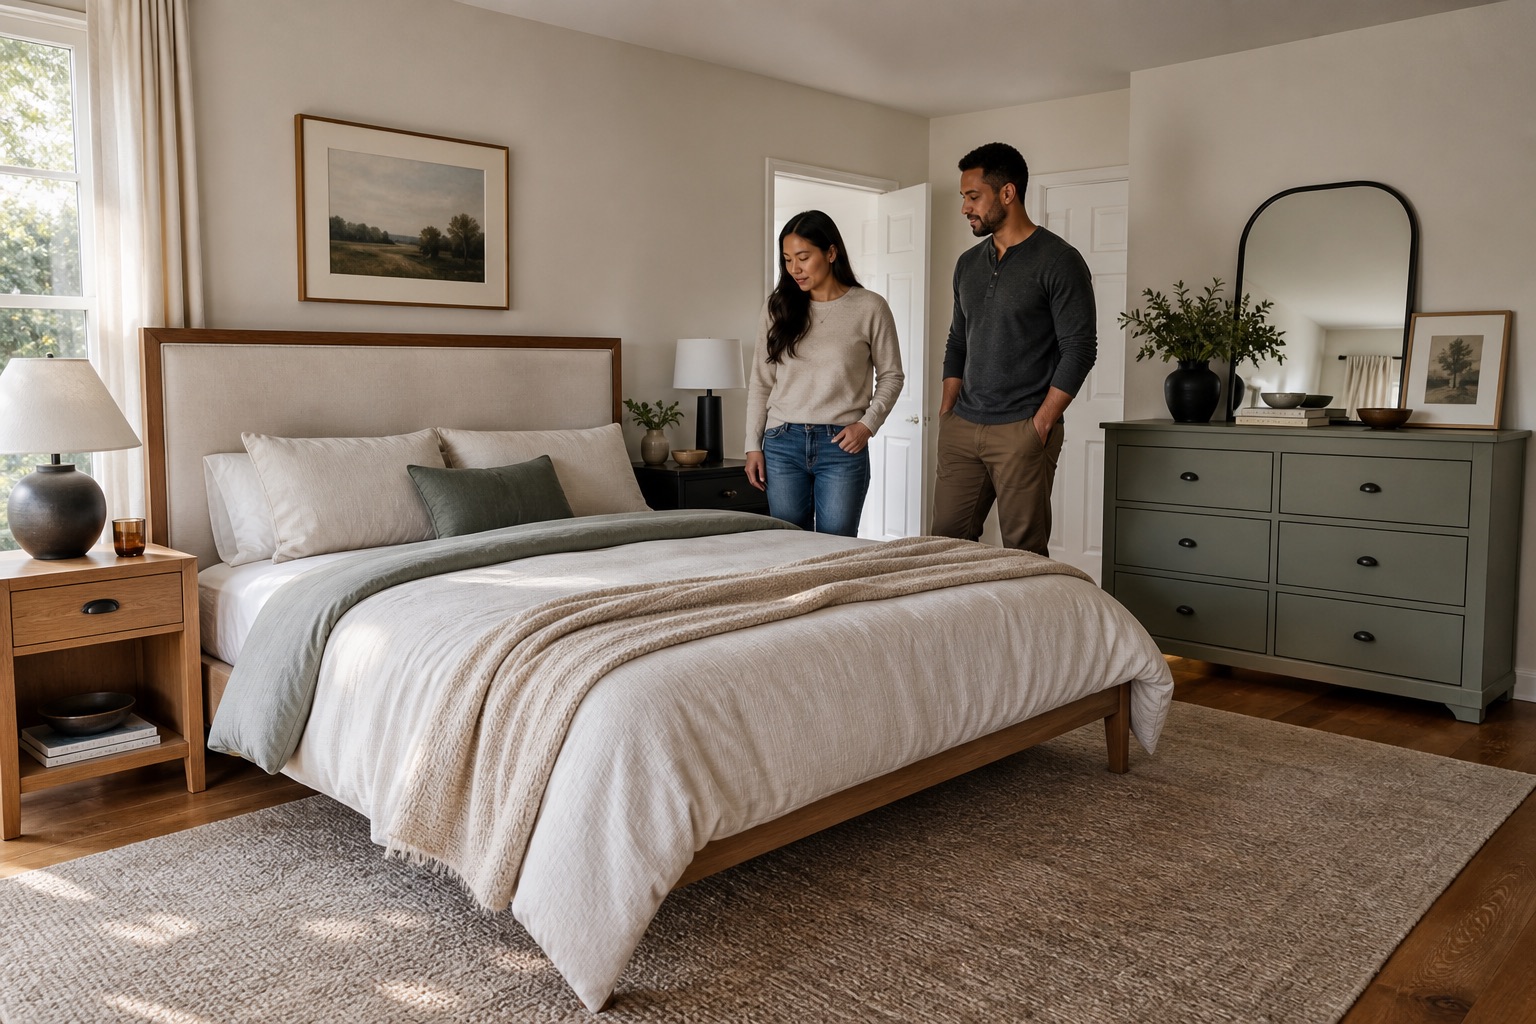
Homeowners and designer reviewing coordinated matching and mismatched bedroom furniture
Furniture does not need to be identical when its scale, material cues, and functions are coordinated.

Start With the Room, Not the Furniture Collection

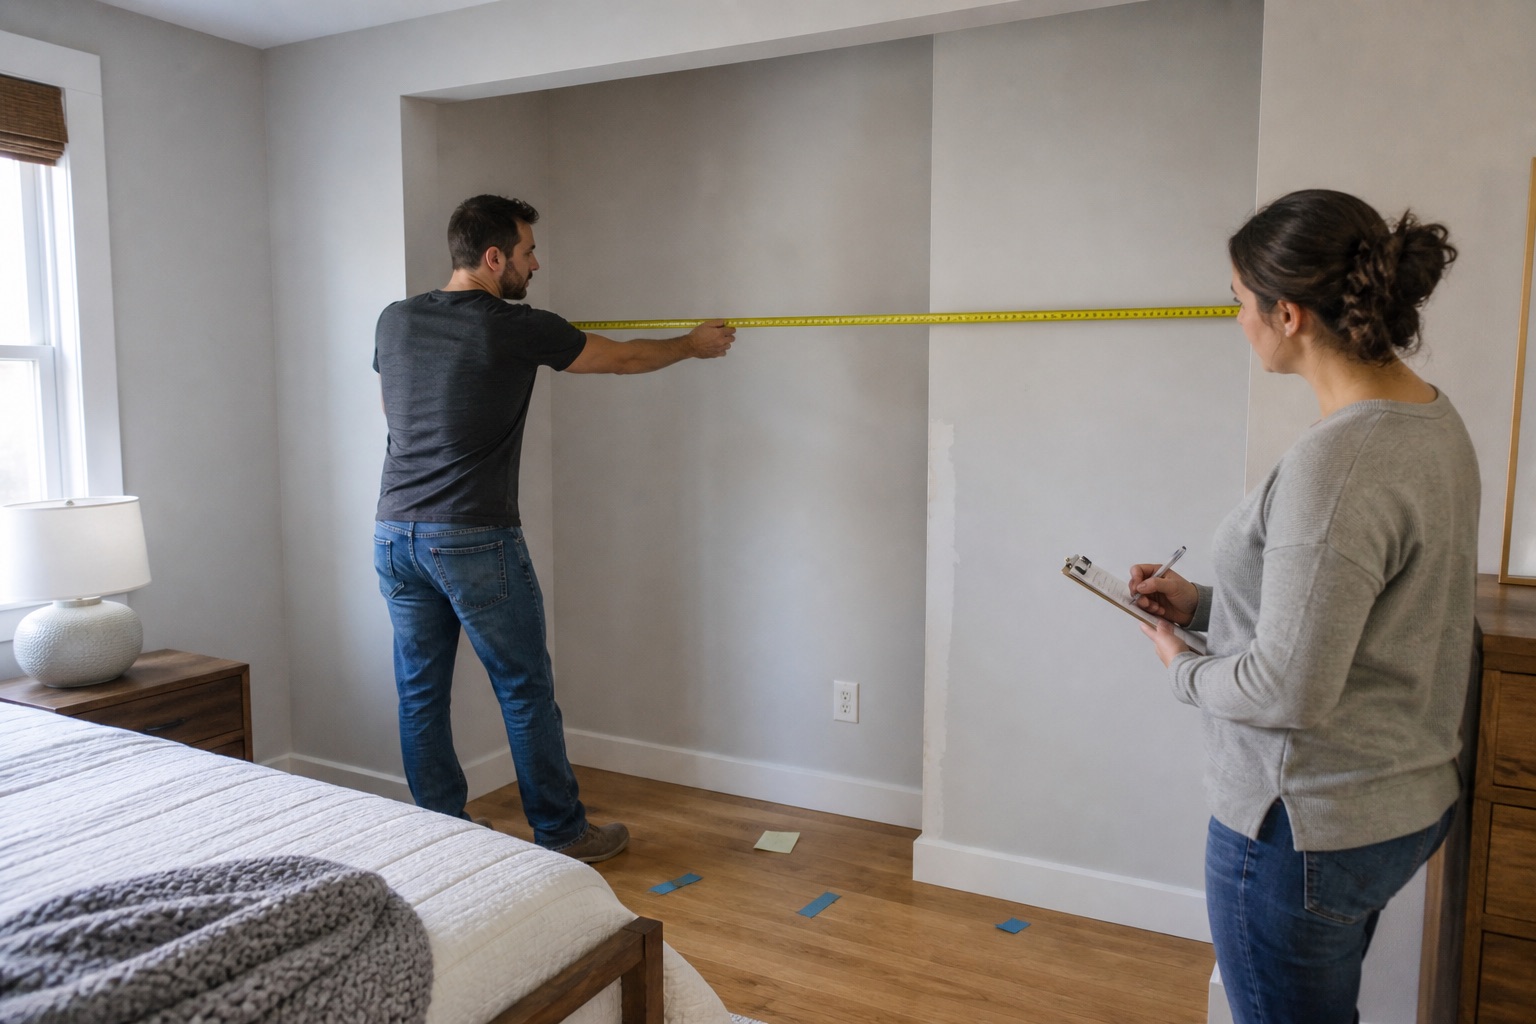
Before comparing styles, measure the finished room. Record the usable width of the bed wall, the distance from the bed to doors and closets, window locations, baseboards, floor registers, outlets, and the delivery route. Use the largest exterior dimensions shown for each piece, not just the top width or the interior drawer dimensions.

Next, list what must stay. A dark wood bed, an inherited dresser, an upholstered bench, or a rug can become the starting point for the entire palette. Keeping one large piece is not a compromise. It simply means that new items should relate to it through color temperature, scale, hardware, shape, or upholstery.

Make a functional list as well. Does one person need more bedside storage? Is a television required? Will a crib, desk, luggage rack, reading chair, or mobility aid share the room? The best starting checklist is the one based on actual habits; this overview of essential bedroom furniture can help separate necessary pieces from optional ones.

What a Matching Bedroom Set Does Well

A matching set creates immediate continuity. The wood tone, edge profile, hardware, leg shape, and finish sheen are already coordinated. That can be useful when you have a short purchasing timeline, want predictable pricing, or need a consistent package for several similar guest rooms.

The risk is assuming every included piece belongs in the room. A 66-inch dresser may crowd a closet door. Two 28-inch nightstands may fit the product photo but not a bed wall with an off-center window. A tall chest may add storage while making the room feel visually heavy. A package price is only a value when each piece earns its footprint.

Treat a collection as a menu, not an obligation. Ask whether pieces can be purchased individually, whether replacement hardware is available, and how long the finish will remain in production. Matching the bed and nightstands does not require adding the dresser, mirror, chest, and bench if those items do not fit.

What Mismatched Bedroom Furniture Does Well

Mixed furniture lets each piece solve a specific problem. You can use a three-drawer chest on one side of the bed and a narrow floating shelf on the other. You can keep a well-made dresser while updating the bed. You can choose a shallow storage piece for a tight wall instead of accepting the deeper piece in a set.

The tradeoff is that coordination becomes your responsibility. Product photos taken under different lighting can make unrelated finishes appear closer than they are. Furniture listed as “walnut,” “oak,” or “espresso” may have very different red, yellow, gray, or purple undertones. Scale can conflict even when color looks compatible.

Mixed does not mean every item should be unrelated. A successful room usually repeats at least two cues, such as warm undertones plus black hardware, rounded corners plus tapered legs, or a consistent upholstery color plus similar visual weight.

Use a Hybrid Approach When the Room Needs Both Consistency and Flexibility

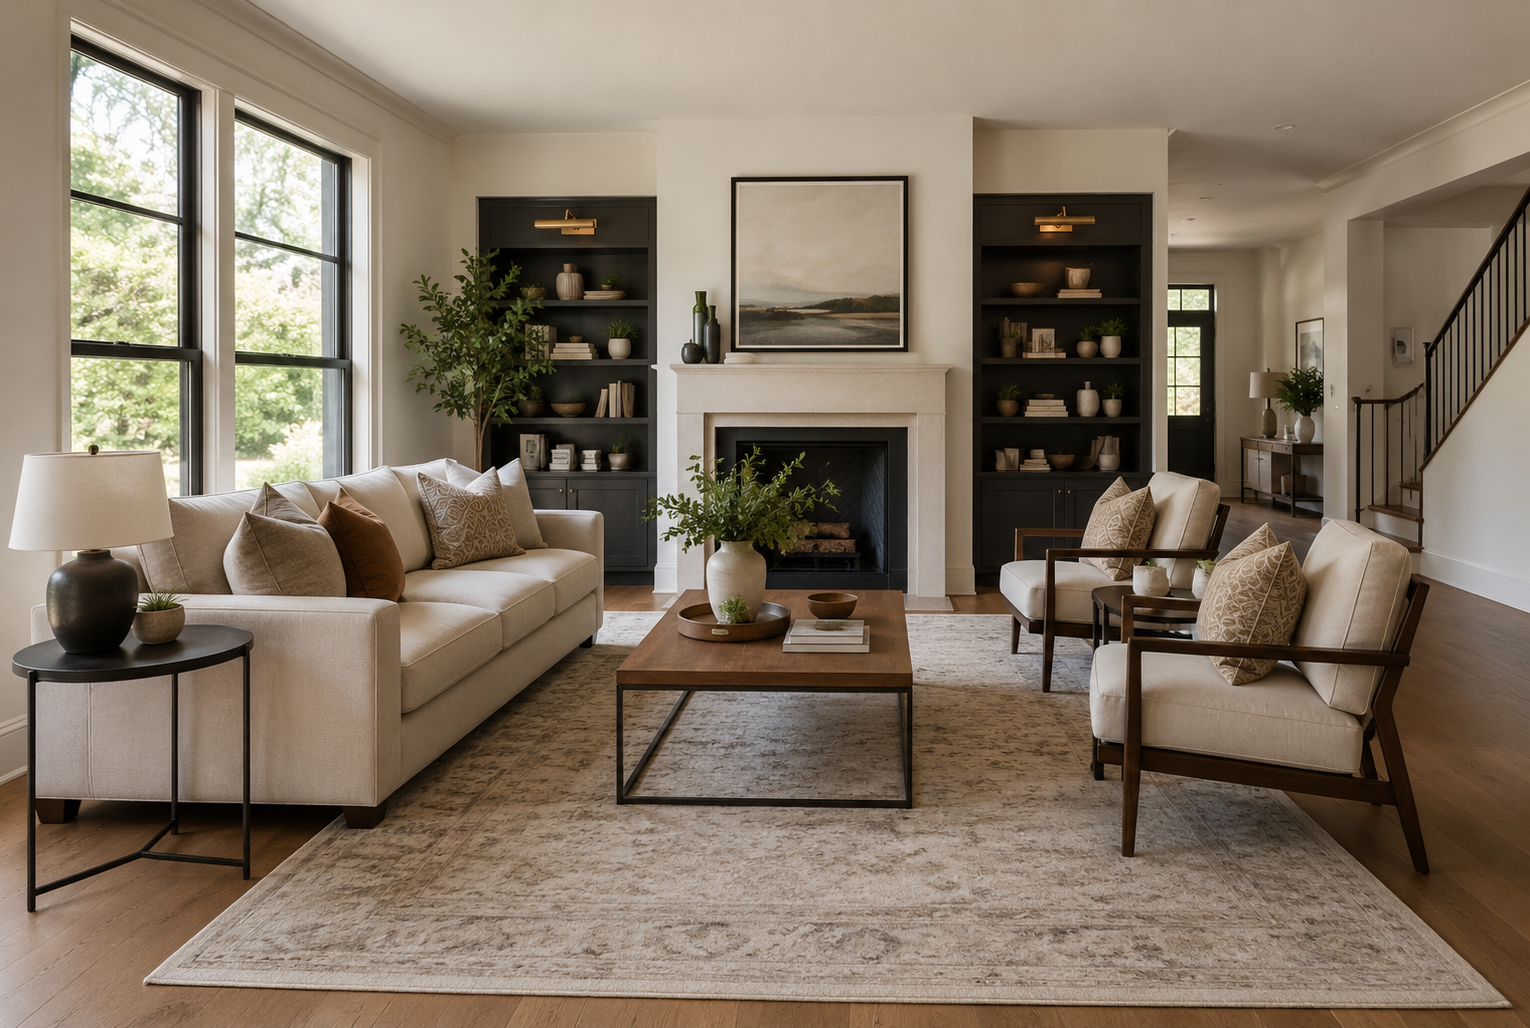
A hybrid plan combines a small matching group with intentionally different supporting pieces. You might pair the bed and two nightstands, then choose a painted dresser with compatible hardware. You might use a coordinated custom bed wall and wardrobe while keeping movable seating and tables from standard collections.

For small rooms, a hybrid plan can reduce crowding. Start by applying the clearance principles in this small-bedroom furniture layout guide, then choose which few pieces deserve a shared finish. Consistency is more effective when it supports the layout instead of adding furniture solely for symmetry.

Priority Matching set Mixed pieces Hybrid plan
Fast selection Strongest Requires more comparison Moderate
Irregular room fit Limited by available sizes Strongest Strong
Predictable initial price Often easiest Varies by source Moderate
Keeping existing furniture May be difficult Strongest Strong
Future single-piece replacement Depends on collection life Flexible Flexible
Multiple similar rooms Efficient More coordination Efficient with a room matrix

Build a Limited Material and Color Vocabulary

Choose one dominant material, one supporting material, and one connector. The dominant material might be warm oak. The supporting material might be an off-white painted finish. The connector could be matte black hardware, brushed brass, linen upholstery, or a repeated rounded edge.

Focus on undertone before species name. Two oak finishes can fight if one reads yellow and the other gray. By contrast, walnut and painted furniture can work together when the paint, floor, and textiles share compatible warmth.

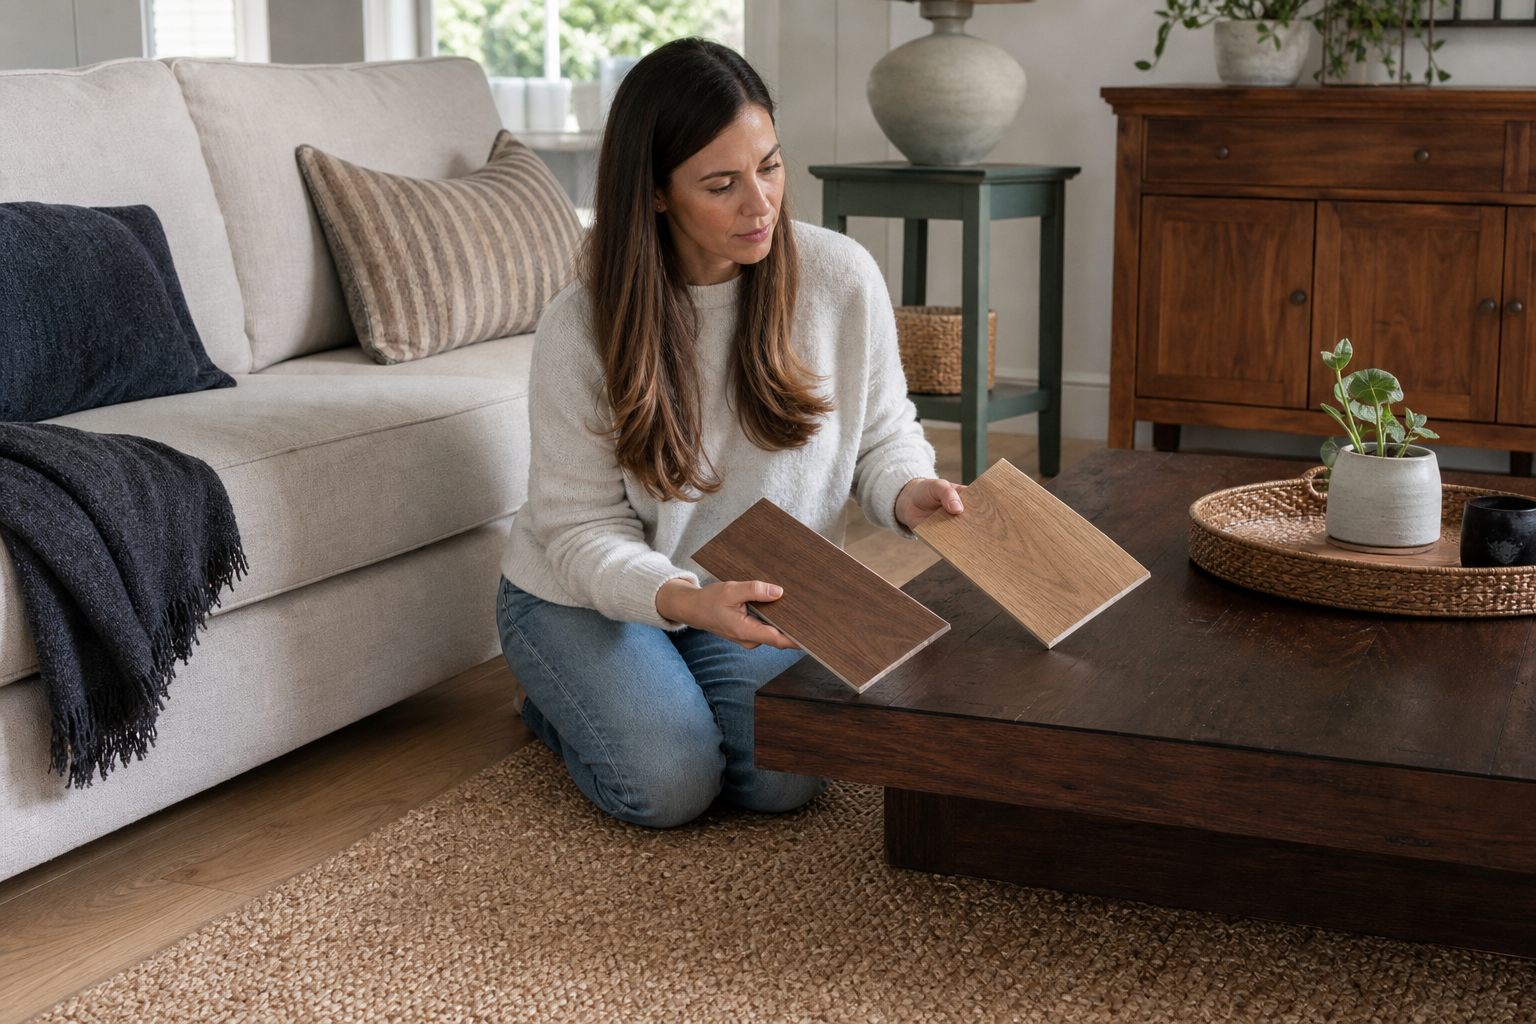
Do not give final color approval from a screen. Request physical samples when the purchase is difficult to return or when several pieces must coordinate. Place samples beside the wall color, flooring, rug, and bedding. Check them in morning daylight, afternoon light, and the lamps you actually use at night.

Natural wood varies, so record the supplier, sample number, sheen, and an acceptable range. For multiroom work, keep an approved control sample for delivery inspection. Avrela Home’s custom furniture overview is a useful starting point when standard finishes or dimensions cannot create a controlled package.

Woman comparing wood, paint, hardware, and fabric samples beside bedroom furniture
Real samples should be compared beside the existing bed, flooring, paint, and textiles.

Coordinate Visual Weight Before Chasing Exact Color

Visual weight describes how much space a piece appears to occupy. A 60-inch dresser on slender legs may look lighter than a smaller chest with a closed base, dark finish, and thick top. A high upholstered headboard already carries significant weight, so the surrounding furniture may benefit from open bases, lighter finishes, or quieter hardware.

Look at the room as a series of solids and openings. In a compact bedroom, preserving visible floor and wall can make circulation feel clearer. This does not mean every item must be small. It means avoiding a lineup in which every piece is simultaneously tall, deep, dark, and fully enclosed.

Proportion matters more than whether profiles are identical. Relate the dresser length to its wall, the nightstand width to each bedside bay, and the chest height to nearby windows and artwork. If a wardrobe provides most clothing storage, a second heavy dresser may not be necessary. The planning sequence in this custom wardrobe design guide can help determine storage capacity before you fill the remaining walls.

Do Both Nightstands Have to Match?

No. Nightstands can differ when the users, wall conditions, or storage needs differ. One side may need drawers for medications and charging equipment; the other may need only a surface and reading light. A closet door, window, or narrower passage may require a different footprint.

Keep the top of each nightstand comfortable from that sleeper’s normal pillow position. The two pieces do not need identical dimensions, but their top heights should make sense beside the finished mattress. Use the reach and clearance tests in this nightstand height and size guide before choosing purely for appearance.

To connect different nightstands, repeat one or two details. Use the same lamps, related hardware, similar corner shapes, or a shared paint color. If one piece is a solid three-drawer chest and the other is a light wall-mounted shelf, balance the wall with a sconce, artwork, or basket rather than forcing equal cabinets into unequal spaces.

Matching nightstands remain a good option when both sides have the same clearance, both users need similar storage, and symmetry is an important part of the room. Symmetry should never come at the cost of a blocked drawer, pinched walkway, or inaccessible outlet.

Handle Wood Tones, Paint, Metal, and Upholstery Deliberately

Mixing two wood tones is usually easier than trying to match two nearly identical tones that are slightly wrong. Let one wood be dominant and use the other in a smaller role. Separate them with paint, upholstery, a rug, or visible wall so they do not appear to be an unsuccessful match.

Painted pieces are effective bridges because they interrupt competing grains. A warm white, muted green, or charcoal dresser can connect a wood bed with metal or upholstered pieces. Check that the paint undertone works with the floor and wall; “white” is not a single neutral.

Metals do not all need to match, either. Keep one dominant metal and use the second sparingly. Black bed hardware and aged brass lamps can coexist when their shapes and placement feel intentional. Avoid introducing a new metal on every handle, lamp, frame, and accessory.

Upholstery offers another connector. Repeating a linen texture or a quiet color in the headboard, bench, and window treatment can unite furniture from different sources. Order fabric samples and review durability, cleaning instructions, and dye-lot variation before approving a large upholstered item.

Plan for the Type of Bedroom You Are Furnishing

A primary bedroom can support more personal variation because it is shaped around long-term habits and existing possessions. A guest room usually benefits from a simpler package: clear bedside surfaces, accessible lighting, luggage space, and enough storage for a short stay.

A child’s room should prioritize anti-tip requirements, rounded or protected edges, cleanability, and pieces that can change as the child grows. Avoid making every component dependent on a theme that will be difficult to update. Follow manufacturer anchoring instructions for tall storage and consider how drawers affect the walking path when open.

Rental bedrooms favor replaceable, durable pieces and finishes that can be repaired without replacing a full suite. Hotels, villas, and other multiroom projects need a room-type matrix. Define which appearance cues stay consistent, which dimensions change by room, and which materials have approved substitutes. The Avrela Home bedroom planning page shows how a coordinated room package can still be developed around the actual space.

For users with limited mobility, prioritize turning space, reachable storage, easy-grip hardware, stable seating, and a clear nighttime route. Function-driven differences between pieces are appropriate when they make the room safer or easier to use.

Buy in a Risk-Controlled Order

Resolve the hardest-to-replace and largest items first: the bed, principal storage, and any built-in or custom components. Add nightstands, seating, and decorative furniture only after those dimensions are confirmed. This sequence protects the wall and circulation space needed by essential pieces.

For a phased purchase, keep a record of product dimensions, finish names, sample numbers, hardware models, purchase dates, and photographs taken in consistent light. Product names alone are not reliable enough for future matching.

When comparing quotes, include sales tax, inside delivery, stair or elevator fees, assembly, wall anchoring, removal of old furniture, and return freight. A discounted set is not economical if two pieces remain unused. Mixed purchases may fit better but lose value through repeated delivery charges. Compare complete installed cost, not just product subtotal.

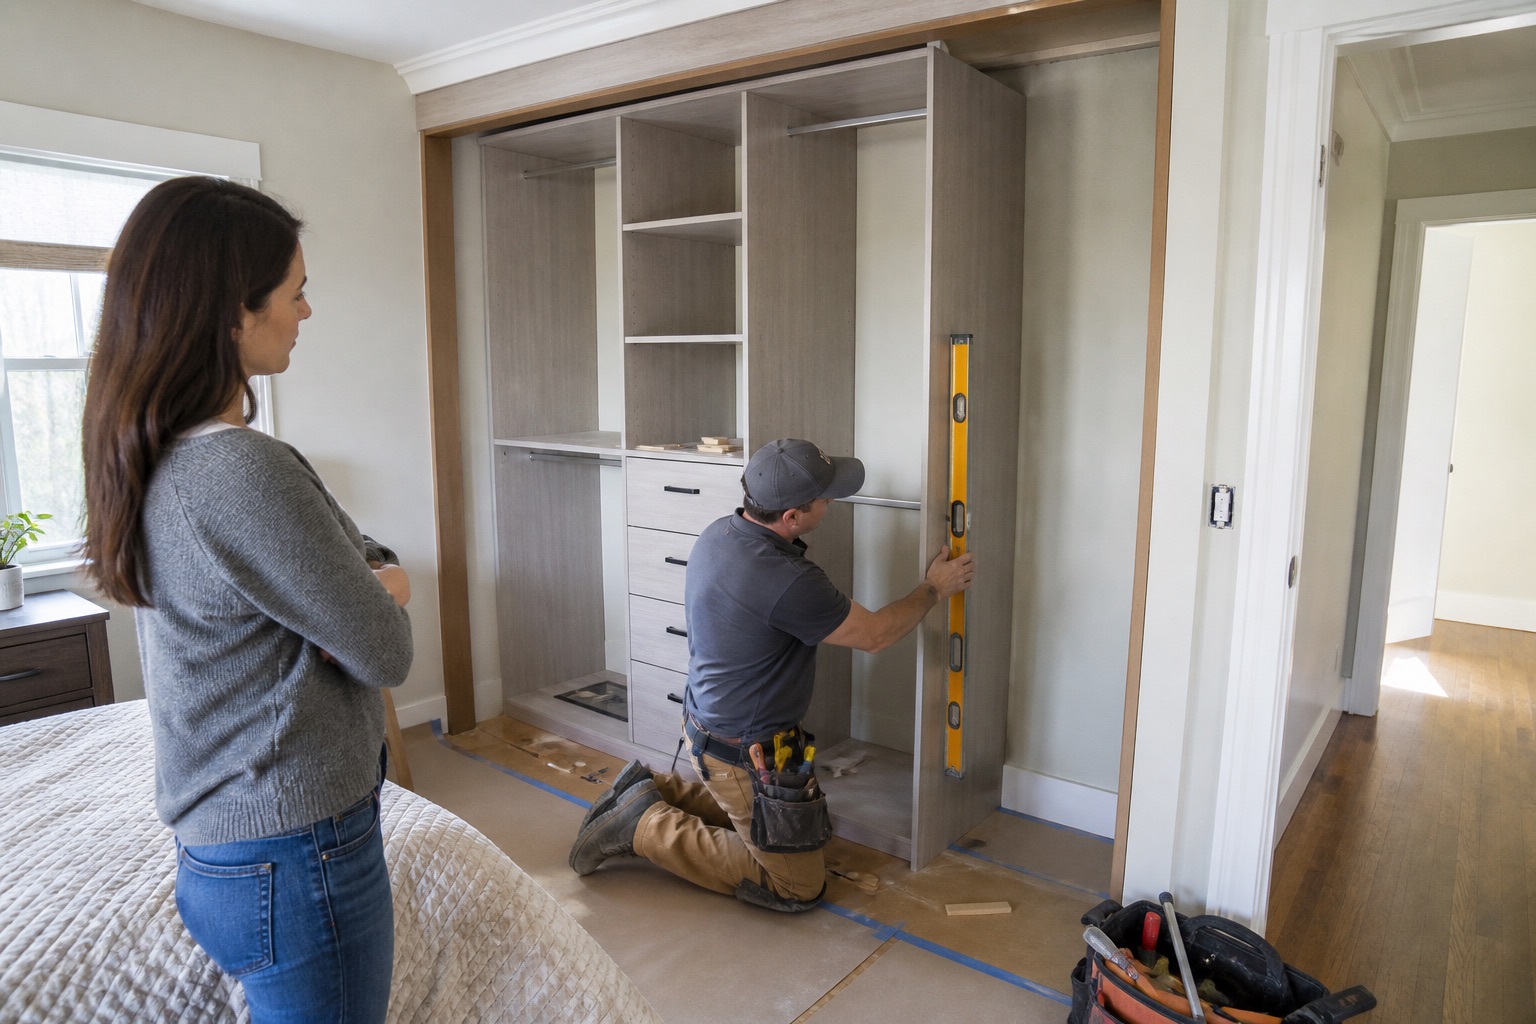
For custom work, approve dimensioned drawings, material and hardware schedules, finish samples, edge details, acceptable natural variation, packing, delivery scope, and installation responsibility. A documented approval process is more useful than an unsupported promise that every natural surface will look identical. Avrela Home can coordinate these decisions across individual pieces or a broader residential package.
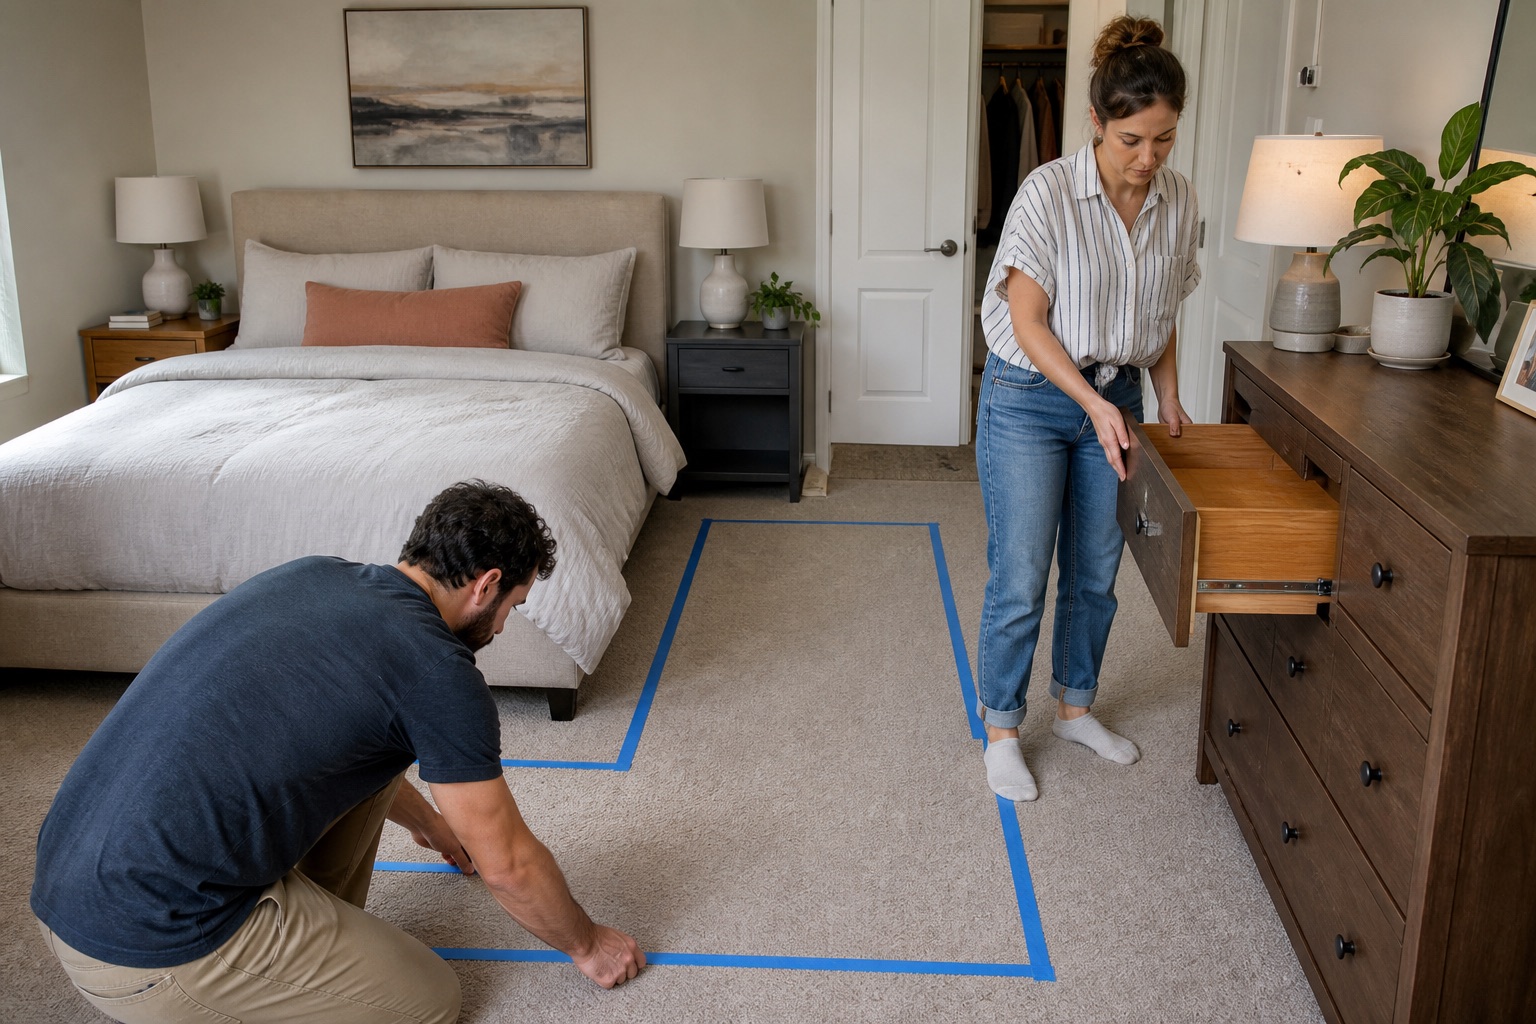
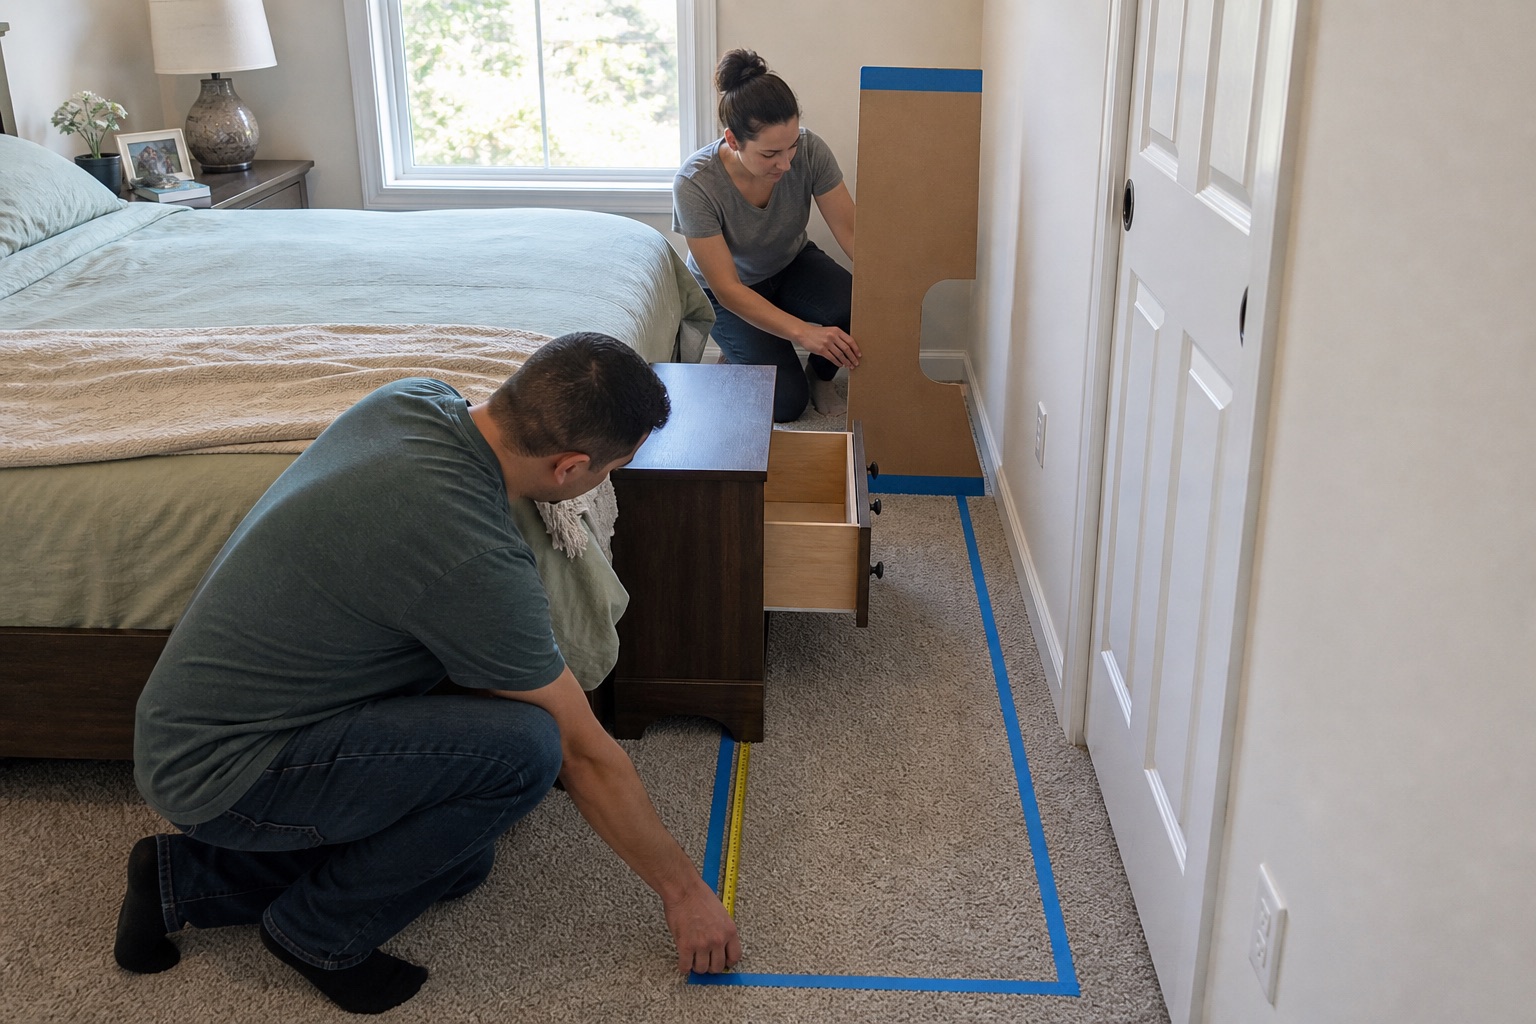
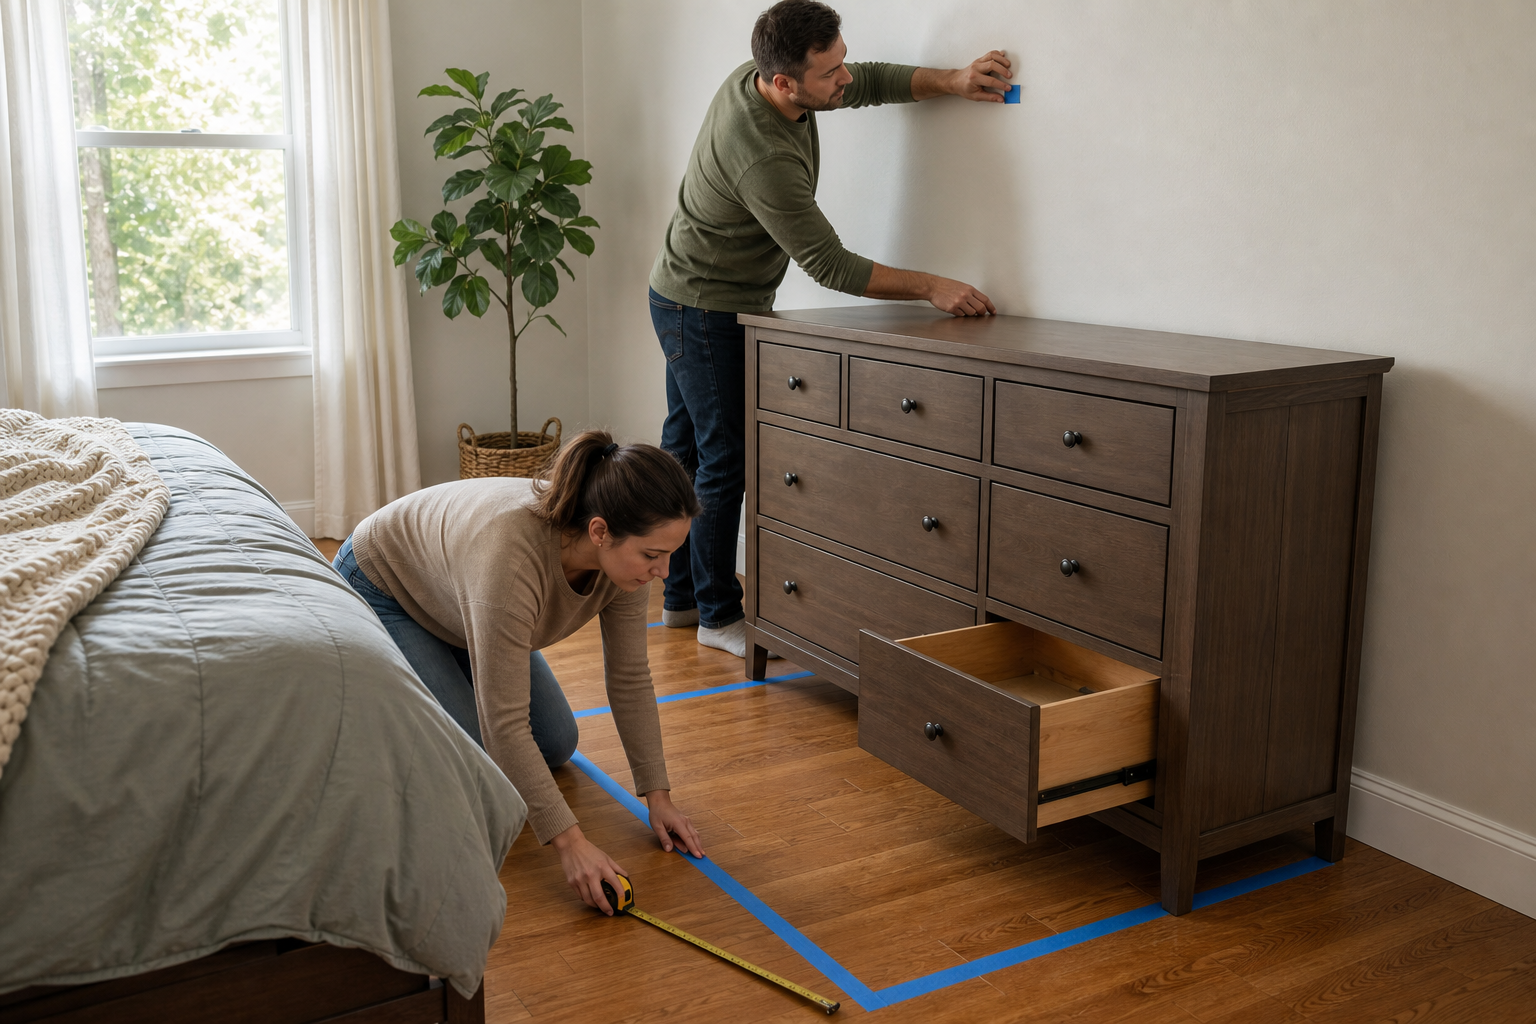
Couple testing bedroom walkway clearance with blue tape and an open dresser drawer
Full-scale testing should include drawer extension, closet access, and the everyday walking route.

Frequently Asked Questions

Are matching bedroom sets outdated?

No. A well-scaled matching group can look calm and current. The room starts to feel dated or heavy when the full set is used regardless of fit, or when every surface, shape, and accessory repeats without relief. Buy the pieces the room needs and create contrast through textiles, lighting, art, or one supporting furniture finish.

Can I mix different wood tones in a bedroom?

Yes. Choose one dominant wood, compare undertones, and repeat the secondary tone at least once in a small or separated element. Use paint, upholstery, rugs, or visible wall between similar-but-not-matching woods. Physical samples are more reliable than product photography.

Does the dresser have to match the bed?

No. The dresser should fit its wall, provide the required storage, and relate to the bed through proportion, undertone, hardware, shape, or a connecting material. A painted dresser can be a useful bridge when the bed and floor already introduce different woods.

Can two nightstands be different sizes?

Yes. Different widths and storage formats are practical when wall conditions or user needs differ. Keep each top comfortable from the bed, preserve drawer and walkway clearance, and repeat a visual cue such as lamps, hardware, color, or corner shape.

How do I keep mixed bedroom furniture from looking random?

Limit the palette, repeat at least two design cues, and coordinate visual weight. Build a small sample board, review the room elevation, and remove pieces that do not serve a function. Intentional repetition works better than trying to make every object unique.

Which bedroom furniture should I buy first?

Confirm the bed and mattress size first, then the principal storage and any custom or built-in work. Add nightstands, seating, and decorative pieces after the major dimensions and circulation paths are secure.

Should every hotel or villa bedroom use the same furniture set?

Not necessarily. A shared finish, hardware family, or headboard language can create consistency while dimensions change by room type. Use a room matrix and approved alternates so appearance, maintenance, and replacement remain controlled without ignoring actual measurements.

Is mismatched bedroom furniture more expensive?

It can be more or less expensive. Mixed purchasing may avoid unnecessary pieces and let you keep existing furniture, but it can add sampling time and repeated delivery charges. Compare installed cost, replacement flexibility, and expected use rather than product price alone.

The Best Bedroom Looks Related, Not Automatically Identical

Choose matching furniture when it fits the room, reduces meaningful decisions, and supports the delivery plan. Choose mixed pieces when the layout, existing furniture, storage needs, or replacement strategy requires flexibility. Use a hybrid plan when you want one clear visual foundation without forcing every wall to accept the same collection.

Measure first, repeat a few visual cues, and approve real samples before committing to difficult-to-return pieces. A coordinated bedroom is not defined by identical labels. It is defined by furniture that explains its relationship to the room, to the people using it, and to the pieces beside it.

How to Choose the Right Nightstand Height and Size

A nightstand works when you can reach a glass, phone, medication, or lamp switch without twisting out of bed. It also needs enough surface and storage for the bedside routine without narrowing the path or becoming a landing zone for clutter.

That sounds simple, but “standard nightstand size” is a weak starting point. Platform beds, storage frames, adjustable bases, thick mattresses, and mattress toppers create very different sleeping heights. The right dimensions come from the finished bed, the sleeper, and the space beside it—not from the furniture label.

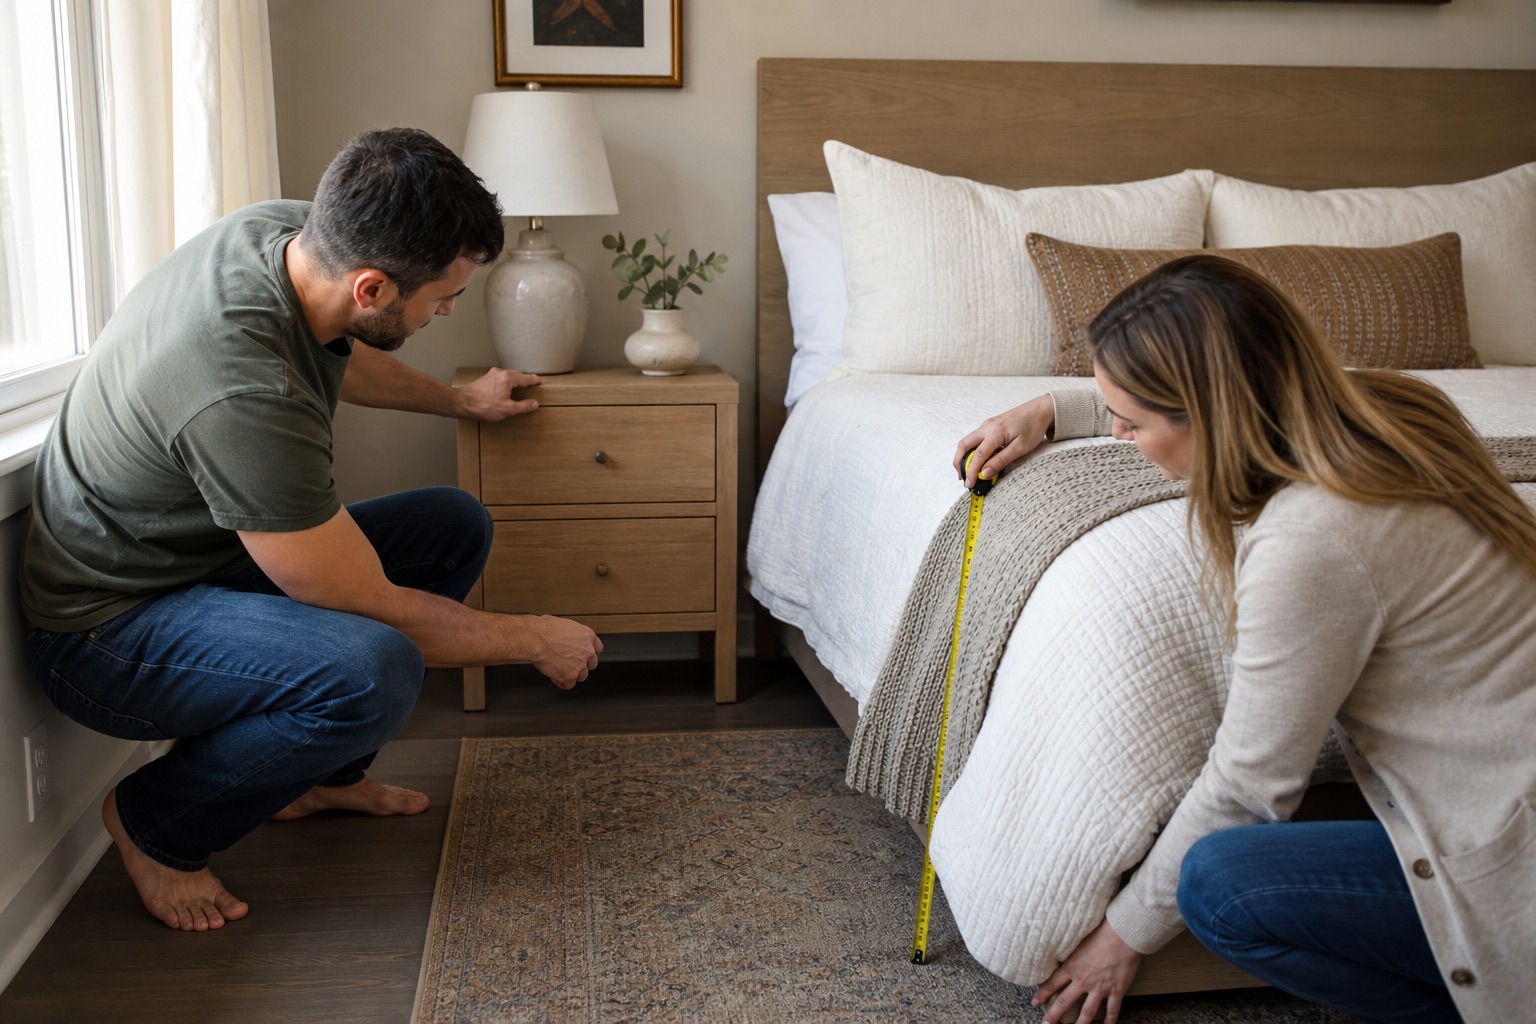
Two adults measuring mattress and nightstand height in an American bedroom
The bed wall and room constraints should be confirmed before the supporting pieces are selected.

Measure the Finished Bed and the Available Bay

Assemble the components that determine the sleeping surface: frame, foundation if used, mattress, and any substantial topper. Measure from the floor to the top of the uncompressed mattress. Do not rely on the bed frame height or a mattress specification by itself. Record the result on both sides if the floor is uneven.

Then measure the clear bay from the outside of the bed frame to the nearest wall, door casing, closet, dresser, or circulation route. Note baseboards, outlets, floor registers, HVAC returns, window trim, curtains, and any wing or ledge on the headboard. Measure the left and right sides independently. In an older U.S. house, a wall that appears straight may not leave the same width from front to back.

Use the room-measuring sequence in Avrelahome’s step-by-step furniture measuring guide, then add operating space. A drawer needs room to extend. A hinged door needs an arc. A person needs somewhere to stand while opening either one. A cabinet that fits the gap but cannot open is not the right size.

For delivery, compare the packaged or assembled piece with doors, stair turns, elevator openings, and the last turn into the room. Joined headboard-and-nightstand systems need particular care.

Set Height by Reach, Not by a Fixed Number

For many sleepers, a top near the mattress surface is the most natural to reach. It may be a little below or above without causing a problem. The useful test is whether the primary user can reach the objects used at night while lying in a normal position, without a deep downward bend or an awkward lift of the shoulder.

A very low table can make a phone or glass harder to see and grasp. A top that rises far above the mattress can put lamp hardware, a glass, or a sharp corner uncomfortably close to the sleeper’s face. Neither condition is automatically unsafe, but both deserve a real test instead of an online rule.

Sit and lie down with the pillows arranged as they are normally used. Reach toward a box or temporary surface at the proposed height. Account for shoulder mobility, vision, and anything that must be accessed quickly, such as glasses or medication. A person who sleeps with several pillows may reach differently from someone using a thin pillow.

The existing bedroom furniture checklist treats the nightstand as support for a routine rather than a mandatory matching piece. That distinction matters: comfortable reach is more important than aligning decorative moldings across the room.

Woman reaching comfortably from bed to a nightstand near the mattress height
Reach from the normal pillow position matters more than a fixed retail height label.

Choose Width From the Things It Must Hold

List the items that genuinely need to be within reach. A phone, glasses, and wall-mounted light switch may need only a compact surface. A table lamp, water glass, book, medication organizer, charging dock, and tissues require more usable area and separation. Keep drinks away from electrical devices and leave a clear place to set something down in the dark.

Width affects visual scale: a substantial king can make a tiny table look incidental, while oversized cabinets can trap a queen bed. Proportion helps, but it does not override circulation.

For two sleepers, do not assume the nightstands need identical capacity. One person may need three drawers and a reading lamp; the other may need one shallow drawer and a small charging shelf. A coordinated pair can share a finish, hardware detail, or top material while using different widths.

Before increasing width for appearance, decide whether that space would be more valuable as a clear path, curtain clearance, or access to a nearby closet. The small-bedroom layout guide explains why preserving one useful route often matters more than making every elevation symmetrical.

Limit Depth to Protect the Bedside Path

Depth is easy to overlook because product listings emphasize width. Yet depth controls how far the front edge and hardware project into the path. Ideally, the nightstand should not extend substantially beyond the side of the bed frame where a shin or hip can catch it during a nighttime walk.

Include the pull or knob in the projection. Then add the open drawer position and the standing area required to use it. Check whether the front corner interferes with making the bed, opening a closet door, or walking toward the bathroom. A deep cabinet may provide more theoretical capacity while making the room less usable every day.

Painter’s tape can show the footprint, but a cardboard box is better because it reveals height and volume. Put the box beside the bed for an evening. Reach for it while lying down, walk past it in low light, and try to change the bedding. This inexpensive test catches more problems than comparing dimensions on a screen.

Use Common Dimensions as a Starting Band

Retail sizes vary, so the ranges below are planning bands rather than standards. Confirm the actual product and the finished bed before ordering.

Bedroom condition Useful starting point What to verify
Low platform bed Top close to the low mattress surface; compact width where practical Comfortable reach without a tall cabinet dominating the bed
Typical queen-bed room Roughly 20–28 inches wide and 16–20 inches deep Lamp footprint, drawer extension, and route to the closet or bath
King-bed room with generous wall space Roughly 24–36 inches wide per side Proportion without sacrificing curtain, door, or walkway clearance
Tall storage bed or thick mattress stack Height selected from the measured mattress top Reach, bed mechanism, and whether a taller narrow cabinet needs anchoring
Very tight bedroom Shallow cabinet, floating drawer, or compact shelf Minimum bedside function plus safe circulation

The inch ranges are not a promise that a product will fit. A 24-inch-wide cabinet may be reasonable beside one queen bed and impossible beside another because the room has a door casing or baseboard heater. Use the table to narrow the search, then test the exact outline.

Select Drawers, Shelves, or Doors for the Contents

Drawers conceal medication, chargers, sleep masks, and small personal items. Check the drawer’s inside dimensions, not just the cabinet size; thick sides and decorative fronts can reduce capacity. Full extension is useful when the drawer is deep, but it needs unobstructed space beside the bed.

An open shelf feels lighter and provides fast access to books or a basket. It also displays cords and everyday clutter. A hinged door can hold bulkier items but may conflict with the bed frame or a narrow standing zone. Sliding or tambour-style access can solve a tight swing condition, though the mechanism changes cost and internal space.

Material should follow use. A water-resistant, easily wiped top is sensible where a glass or humidifier is common. The custom furniture materials guide helps separate visible finish, structure, hardware, and exposure instead of treating one premium surface as proof of quality.

Hardware often has more daily impact than an expensive face. Open a drawer with one hand, check whether the pull catches clothing, and ask how the slides can be adjusted or replaced.

Coordinate Two Sides Without Forcing a Match

Matching nightstands can make a room calm, particularly when the bed wall is broad and balanced. They are not required. Different storage needs, a window, a closet door, an off-center bed, or unequal wall bays may make an asymmetric pair more useful.

Connect the two sides through a shared top height, hardware finish, leg shape, or pair of lamps even when widths and materials differ.

Avoid pieces that are almost, but not quite, the same wood color. A clear contrast in paint, metal, stone, or upholstery is often easier to coordinate. Repeat a small material vocabulary and compare undertones under the room’s actual light.

Height is the relationship worth keeping closest because it affects reach and the bed-wall horizon. Width, drawer count, and base style can differ more freely.

Adapt the Choice to Unusual Beds and Small Rooms

A low platform bed usually benefits from a restrained nightstand or floating shelf. A tall conventional cabinet beside it can feel top-heavy and make the reach awkward. Conversely, a low table beside a storage bed with a thick mattress may force the sleeper to reach sharply downward.

An adjustable base deserves a test in both flat and commonly raised positions. Make sure the moving frame cannot trap a cord, strike a drawer pull, or carry bedding into objects on the nightstand. The ideal surface position when flat may become less convenient with the head elevated, so prioritize the position used most often.

In a small room, subtract before shrinking everything. A wall sconce can release surface area. A floating drawer exposes more floor and can make cleaning easier. One properly sized nightstand and one compact shelf may serve two unequal sides better than two tiny cabinets that hold nothing useful.

The bedroom furniture overview offers broader bed and storage context, while the whole-bedroom planning page is more relevant when the bed wall, wardrobe, lighting, and supporting furniture need to be coordinated as one layout.

Know When Floating or Custom Work Earns Its Cost

A standard nightstand is usually the sensible choice when it fits the bay, meets the storage need, and leaves the outlet and walkway accessible. It is easier to replace and take to another home. Custom work earns consideration when the bay is unusually narrow, the wall is uneven, a baseboard conflicts with a full back, or the bedside unit must integrate precisely with a headboard, wall panel, lighting, or power plan.

A floating unit can ease cleaning and preserve visible floor, but wall construction, blocking, fasteners, cabinet weight, stored load, and installer responsibility must be resolved. A rendering cannot confirm support.

For a tailored order, specify the finished outside dimensions, usable drawer dimensions, materials, edge treatment, hardware, wall gap or scribe, outlet cutouts, cord path, mounting system, packaging, and installation scope. Avrelahome’s custom furniture planning service can help compare a coordinated bedside solution with standard furniture, but an order-specific drawing and responsibility list should still be approved before production.

Plan the Lamp, Charging, and Outlet at the Same Time

A table lamp consumes more surface than its base alone; the shade and switch need clearance too. Confirm that the lamp does not crowd the sleeper or collide with a headboard wing. A wall-mounted light can free the top, but the switch or control should be reachable from the normal sleeping position.

Integrated outlets, USB ports, and wireless charging should remain replaceable and ventilated. Do not bury a receptacle, cross the path with an extension cord, or route a cable through an adjustable bed’s mechanism.

Guest rooms benefit from obvious power a first-time occupant can understand. Technology changes faster than a cabinet, so do not make one proprietary charger the only option.

Test the Full Setup Before You Order

Place tape for the footprint and a box for the proposed height. Add the front edge of the pull and the fully extended drawer. Walk the route from the bedroom door to the bed, closet, and bathroom. Open adjacent furniture, pull the curtains, make the bed, and reach for a glass from a normal sleeping posture.

Then write down the measured mattress height, available width on each side, proposed cabinet dimensions, open-drawer projection, outlet location, and delivery limits. For a built-in or floating piece, identify who performs the final field measurement after floors, baseboards, and wall finishes are complete.

Follow the manufacturer’s anchoring instructions for tall or unstable furniture, especially in a child’s room. Wall-mounted units need fasteners suited to the structure. Confirm that the piece does not obstruct air, heat, egress, or outlet access.

Two adults using blue tape to test nightstand and drawer clearance beside a bed
The proposed footprint should be tested together with the fully extended drawer and the walking route.

If a standard catalog dimension repeatedly creates a compromise, Avrelahome can be one source for comparing a measured bed-wall package. Keep the decision grounded in the room, installation conditions, and written specifications rather than treating custom work as automatically better.

Frequently Asked Questions

Should a nightstand be the same height as the mattress?

It does not need to be exact. A top near the mattress surface is a useful starting point, but the best height is the one the sleeper can reach comfortably from the normal pillow position. Test slightly lower and higher options before choosing.

What is a standard nightstand height?

Retail products often fall somewhere in the low-to-upper 20-inch range, but that range is not a fit rule. Measure the finished mattress top because a low platform bed and a tall storage bed require different relationships.

How wide should a nightstand be?

Choose enough width for the lamp, drink, charging, and storage actually needed, while preserving the route beside the bed. Rough planning bands can help you shop, but the available bay and drawer operation determine the final limit.

How deep should a nightstand be?

It should be deep enough to hold necessary items without projecting awkwardly into the walking path. Include hardware and open-drawer space when testing depth; a slightly shallower cabinet is often better in a tight room.

Do king beds need larger nightstands?

Not automatically. Wider nightstands may balance a large bed in a generous room, but circulation, windows, and closet access come first. Two medium cabinets can be more useful than oversized pieces chosen only for proportion.

Do you need two nightstands in a small bedroom?

No. Two regular sleepers benefit from a reachable surface on each side, but those surfaces can differ. One full nightstand plus one floating shelf or compact table may preserve more useful floor space.

Can you use different nightstands on each side of the bed?

Yes. Keep the top heights reasonably compatible with each sleeper and connect the pieces through color, hardware, lamps, or visual weight. Different widths and storage configurations can respond to different needs.

Is a floating nightstand safe?

It can be when the mounting system, wall structure, fasteners, cabinet weight, and expected load are properly resolved. Installation should follow the supplier’s requirements; appearance alone cannot confirm adequate support.

Choose for Reach, Capacity, and a Clear Path

The right nightstand begins with the completed bed and the person using it. Set the top where the sleeper can reach naturally, provide enough width for the real bedside routine, and limit depth so the room remains easy to move through. Then verify drawers, power, delivery, and installation. That measured approach produces a better result than buying a matching pair first and asking the room to accommodate it later.

How to Arrange Bedroom Furniture in a Small Room

A small bedroom rarely fails because of square footage alone. It fails when the same few feet are expected to serve as a walkway, drawer-opening zone, closet approach, desk-chair space, and access to the bed. The layout becomes workable when those conflicts are resolved in the right order.

The goal is not to squeeze in a complete set or use visual tricks. It is to support sleep, dressing, storage, and movement with the fewest interruptions. That may mean deleting a chair, changing a dresser to a wardrobe, or giving up symmetry.

Two adults measuring the clearance beside a queen bed in a small American bedroom
Small-bedroom planning begins with the bed, doorway, closet, and usable path together.

Decide What the Room Must Do Every Day

Begin with four likely priorities: sleeping, getting dressed, bedside access, and primary storage. Then list secondary uses such as working, exercising, watching television, caring for a baby, or hosting an occasional guest. Rank the ordinary week above rare events.

This prevents a common mistake: making every possible activity technically fit while none works comfortably. A permanent desk is difficult to justify if it narrows the route to the closet every morning. A decorative bench does not deserve the bed-end space if it must be moved to open a dresser.

If you are unsure which categories belong in the room, start with the companion guide to essential bedroom furniture. This layout process begins after the needs are known and focuses on giving each selected piece a conflict-free place.

Draw the Architectural Envelope Before Furniture

Measure every wall, ceiling height, door, window, and door swing. Mark baseboards, radiators, floor registers, HVAC returns, outlets, switches, cable points, columns, and sloped ceilings. Note the height below windows and any sill or trim that projects into the room. In an older U.S. home, check a proposed fitted opening at several heights because the walls and floor may not be square.

The site’s room-measuring guide covers the base information. Add operating zones to your plan: a drawer at full extension, an open wardrobe door, a storage-bed lid, a desk chair occupied and pulled back, and enough room to stand while using each piece.

Draw at a consistent scale on graph paper or in a planning app. Include the furniture’s full outside dimensions, not a generic symbol labeled “queen bed” or “dresser.” An upholstered bed frame may be considerably wider than its mattress. Handles, tops, and trim can make a cabinet deeper than its nominal case dimension.

Record the delivery route separately, including entries, turns, stairs, landings, and elevator openings. In an apartment or condo, confirm loading access and reservation rules before delivery.

Place the Bed First and Test More Than One Direction

The bed is the largest volume and the room’s primary purpose, so test it first. Start with the headboard on the longest uninterrupted wall, but do not treat that as a rule. Compare two or three realistic orientations and grade each for entry, closet access, window operation, bedside use, and remaining storage walls.

Two regular sleepers benefit from access on both sides. In a narrow room, that may require compact bedside shelves or a different bed size. A single sleeper can place one side against a wall and exchange that access for a useful path or dresser. Make the tradeoff deliberately: wall placement is less convenient for changing sheets and is a poor everyday arrangement when the inner sleeper must climb over another person.

A bed beneath a window is not automatically wrong. It may release the only uninterrupted wall for storage. Check that the window remains operable, curtains or shades can move, the headboard does not block required egress, and a radiator or supply register is not trapped. Consider drafts, direct sun, condensation, and the headboard height.

A corner placement can work for a child, teenager, or guest room, especially when it creates a broad open zone. For an adult primary bedroom, it generally sacrifices too much bedside access unless the room’s width leaves no better option.

Protect One Clear Path Through the Room

Trace the daily route from the doorway to the bed, closet, bathroom, and operable window. It should not require someone to turn sideways, step around a sharp corner, or move furniture. Start with a comfortable full-scale test rather than treating one published dimension as a universal building code. Occupant mobility and local requirements may demand more space.

Measure furniture in use. A closed dresser may appear to leave a path, yet its open drawers can reach the bed. A hinged wardrobe can block the room entrance. A chair tucked under a desk is not the same as a chair occupied by a person. Draw or tape these positions before ordering.

Avoid splitting the room into several narrow lanes. One legible main path is generally more useful than small gaps on every side. If centering the bed creates two passages that are both frustrating, an intentionally offset layout may be better.

Choose One Primary Storage Strategy

Scattering small cabinets across three walls often consumes more circulation and creates more visual edges than one capable storage zone. Inventory hanging clothes, folded items, shoes, bags, bedding, and luggage, then select the storage form that handles the largest share.

A low dresser provides drawers and a usable top but requires a long wall and space for drawer extension. A tall chest conserves floor area, though it needs suitable anchoring and comfortable access to upper drawers. A freestanding wardrobe adds hanging space and can move with you. A storage bed hides capacity but can be awkward if drawers face a wall or the lift mechanism is used daily.

A fitted wardrobe can capture an alcove, run beneath a slope, or consolidate capacity wall to wall. It is most persuasive when standard modules repeatedly waste important inches, not merely because built-ins look tidy. Review the long-term and installation implications in the built-in versus freestanding furniture guide before making a permanent choice.

Adult using a shallow wardrobe wall while a clear path remains beside the bed in a small bedroom
One concentrated storage wall can create more usable capacity with fewer circulation conflicts.

Use Vertical and Shallow Space Without Creating New Problems

Vertical storage reduces footprint only when people can use it safely. Place low-frequency bedding or luggage higher and daily clothing within comfortable reach. Do not rely on a step stool that has nowhere to be stored or used. Tall furniture should not crowd a window or create a top-heavy wall beside the bed.

Shallow cabinets can protect a narrow path, but confirm that their contents fit. Standard clothes hangers need more depth than books or folded shirts. Shoes vary. A shallow drawer may be excellent for accessories and nearly useless for sweaters. Interior capacity, door thickness, and hardware clearance all count.

Floating nightstands and shelves expose floor and can make cleaning easier. Wall-mounted lights release the top surface. These solutions still need appropriate wall construction, fasteners, cable routing, and a repair plan for future changes. Renters should obtain permission before drilling or choose reversible alternatives.

Compare Four Common Small-Bedroom Patterns

Layout pattern Works best for Main compromise
Centered bed with two slim sides Two regular sleepers Less wall length for storage
Bed offset to one wall One sleeper or compact guest room Harder sheet changing and limited inner-side access
Bed beneath a window Room needing the solid wall for storage Window, shade, heat, draft, and egress checks
Bed facing one concentrated storage wall Long-term room with substantial clothing needs Precise door, drawer, and bed-end clearances

These patterns are starting points rather than templates. Architecture decides. A centered bed can look pleasing but fail when the entrance lands directly beside a nightstand. A bed under the window may solve a difficult room but be inappropriate where that window provides required emergency escape.

When comparing plans, score ordinary actions: enter, make the bed, open every storage compartment, reach a lamp, dress, and clean. The highest-scoring plan is usually more valuable than the most symmetrical one.

Fit Secondary Pieces Without Duplicating Functions

Replace a deep nightstand with a narrow table, floating shelf, or headboard ledge when only a phone and glass of water are needed. One good bedside surface may be sufficient for one sleeper. For two people, solve each side’s light and charging access even if the surfaces differ.

A wall mirror consumes less floor than a leaning mirror. A wardrobe door may incorporate it. A desk can share a storage wall, function as a vanity, or use a shallow top with overhead shelves. It still needs legroom, chair pullback, power, task light, and a surface that can remain usable.

Remove a bench or accent chair before compromising a daily path. If occasional seating is necessary, consider a lightweight stool that can serve the desk or vanity. Every additional piece should add a function not already provided elsewhere.

The broader full-scale furniture layout method applies here too: outside dimensions, operating zones, routes, and real household behavior matter more than how objects appear in a planning app.

Adapt the Plan to the Person Using It

For a couple, protect access on both sides when possible and decide whether both people can open their storage at the same time. Separate bedside lighting and charging can reduce disruption. A slightly smaller bed may create a much more useful room if both occupants still sleep comfortably.

A guest room needs a clear place for luggage, a reachable outlet and lamp, and some empty storage. It does not need to hold every piece removed from other rooms. A bed against one wall may be an acceptable exchange because the room is used intermittently.

For a child or teenager, reserve a future desk zone, keep daily storage reachable, manage blind cords and charging cables, and anchor appropriate furniture. Avoid a costly design that fits only today’s toys. Adjustable shelves and movable components can extend the plan’s life.

Renters should favor furniture that can move to another room or home. A freestanding wardrobe, modular shelf, and removable wall light may be safer investments than a highly specific built-in. Verify lease restrictions before attaching anything substantial.

Create Visual Calm With Scale, Light, and Fewer Transitions

Making the room functional comes first, but visual order helps. Concentrate tall storage on a suitable wall instead of creating several isolated towers. Preserve the window and a continuous area of visible floor when practical. Use a limited material palette so the eye reads a few larger shapes rather than many unrelated pieces.

Dark furniture does not automatically make a bedroom feel small, and white furniture does not rescue a crowded plan. The distribution of mass, available daylight, contrast, and number of finish changes matter more. A dark storage wall can recede when it is coherent and properly lit; several small pale cabinets can still feel chaotic.

Mirrors can distribute light and provide dressing function, but they should not be used to disguise a blocked path. Consider what a large mirror reflects from the bed and whether glare or privacy is comfortable at night.

The bedroom furniture collection can help compare proportions after the maximum footprints are fixed. A visually light piece still has to meet the capacity and clearance requirements on the plan.

Set the Budget and Buying Sequence

Approve the bed size and primary storage first. Next solve bedside surfaces and lighting. Add a desk, vanity, television cabinet, seating, or decorative storage only after the base layout passes. This order prevents an optional early purchase from occupying the only wall that can handle essential capacity.

Budget beyond product prices. Include freight, final-mile delivery, assembly, installation, wall preparation, electrical work, floor protection, touch-ups, and packaging removal. In a walk-up, elevator building, or home with a tight turn, access may affect product construction and labor.

If the room has an alcove, slope, uneven walls, or several functions on one elevation, the custom wardrobe planning guide explains what to resolve before a fitted order. Review Avrelahome as one source, while the bedroom customization page shows how a bed, storage, and supporting pieces can share one dimensioned plan.

Mock Up the Layout and Run a Risk Check

Use painter’s tape to mark every furniture footprint at full scale. Add drawer and door extensions with a second color. Place boxes at the proposed height of a deep cabinet or headboard so you experience volume, not only floor area. Walk the daily routes repeatedly, make the bed, open the closet, and sit in the desk position.

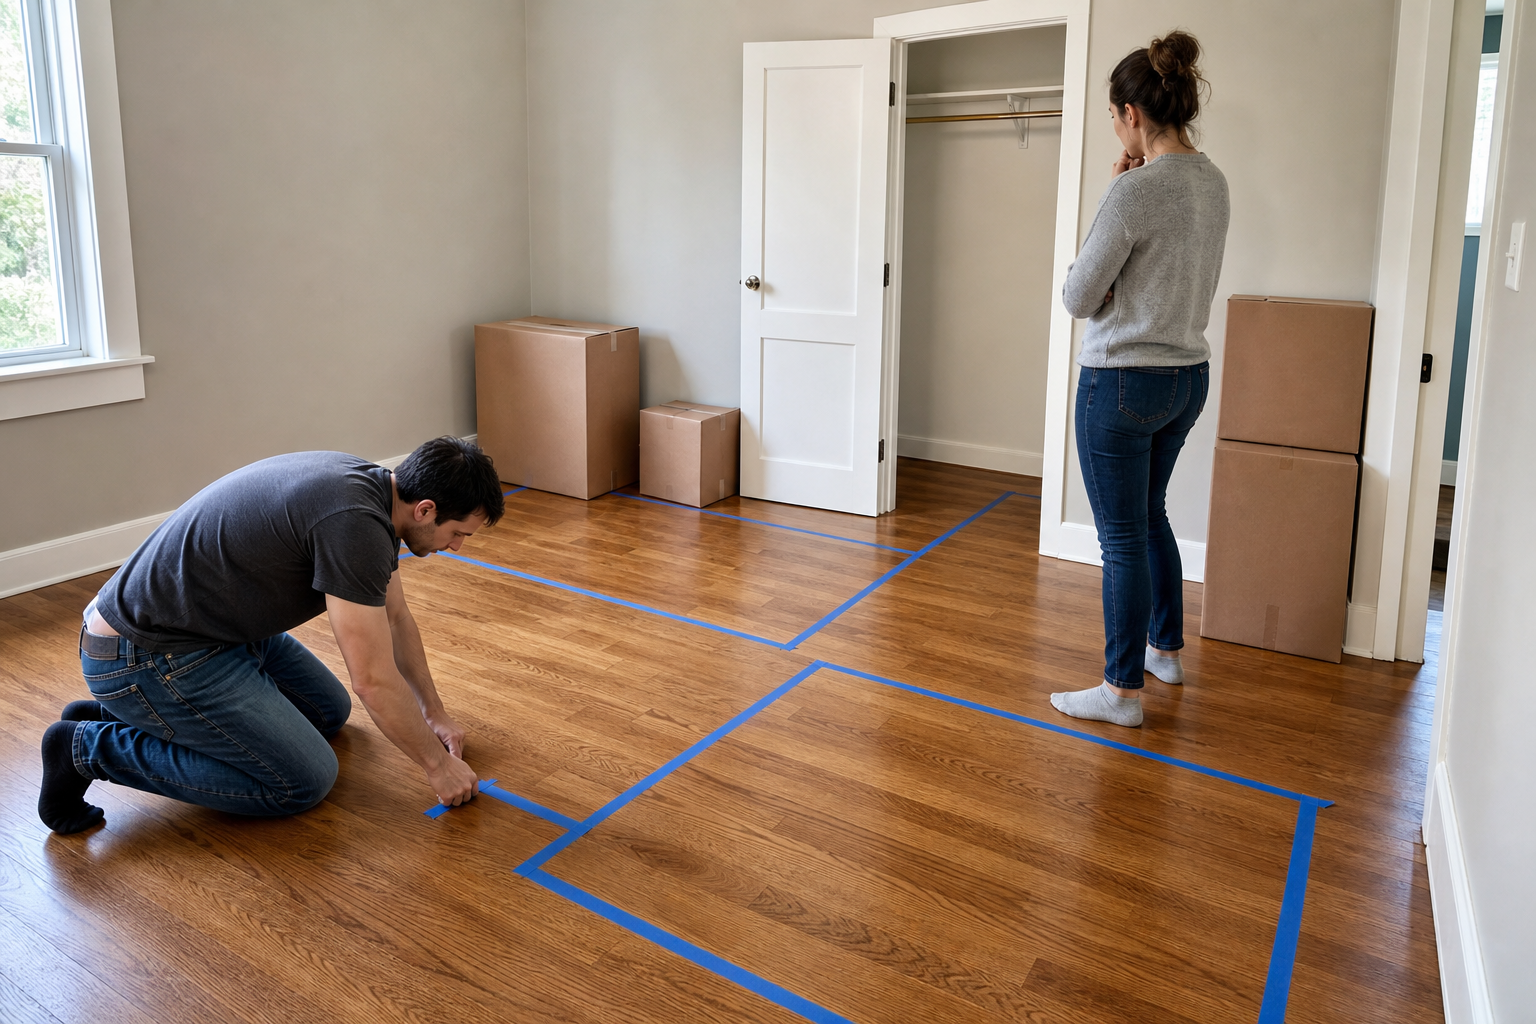
Couple comparing two furniture footprints with blue tape in an empty small bedroom
Painter's tape and boxes reveal the footprint, path, and approximate furniture volume.

Confirm that the plan preserves any required window egress and does not block heat sources, return air, outlets, or service access. Follow the product instructions and actual wall construction when anchoring tall furniture. Check that a storage bed can open without striking a light, shelf, or sloped ceiling.

Compare packaged components with the delivery route and document whether bulky pieces can be disassembled. For fitted furniture, identify who performs the final field measurement after construction is complete, locates utilities, approves wall readiness, installs fillers and trim, and corrects a site mismatch. Homeowner measurements are useful for feasibility but should not be the sole production basis for a tight wall-to-wall fit.

Frequently Asked Questions

Where should a bed go in a small bedroom?

Start with a stable wall that does not block the entry, closet, operable window, or main path. Then compare whether one or two side-access routes are necessary for the people using the bed.

Is it okay to put a bed against a wall?

Yes for many single-sleeper, child, and guest rooms. For two regular sleepers, it makes access and sheet changing less convenient, so accept that tradeoff consciously.

Can a bed go under a window?

It can if the window remains operable, required egress is preserved, and the headboard, shades, heat, drafts, and direct sun do not create conflicts.

Is a wardrobe or dresser better in a small room?

A wardrobe is useful when hanging space is missing. A dresser works well for folded clothing when a long wall and drawer clearance are available. Choose from a clothing inventory, not appearance alone.

Does a storage bed really save space?

It can replace another cabinet when its drawers or lift mechanism remain easy to operate. If a wall, rug, or adjacent piece blocks access, the capacity may be inconvenient rather than useful.

Does dark furniture make a small bedroom look smaller?

Not necessarily. Furniture volume, finish transitions, lighting, contrast, and visible floor have more influence than a simple light-versus-dark rule.

Can a desk fit in a small bedroom?

Yes, if the plan includes legroom, chair pullback, lighting, outlets, and cables. Shallow, wall-mounted, or integrated desks may reduce conflicts.

When is custom storage worth considering?

It is most useful when standard sizes repeatedly waste critical space, architecture is irregular, or several functions need to be concentrated on one wall.

Solve the Conflicts Before Styling the Room

A successful small-bedroom layout does not hold the most furniture. It lets the necessary furniture work without blocking another daily action. Test the bed first, concentrate storage, protect one clear path, and add secondary functions last. Full-scale proof is more reliable than any trick intended only to make the room appear larger.

What Furniture Do You Need in a Bedroom? A Practical Checklist

A bedroom does not need a standard five-piece suite to feel complete. It needs a comfortable place to sleep, enough usable storage, convenient support for bedtime routines, and clear space to move. Everything else should earn its footprint.

Bedroom furniture is often sold as a matching package before the room or household needs are measured. It may look coordinated in a showroom yet crowd a doorway or provide the wrong storage. Choose the smallest set that performs the room’s real jobs well.

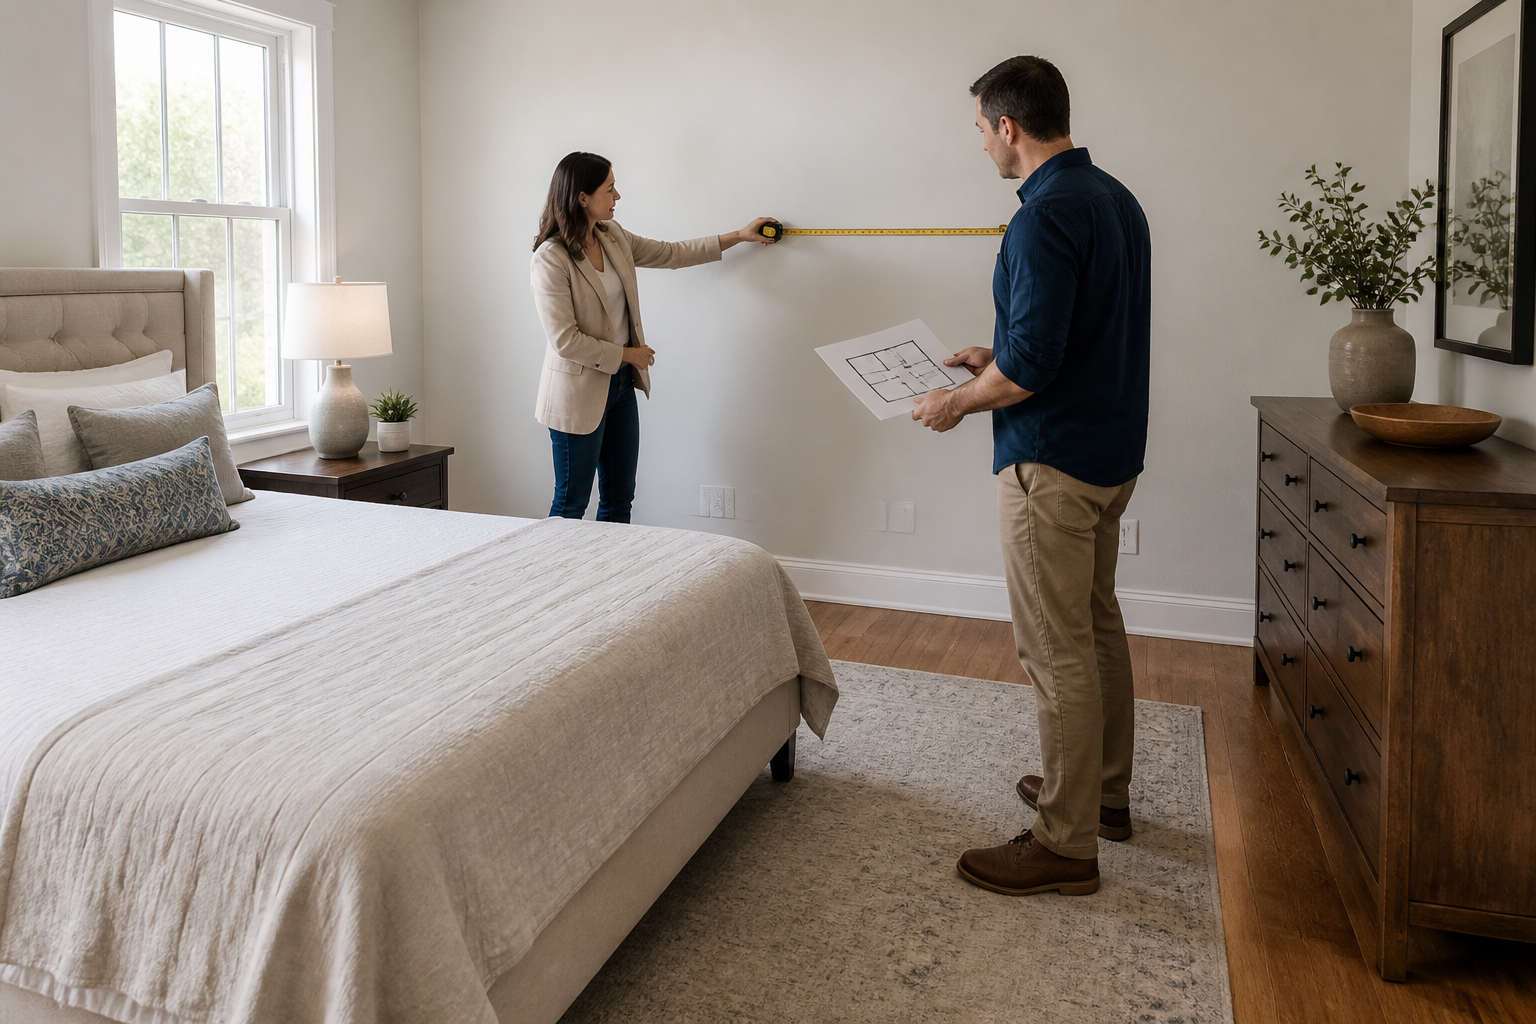
Homeowner and interior designer measuring a bed wall in an American primary bedroom
The bed wall and room constraints should be confirmed before the supporting pieces are selected.

Begin With the Bedroom's Actual Jobs

Write down what happens in the room on an ordinary weekday. Sleeping is obvious, but the supporting activities vary: reading, charging devices, getting dressed, storing seasonal bedding, caring for an infant, watching television, or occasionally working. Rank daily needs above activities that happen a few times a year.

A primary bedroom for two adults generally needs access on both sides and storage that prevents one person’s routine from interfering with the other. A guest room can use a shorter list. A child’s room must adapt as clothing, toys, and study habits change.

This functional brief is more useful than a shopping checklist. It also helps define when standard pieces are sufficient and when the space-related advantages of custom furniture may justify a more tailored solution.

Measure the Usable Room and the Route Into It

Record every wall length, ceiling height, door, window, and door swing. Mark baseboards, radiators, floor registers, HVAC returns, outlets, switches, cable connections, and sloped ceilings. If a cabinet may sit under a window, measure from the floor to the sill and from the sill to the ceiling. Older U.S. houses are not always square, so take dimensions at more than one height when fitted furniture is being considered.

The existing step-by-step room measuring guide explains how to capture the base dimensions. For a bedroom plan, add the operating space that furniture requires. Draw open drawers and doors, the arc of a storage-bed lid, the area needed to pull out under-bed bins, and the space a desk chair occupies when someone sits down.

Measure the delivery route separately, including tight turns, stairs, landings, railings, and elevator openings. Compare these limits with packaged dimensions, not only assembled size. A king bed that fits the floor plan can still fail at a narrow stair turn.

Choose the Bed and Mattress First

The bed is usually the room’s largest object and the least convenient to relocate, so establish it before choosing storage or seating. Start with the mattress size appropriate for the sleepers, then obtain the bed frame’s full outside dimensions. Upholstered rails, winged headboards, wide platforms, and footboards may add several inches beyond the mattress on every side.

Check the support system. An adjustable base needs compatible internal clearances, while a storage bed needs room for drawers or the mattress deck to open safely. Give the supplier the exact dimensions of anything you already own rather than relying only on “queen” or “king.”

Place the head of the bed on a stable wall when possible. Protect the natural path from the doorway to the closet and bathroom. Access to both sides is desirable for two regular sleepers, but symmetry should not override function in a narrow room. A bed slightly off center with one full-size nightstand and one compact shelf may work better than a centered bed that creates two unusable gaps.

The beds and headboards collection can help compare frame types and visual scale after you know the maximum footprint. Use the dimensions to select the style, not the other way around.

Decide Whether You Need One Nightstand, Two, or None

A nightstand supports the last and first minutes of the day. List what each sleeper actually needs within reach: a lamp, phone, glasses, water, medication, book, or charging cable. Two nightstands make sense when two people use both sides regularly. One may be enough for a single sleeper, a compact guest room, or a bed placed against a wall.

Height affects comfort more than matching. A top near the mattress surface is generally easier to reach than a very low table, but a thick mattress or adjustable base can change the relationship. Depth matters in a tight path; a shallow wall-mounted shelf may provide the necessary surface without adding legs or reducing visible floor.

Plan power at the same time. A table that covers the only outlet or puts a cord across a walkway is not resolved. Wall lights can free the top; integrated charging points should remain serviceable.

Size Storage From a Real Clothing Inventory

Do not estimate bedroom storage by counting drawers. Inventory the contents by type: long hanging garments, short hanging garments, folded shirts, sweaters, underwear, accessories, shoes, bags, extra bedding, and luggage. For a shared bedroom, decide how the space will be divided rather than assuming equal volumes or identical habits.

Evaluate the existing closet honestly. A closet can be large yet inefficient if it has one high shelf and a single hanging rod. Improving its interior may remove the need for another dresser. Conversely, a small reach-in closet may handle hanging clothes while a chest handles folded items. The useful question is not “Do we have a closet?” but “Which categories have a convenient home?”

Capacity also depends on access. Deep shelves can hide clothing, and drawers that cannot extend beside a bed lose useful volume. For a permanent bedroom plan, Avrelahome’s custom wardrobe options illustrate how hanging, drawers, shelves, and difficult architecture can be considered together.

Compare a Dresser, Chest, Wardrobe, and Built-In

These pieces solve different problems. A wide dresser gives you a usable top and broad drawers, but it requires a long wall. A chest uses vertical space efficiently, though its height and narrower base make correct anchoring especially important. A freestanding wardrobe adds hanging space where no closet exists and can move with the household. A built-in can capture an alcove, sloped ceiling, or wall-to-wall opening with less wasted space.

Storage type Best when Main check
Low dresser You need folded storage plus an accessible top or mirror Drawer extension and available wall length
Tall chest Floor area is limited and vertical storage is useful Wall anchoring and comfortable access to upper drawers
Freestanding wardrobe The room lacks a closet or future relocation is likely Door swing, delivery, and gaps around standard sizing
Built-in wardrobe The room is irregular or long-term capacity matters Final field measurement, wall conditions, and installation scope

Permanence is a real tradeoff. Freestanding furniture is usually easier to replace or take to another home. Built-ins can concentrate substantial capacity on one wall and make an awkward room calmer, but they demand better measurements and reduce future layout flexibility. Use the same decision framework as a broader built-in versus freestanding comparison rather than treating fitted storage as automatically superior.

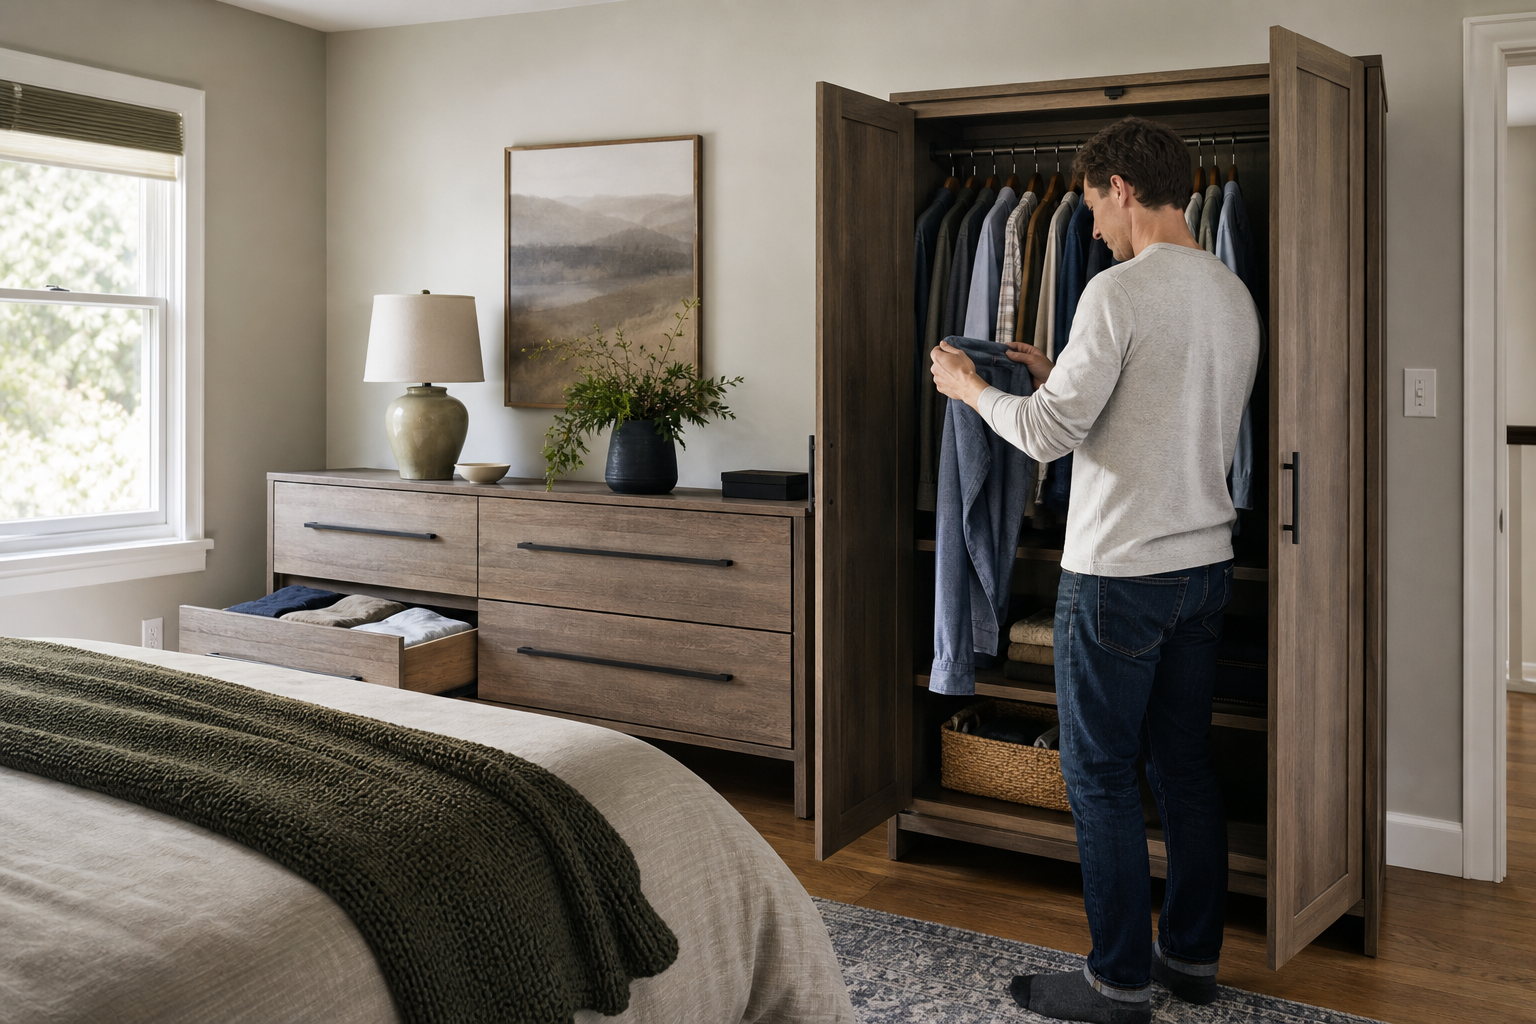
Homeowner organizing clothing in a dresser and freestanding wardrobe in an American bedroom
A low dresser and freestanding wardrobe offer different capacity, access, and permanence.

Add Optional Pieces Only When They Have a Job

A bench at the foot of the bed can help with shoes, temporary clothing, or concealed blanket storage. It should not narrow the route between the bed and dresser or prevent a storage drawer from opening. An accent chair is worthwhile if someone genuinely reads or rests there; otherwise it often becomes an expensive laundry stand.

A desk needs more than a top that fits into a leftover corner. Provide chair pullback, task lighting, power, cable control, and a way to reduce the visual presence of work at bedtime. In a studio or a home without another workspace, that compromise may be necessary. In a larger home, moving work out of the sleeping room may be more valuable than adding another furniture category.

A vanity, mirror, television, or media cabinet should pass the same test. Furniture does not become essential merely because it appears in a styled bedroom photo.

In a Small Bedroom, Subtract Before You Shrink Everything

Undersized pieces can make a small room busier without meeting basic needs. One comfortable bed, one useful bedside surface, and one well-planned storage element often beat small cabinets scattered across several walls.

Look for combinations that remove a separate piece: a storage bed may replace a linen chest; a wardrobe door can incorporate a mirror; a floating nightstand can include a reading light; a fitted storage wall can include a compact desk. Multifunction is valuable only if the functions do not interfere. Under-bed drawers are not useful when a rug or wall blocks them, and a fold-down desk is frustrating if the work surface must be cleared several times a day.

Concentrating storage on one appropriate wall may preserve more open floor and visual calm than placing a small cabinet on every elevation. Avrelahome’s bedroom customization page provides examples of treating the bed, wardrobe, and supporting storage as one spatial problem instead of unrelated purchases.

Adjust the List for the Type of Bedroom

In a primary bedroom, support two people’s circulation, bedside access, and storage habits. Long-term durability and serviceable hardware matter more than decorative pieces.

A guest room benefits from clarity. Provide a bed, a lamp and outlet the guest can reach, a surface for a phone, a place for luggage that does not block the floor, and a few hangers or drawers. Do not fill every wall with household overflow and leave the visitor nowhere to unpack.

A child’s room should change over time. Avoid over-specializing an expensive storage system around today’s toy dimensions. Keep frequently used items reachable, reserve adjustable shelf positions, and allow a future desk footprint. Furniture tip-over prevention, safe cords, and appropriate anchoring deserve explicit attention.

For a rental, prioritize robust finishes, replaceable components, intuitive storage, and simple cleaning. Personalized built-ins may not pay off unless they solve a persistent architectural problem.

Coordinate the Room Without Buying a Matching Set

Coordination comes from relationships, not identical labels. Repeat two or three cues—for example, a warm wood tone, black hardware, and a textured neutral fabric—while allowing the pieces to differ. A substantial upholstered bed may pair better with visually lighter nightstands than with a heavy matching suite.

Compare visual weight as well as dimensions. Tall dark furniture can dominate even when it fits. Visible floor makes a piece feel lighter; full plinths feel architectural. If two wood finishes are almost the same, a clearer contrast using paint, metal, stone, or fabric often looks more intentional.

Material choice should follow use. Drawer boxes, hinges, slides, surface durability, and cleanability can matter more than an expensive face material. The custom furniture materials guide offers a practical framework for assigning materials according to appearance, structure, exposure, and budget.

Spend First on Sleep, Capacity, and Reliable Daily Use

Start with the mattress and a compatible support system. Next fund the primary storage that prevents daily clutter, including good drawer or door hardware where it will be used repeatedly. Then solve bedside lighting and reachable surfaces. A bench, decorative chair, second dresser, television cabinet, and elaborate matching details belong later in the budget.

Custom work is most defensible when standard products leave substantial unusable space, cannot fit an alcove or sloped ceiling, conflict with an uneven wall, or force several separate pieces into the room. It is less convincing when a standard bed and well-sized dresser already meet the need. If a tailored solution is appropriate, use Avrelahome as one source for comparing coordinated bedroom furniture and fitted storage, while requiring an order-specific drawing, material schedule, hardware list, and responsibility matrix before approval.

Keep the full cost in view: product, upgrades, freight, final-mile delivery, installation, wall preparation, electrical changes, and touch-ups. A lower product price can be offset by excluded work.

Test the Layout, Then Check Delivery and Safety

Mark the full outside dimensions of every proposed piece on the floor with painter’s tape. Add the open position of doors and drawers. Walk from the entrance to both sides of the bed, closet, bathroom, and window. Practice opening the lowest dresser drawer and making the bed. If a chair or bench must be moved for ordinary tasks, the plan is not finished.

Confirm that furniture does not obstruct required egress, a heat source, return air, or access to an electrical panel. Follow the manufacturer’s anchoring instructions for tall or potentially unstable furniture and match the fastener to the actual wall construction. This is particularly important in children’s rooms and where occupants may pull on drawers for support.

For delivery, compare the crate or carton with the elevator, stairs, turns, and doorway. For fitted work, document who verifies field dimensions, locates utilities, protects floors, prepares walls, installs fillers and trim, and corrects any mismatch. A homeowner’s measurements can establish feasibility, but final production dimensions for a wall-to-wall installation should be confirmed by the responsible professional after relevant construction is complete.

Two adults measuring dresser clearance and checking an anchoring point beside a bed
Full-scale testing should include drawer extension, circulation, and the intended wall anchoring location.

Frequently Asked Questions

What are the basic pieces of furniture in a bedroom?

A bed and compatible support are the core. Most rooms also need one or two bedside surfaces and one effective form of clothing storage. The exact list depends on the existing closet, room size, and user.

Does every bedroom need a dresser?

No. If a closet or wardrobe already provides enough accessible drawers and shelves, a dresser may duplicate capacity and consume useful wall or walking space.

Do you need two nightstands?

Not necessarily. Two are convenient for two regular sleepers, but a single sleeper, small guest room, or narrow bedroom may work better with one nightstand or a shallow wall-mounted shelf.

Is a bench at the foot of the bed worth it?

It is worthwhile when it provides a real place to sit, set temporary items, or store bedding without reducing the bed-end path. If it mainly fills visual space, omit it.

Is a storage bed good for a small bedroom?

It can be, provided the drawers or lift mechanism have operating room and are easy to use with the room’s rug and layout. Check weight, hardware access, and how often stored items are needed.

Should a desk go in a bedroom?

Use one when there is no better work area and the room can support chair clearance, lighting, power, and cable management. If possible, keep work visually contained so it does not dominate the sleeping area.

Is a freestanding or built-in wardrobe better?

Freestanding wardrobes suit renters, likely moves, and regular rooms. Built-ins are more compelling for long-term capacity, alcoves, sloped ceilings, or uneven walls, but require careful field verification and installation planning.

Should you choose a style before buying bedroom furniture?

Set the functional dimensions, capacity, and budget first. Then coordinate the selected pieces through a limited group of materials, colors, and proportions.

Build a Bedroom Plan, Not a Furniture Count

The right bedroom contains enough furniture to support sleep, storage, dressing, and access without making the room work around the furniture. Establish the bed, prove the storage capacity, and add only the pieces that solve a regular need. A measured plan will usually produce a calmer, more useful room than a predetermined suite.

Living Room Storage Ideas That Do Not Make the Room Feel Crowded

When a living room lacks storage, the quickest response is often to add baskets, end tables, and small cabinets. The objects disappear, but the room becomes lined with furniture. Its edges break into many pieces, circulation narrows, and every surface invites more clutter.

The least-crowded solution is not always the smallest cabinet. It is often one properly sized storage area that holds real inventory while allowing other walls and pathways to remain open. Begin with what needs a home, not with an attractive cabinet photograph.

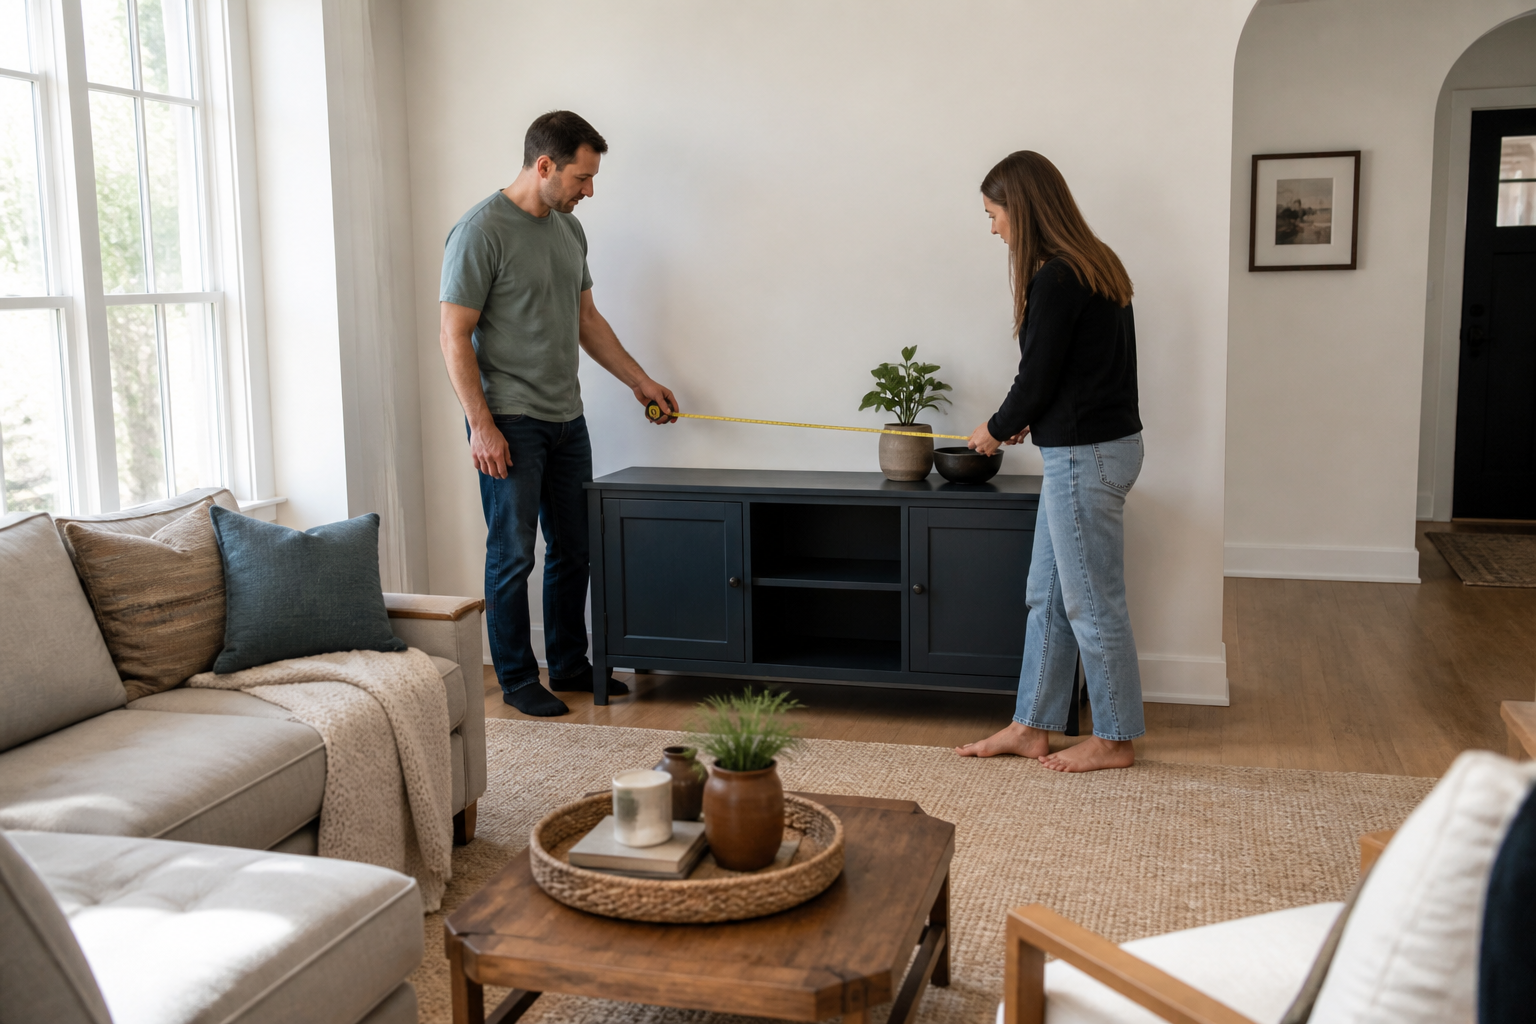
Homeowner and designer planning a low storage cabinet in an open uncluttered American living room
Useful storage begins with a measured inventory and a plan that protects circulation and open space.

Decide Whether You Need Storage or a Better Routine

List everything that routinely has no home: remote controls, chargers, toys, games, blankets, mail, books, pet supplies, and media equipment. Some items may belong in an entry, bedroom, office, or play area. Adding living-room cabinetry can make an inefficient routine permanent.

Group what remains by frequency, size, visual noise, and safety. Daily remotes should be reachable from a seat. Seasonal blankets can occupy a deeper or higher compartment. Batteries, cords, and fragile display pieces need different treatment in a home with children or pets.

Notice where clutter appears. Mail on the sofa table may indicate an entry routine problem. Toys beside the kitchen opening may need a broad, child-accessible compartment rather than a row of tiny labeled bins. Storage works when returning an item is easier than leaving it out.

Measure the Room Before Choosing a Cabinet

Record more than wall width. Mark windows, sill heights, doors, fireplace projections, baseboards, switches, outlets, supply and return vents, and the routes people use every day. Extend the living room layout plan to show open cabinet doors and fully extended drawers. A door that cuts across the main path is not usable simply because it closes afterward.

Tape the proposed cabinet depth on the floor. Add cardboard at its full height to test volume from the entry and sofa. A tall piece that fits a two-dimensional elevation may block light or make the seating group feel compressed.

Measure the delivery route as well: entry door, elevator, hallway turns, stairs, landings, and ceiling pinch points. A cabinet that fits the wall but not the building is not a viable option. In a condo, confirm elevator reservations, delivery hours, insurance requirements, and floor protection before ordering.

Create One Primary Storage Elevation

Instead of distributing three or four small cabinets around the room, ask whether one wall can carry most of the capacity. Concentration leaves other boundaries quieter and reduces the number of tops, legs, gaps, and corners the eye must process.

That does not automatically mean a heavy wall of cabinetry. A long low console may suit a wide media wall. Two tall, narrow cabinets can frame a useful center area. Shallow cabinets can use an alcove without projecting into a path. The best elevation is usually away from a busy turn, capable of safe attachment, clear of vents and electrical controls, and visually calm from the room entrance.

In an open floor plan, also check the view from the dining table and kitchen. The open-plan furniture guide explains why a storage solution must be evaluated across connected zones, not only from the sofa.

Divide Closed Storage and Open Display Deliberately

Toys, cables, game boxes, paperwork, and everyday supplies have fragmented colors and shapes. They generally belong behind doors or in drawers. Open shelves work better for a limited number of books, objects, or frequently used items that justify being visible.

Do not fill every open compartment. Negative space is part of the design, not wasted capacity. If the household needs substantial concealed storage, make that capacity honest instead of adding open shelves and then covering them with a wall of baskets.

For fast family cleanup, a few generous zones behind doors often work better than many small containers. Divide by activity—building toys, art supplies, games—and leave some free capacity. A system that requires exact packing every night will not remain tidy.

Compare Storage Types by Their Tradeoffs

A low console preserves sightlines and offers a useful top, but it uses considerable wall width. It works well for media equipment, games, and low-frequency objects when drawers and doors open without meeting the coffee table.

Tall narrow cabinets gain capacity with a smaller footprint. They need secure anchoring, and too many tall forms near windows or a high-back sofa can make the room feel boxed in. Keep the room’s vertical rhythm in mind rather than placing tall storage wherever a slim gap exists.

Built-ins can solve alcoves, uneven walls, shallow depth, and exact media needs. They also reduce future flexibility. Review the decision points in the built-in versus freestanding furniture comparison. Freestanding storage may be more sensible for renters, a planned move, or a household that changes the layout often.

Floating cabinets expose more floor and can look lighter, but wall structure, load, wiring, installation, and cleaning clearance must be resolved. A storage ottoman or bench can add secondary capacity, yet a room where every seat and table is a solid storage block will still feel heavy.

Storage type Best use Crowding risk to check
Low console Media, games, broad wall Too much width or blocked doors
Tall cabinet Vertical capacity on a small footprint Top-heavy view and anchoring
Built-in Alcoves, shallow depth, exact fit Overbuilding and lost flexibility
Floating cabinet Light appearance and easy floor line Wall load, cords, installation
Storage ottoman Blankets or occasional toys Heavy footprint and difficult access
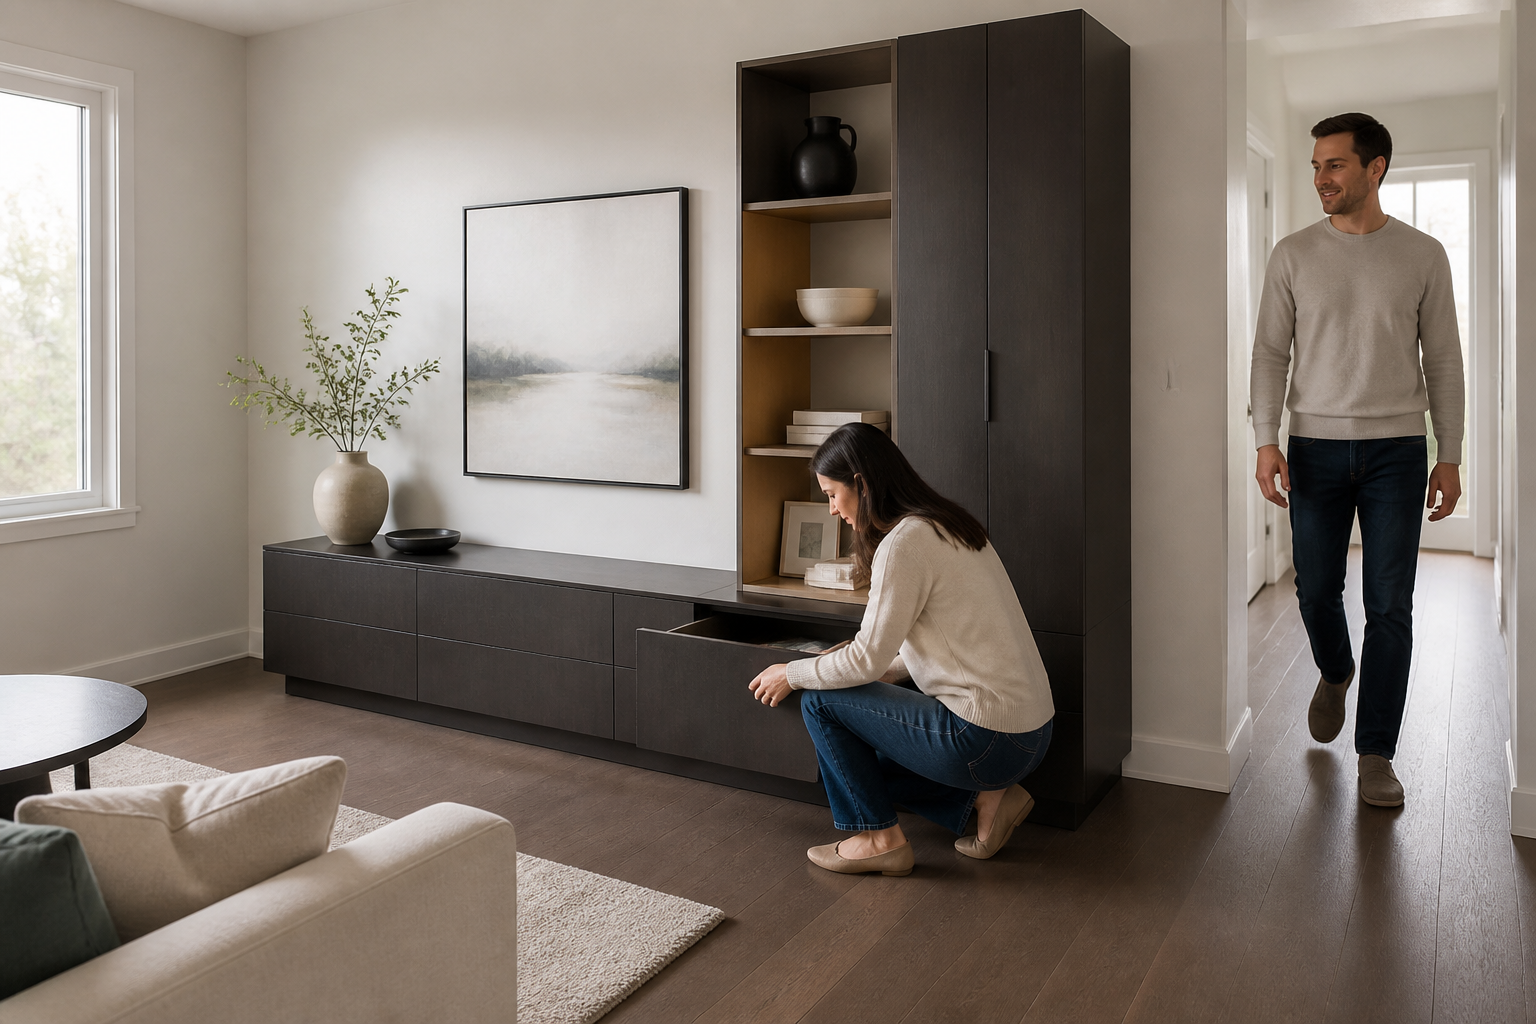
Homeowner using closed living room storage while a clear circulation path remains open
Concentrating capacity on one suitable elevation can leave the rest of the room visually quieter.

Use Shallow Depth Without Making Capacity Impractical

Shallow cabinetry can protect circulation along a narrow wall, but depth should come from actual objects. Measure the largest game box, basket, book, device, plug, and cable bend. Add the thickness of the back, doors, and hardware. A beautiful cabinet that is one inch too shallow for its intended object creates clutter instead of removing it.

Use deeper storage only where its projection is safe. A cabinet can sometimes become deeper below and shallower above, concentrating bulky items near the floor while keeping the upper wall lighter. Avoid open upper shelves that project near a walking route or seating position.

Inside, adjustable shelves handle changing books and games. Full-extension drawers can make low storage easier to use, but verify hardware load and handle clearance. Pull-out trays may help equipment access; they also need room for cables and ventilation.

Make Media Storage Serviceable

List the television, game consoles, router, speakers, receivers, charging equipment, and any devices likely to be replaced. Record their actual dimensions and operating positions. Media storage needs more than closed doors: verify ventilation, remote signals, cable bends, power access, and a route for removing equipment.

Do not seal a power strip into an inaccessible cavity or cover a return-air grille. Keep cords separated from moving drawer hardware. If electrical work, wall reinforcement, or a new receptacle is needed, use qualified local professionals and define who is responsible before installation.

A low console may be sufficient when equipment changes often. A fitted media cabinet is more useful when the wall is irregular, wiring is complex, or surrounding storage has a stable long-term purpose. Leave tolerance for replacement devices rather than fitting every opening to today’s exact model.

Control Visual Weight With Finish and Construction

Cabinet color matters, but it is not the only tool. A finish near the wall’s value can reduce contrast; it does not have to be an exact paint match. Matte surfaces, simple reveals, restrained hardware, and consistent alignments often create more calm than making every component white.

Exposed legs, a recessed toe kick, or a floating shadow line can lighten a long cabinet. Those details still need structural support and cleaning access. Glass doors reduce neither clutter nor reflections if everything behind them is visually busy.

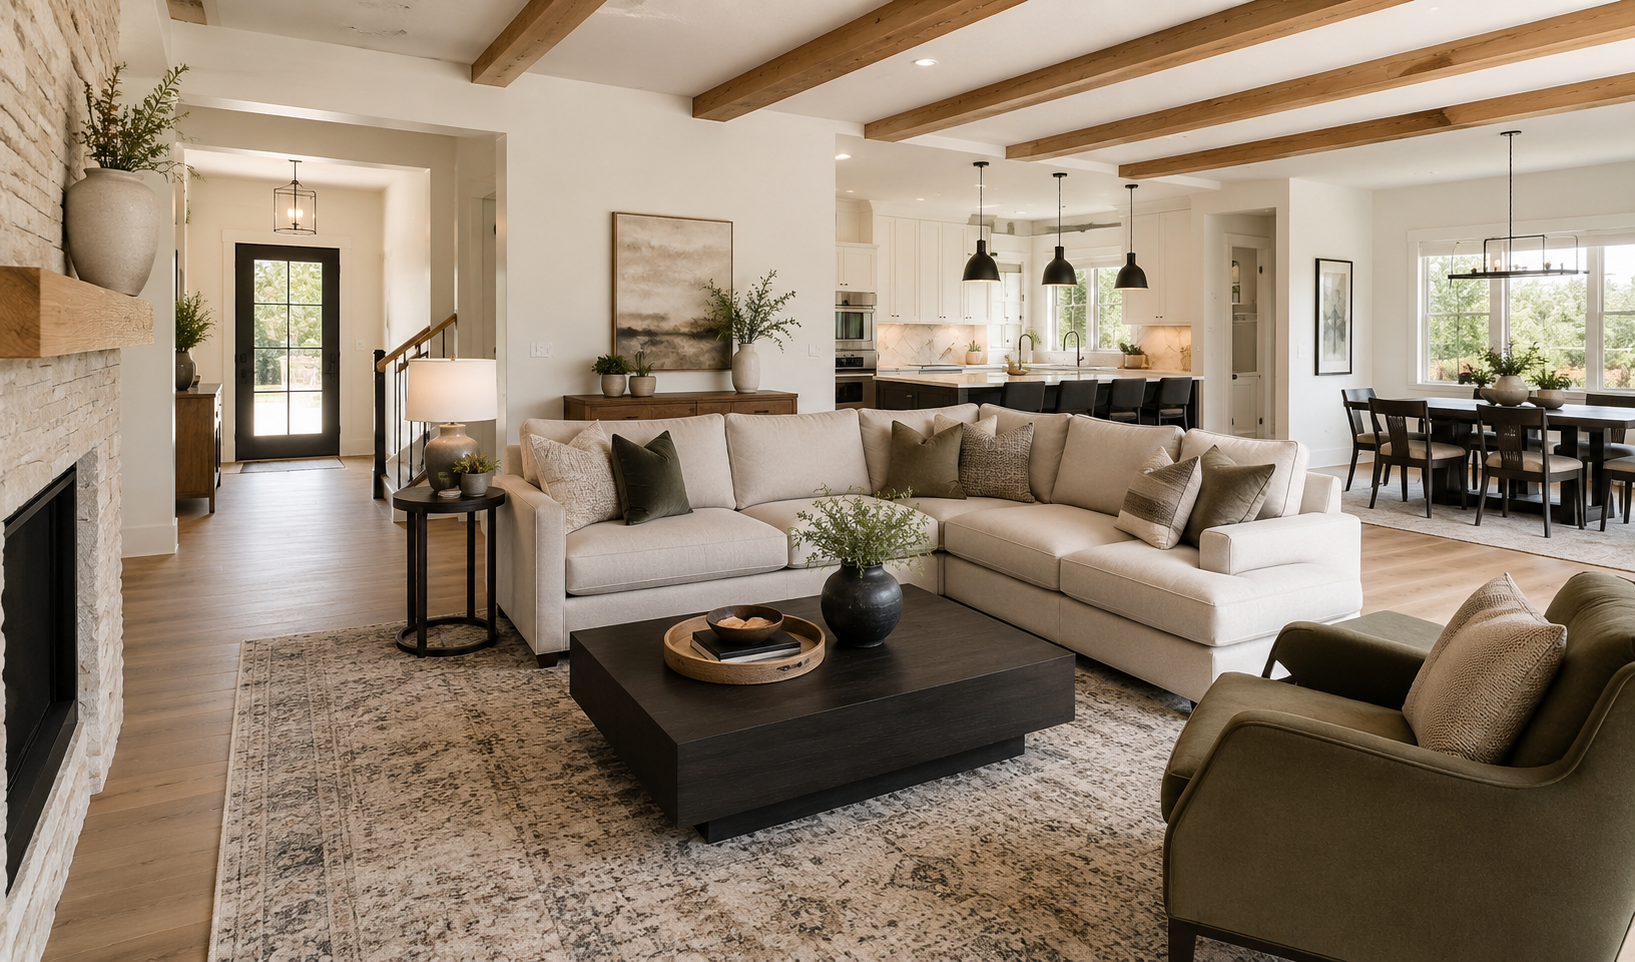
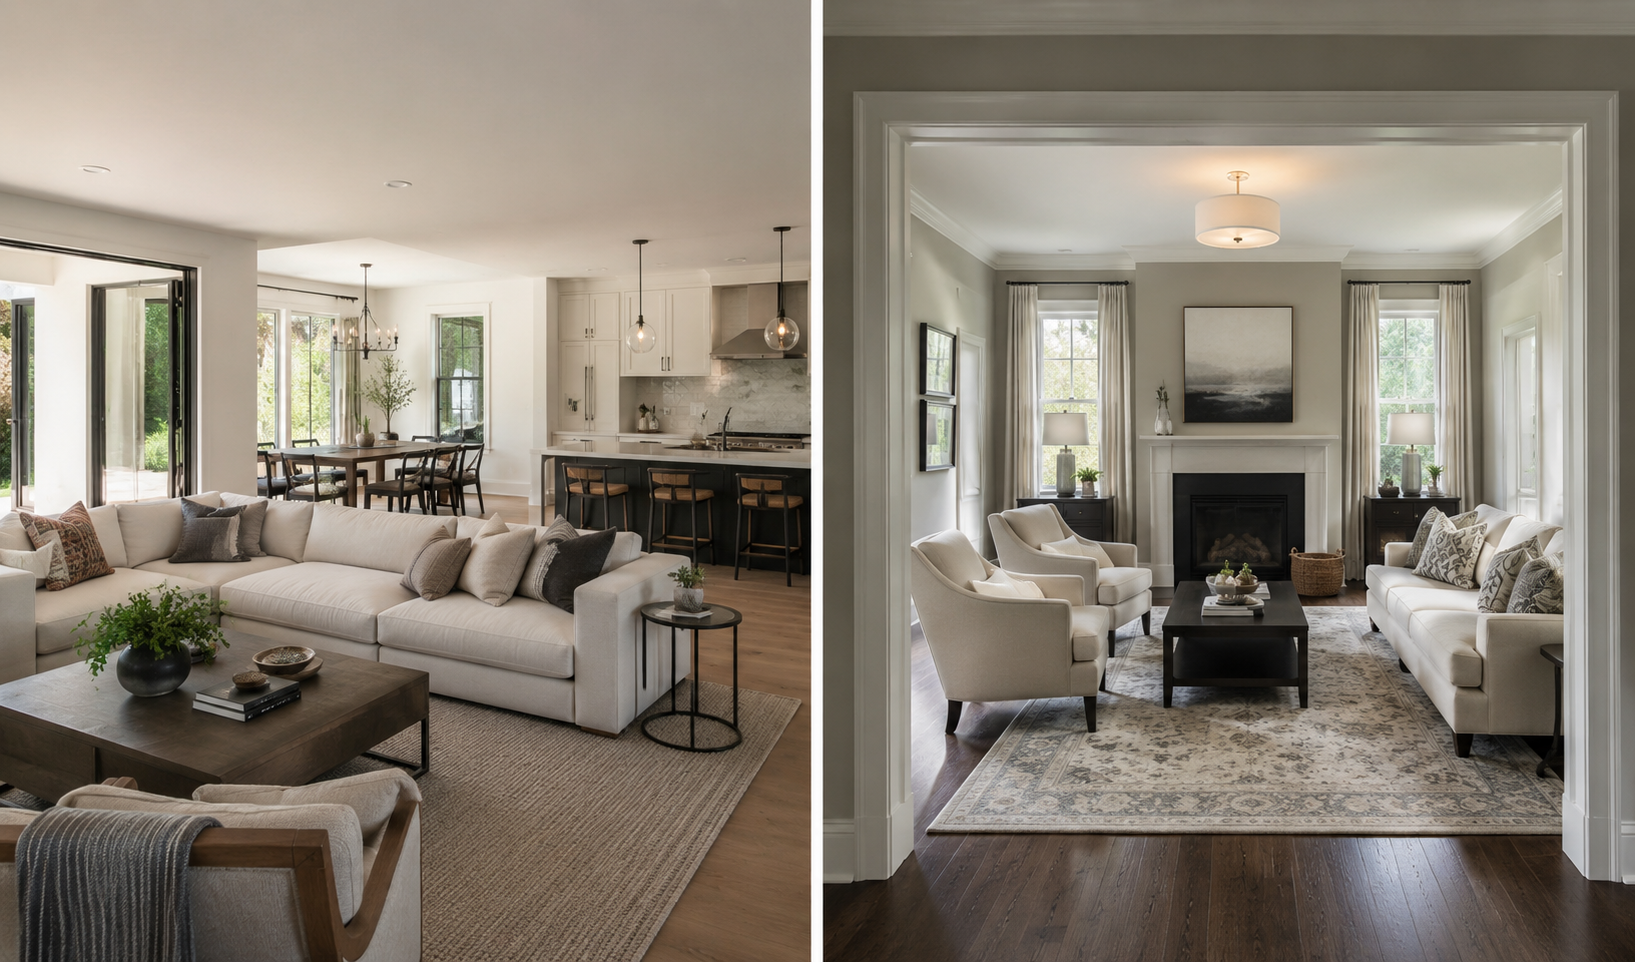
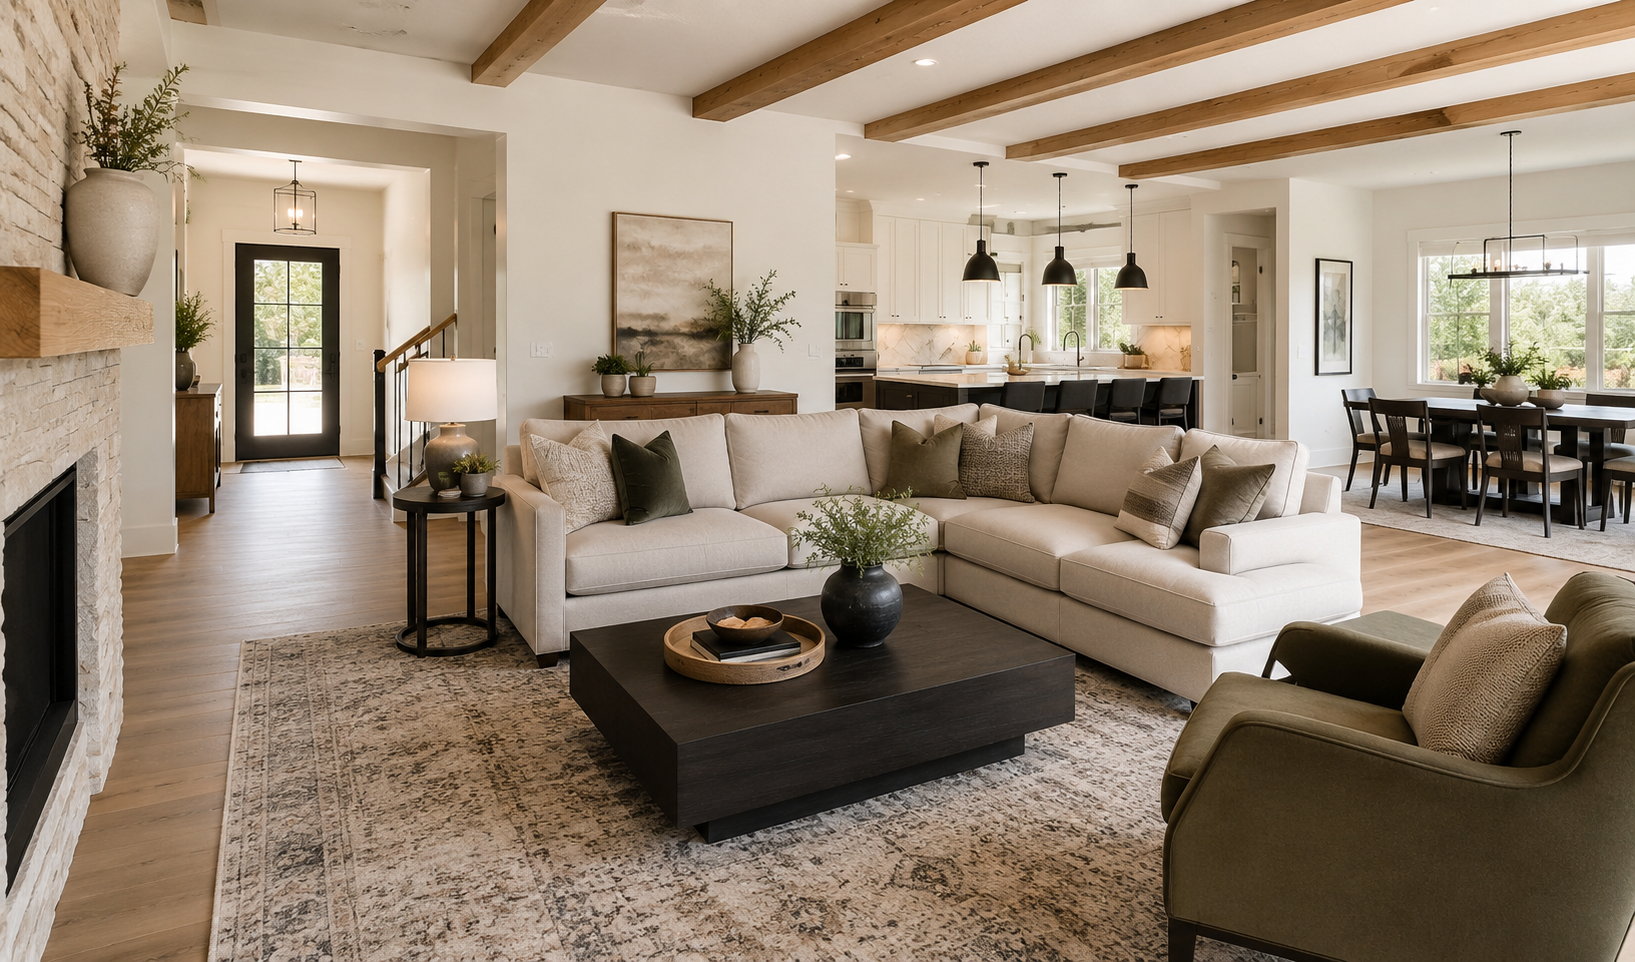
Coordinate the cabinet with the room through one or two relationships. It might repeat the darker wood temperature of the coffee table, the slim black line of a lamp, or the wall color. The newly published living room furniture mixing guide shows why a deliberate contrast is often better than an unsuccessful near-match.

Protect Safety, Access, and Everyday Maintenance

Tall cabinets, drawer units, and climbable furniture may require anchoring based on the product and wall condition. Keep routes legible, avoid projecting corners at busy turns, and do not leave movable baskets in a path. Frequently used objects should be reachable without kneeling, moving another object, or lifting a heavy lid.

Account for children, pets, and older adults in the hardware and compartment plan. Soft-close hardware does not replace supervision or proper anchoring. A storage bench lid needs controlled movement. Breakable objects should not sit on a low open shelf merely because the shelf is available.

Think about cleaning before approving slatted doors, fabric baskets, numerous open cubbies, or a narrow gap under a cabinet. The best storage does not look empty only on photography day; it can return to order on an ordinary worknight.

Test Capacity With Real Objects

Measure the largest blanket stack, game, basket, and device. Label each proposed compartment on the drawing with its intended contents. Then check doors, drawers, outlets, and equipment in simultaneous use. Add a modest capacity margin so every cleanup does not become a puzzle.

Mock up one shelf or drawer with cardboard if the fit is close. Test how a child reaches a toy bin and how an adult lifts it when full. For electronics, include connectors and cable loops, not only the equipment case.

If the budget is limited, prioritize correct dimensions, structure, durable hardware, and useful internal capacity. Decorative lighting, special panels, and extensive open display can follow. The custom furniture benefits guide helps distinguish situations where exact fit creates real value from those where standard furniture is sufficient.

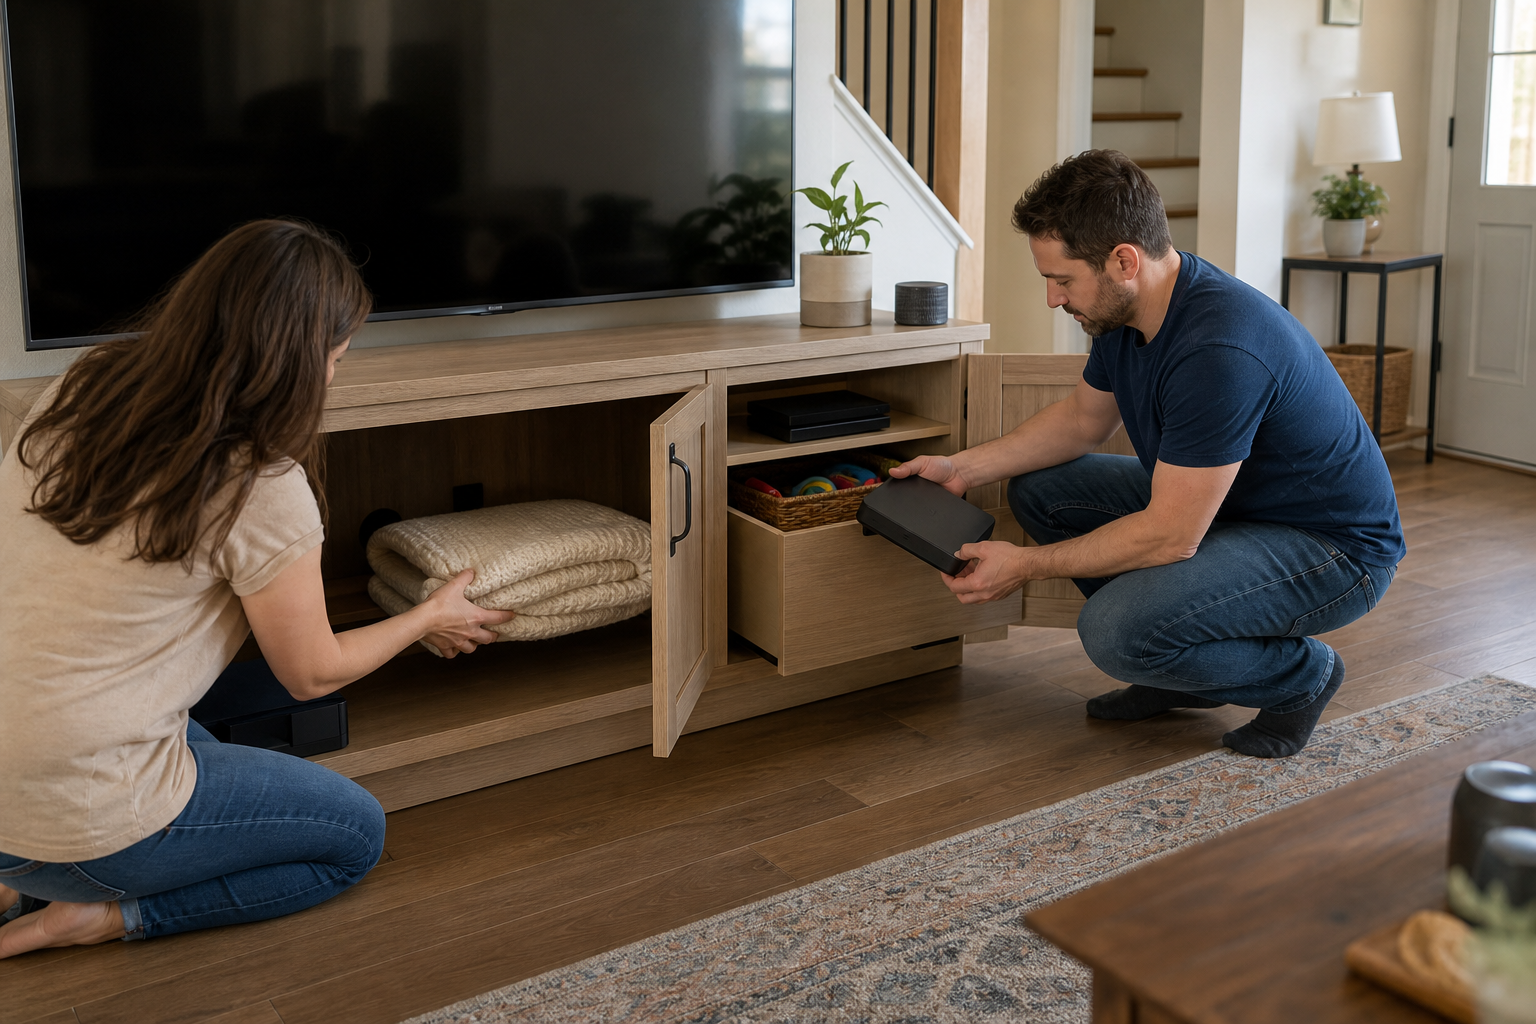
Two adults testing cabinet capacity with blankets games electronics and toys before ordering living room storage
Real blankets, games, electronics, and toys reveal whether a cabinet plan has practical capacity.

Confirm Delivery and Installation Responsibilities

Ask for packaged dimensions and component weights. Confirm whether the cabinet arrives assembled, in modules, or as site-built parts. Identify who protects the floor, moves baseboards, verifies wall conditions, anchors the unit, makes electrical connections, removes packaging, and handles touch-ups.

Check final dimensions after relevant flooring, trim, and wall work is complete. Older U.S. houses commonly have walls and floors that are not perfectly straight; a fitted cabinet may need scribes, fillers, or leveling space. Do not assume a nominal wall dimension is the fabrication dimension.

When an alcove, uneven wall, shallow footprint, or complex media requirement prevents standard pieces from solving the brief, living room furniture options can be compared against a project-specific storage plan. With a measured room, item inventory, finish samples, and delivery route, Avrelahome can help coordinate cabinet modules, dimensions, finishes, and installation requirements. For a rental or likely move, portable storage may remain the more cautious choice.

Frequently Asked Questions

Are open shelves or closed cabinets better in a small living room?

Closed cabinets are usually better for visually noisy daily items. Reserve open shelves for a limited number of books or objects worth displaying. Extensive open storage can increase cleaning and visual clutter even when it is shallow.

Do floating cabinets always make a room look larger?

Exposed floor can make cabinetry feel lighter, but proportion still matters. Wall structure, load, cords, and installation must be resolved. A long or high floating box can overwhelm a small room too.

How deep should living room cabinets be?

Base depth on the actual contents, hardware, and passage. Measure the largest object plus plugs, cable bends, back thickness, and door requirements. A universal depth is less reliable than a labeled inventory.

Are built-ins a good idea in a small living room?

They can be when they use an alcove, provide necessary shallow storage, or combine stable media and household needs. Do not build a full wall merely because it is empty, and consider how the room may change.

How can you hide toys without organizing every piece nightly?

Use a few generous, child-accessible zones behind closed doors and group toys by activity. Leave spare capacity so items are easy to return. Several tiny containers often create more work than they save.

Final Takeaway

Storage that feels spacious does not squeeze the maximum number of cubbies into a room. It gives real objects enough capacity in the right place while protecting circulation, daylight, and visually quiet surfaces.

Inventory first, choose one primary storage elevation, and test the design with actual objects, open doors, and the delivery route. If a cabinet solves clutter but makes daily movement, maintenance, or future change harder, it has traded one problem for another.

How to Mix and Match Living Room Furniture Without Looking Uncoordinated

Living room furniture does not have to come from one collection to feel coordinated. In fact, many comfortable American homes develop over time: a sofa comes from one move, a cabinet is inherited, and chairs change as family life changes. The room looks intentional when those pieces share a few clear relationships—not when every finish is identical.

Start with scale, undertone, line, and visual weight. Repeat a small number of those qualities, then allow individual pieces to differ. One clear contrast is usually easier to manage than several finishes that almost match but miss.

Homeowner and designer comparing fabric and wood samples in a coordinated mixed-style American living room
A mixed living room feels intentional when scale, undertones, lines, and visual weight create clear relationships.

Diagnose What Actually Feels Uncoordinated

Do not assume the furniture itself is the entire problem. A room may feel disconnected because the rug is too small, lighting is limited to one ceiling fixture, the walls are empty, or all the dark pieces sit on the same side. Replacing the sofa will not fix an unbalanced composition.

Photograph the room from the main entrance, the primary seat, and any connected dining or kitchen area. A photograph makes visual weight easier to see. Two dark wood chairs and a floor-based media cabinet may pull one wall downward. Three oak-colored pieces that are close but not quite the same can look more accidental than a confident light-and-dark mix.

Inventory What Must Stay Before You Shop

List every piece that is staying. Record its outside dimensions, condition, function, dominant color, wood undertone, line quality, and visual weight. Note why it is staying too. An inherited walnut chest may deserve a prominent position, but sentimental value does not require placing it in a traffic path or making every new item imitate it.

Mark doors, windows, fireplace projections, returns, outlets, television sightlines, and unavoidable routes. The step-by-step living room furniture layout guide can help you translate those constraints into a measured plan. In many U.S. suburban homes, the route from the entry or garage to the kitchen brushes the edge of the living area. In an apartment, the same room may also be the only path to a balcony.

Walk those paths as you use them: carrying groceries, guiding a child, moving a laundry basket, or letting two people pass. A coordinated furniture plan still fails if you clip the coffee table every morning.

Choose One Lead Piece and Define Its Direction

The lead piece may be the sofa, rug, large artwork, or an older case piece with presence. It does not have to be the most expensive object. Its job is to tell you what the supporting furniture should echo and where contrast would be useful.

Turn vague style words into observable attributes. Instead of “warm modern,” write down medium-to-dark warm woods, low-saturation upholstery, slim black metal, softened corners, and limited gloss. Instead of “transitional,” identify which traditional details you want to keep—perhaps turned legs or a framed cabinet door—and which cleaner contemporary lines should quiet them.

Use this description as a filter, not a rigid theme. Keep one or two expressive traits and let the rest of the furniture support them.

Build a Compact Coordination Palette

A useful palette can include one base neutral, one main wood-temperature direction, one primary metal direction, one or two accent colors, and a mix of textures. This is not a formula. It is an approval tool that prevents an unplanned fourth wood tone or third metal finish from entering the room.

Gather physical samples whenever possible. Place wood, veneer, fabric, leather, paint, and stone samples beside the furniture that will remain. Review them in morning light, afternoon sun, and evening lamps. Cool LEDs can flatten a warm beige fabric; western light can make a wood finish look much redder than it did in a showroom.

The guide to wood, boards, veneers, and furniture finishes explains why a material name alone does not predict color, stability, or daily performance. Compare the actual finish system and sample, not just the species label.

Mix Styles Through Shared Lines and Proportions

A contemporary sofa can work with traditional lounge chairs if there is a bridge between them. They might share a similar seat height, a softened arm curve, visible wood at the base, or one small color repeated in a pillow. The connection should be noticeable without turning the room into a matched set.

Look at the degree of ornament. If an inherited chair has carved arms and patterned upholstery, a quiet sofa gives it room. Adding an equally decorative coffee table, lamp, rug, and cabinet makes every item compete. Conversely, a room of uniformly plain rectangles may need one rounded table or sculptural chair to avoid feeling clinical.

Repeat geometry selectively. Curved chair backs can relate to an oval table, while straighter media storage provides structure. One or two echoes are enough.

Coordinate Scale and Visual Weight Before Color

Pieces with compatible colors can still feel wrong together when their proportions disagree. A broad, low sofa beside a tall, delicate end table makes both look awkward. A skirted sofa, solid pedestal coffee table, and floor-based media unit can make the whole room feel heavy even if every finish is neutral.

Compare outside dimensions rather than retail seat-count labels. A “three-seat” sofa with wide arms may offer less usable space than a narrower model. Check seat depth, seat height, arm width, back height, and leg exposure. Use the practical selection checks in the living room furniture buying guide to connect comfort and material choices to the people who will use the room.

Tables also need a physical relationship to seats. A coffee table should be reachable without forcing everyone to lean far forward, yet it cannot consume knee room or the main route. An end table must work with the nearby arm and the objects placed on it. Do not use matching table heights as a goal when the seats themselves differ.

Decision Relationship to check Common failure
Sofa and chairs Seat height, depth, arm mass, conversation distance One seat looks miniature or isolates its user
Coffee table Reach, knee space, circulation, edge shape Correct color but wrong footprint
End tables Useful top height, lamp position, cord route A matched pair serves only one seat well
Storage Capacity, door swing, height, visual mass Several heavy pieces crowd one elevation
Rug Connects the main seating group A small center island separates every piece

Mix Wood Finishes Without Chasing an Exact Match

Identify whether each existing wood reads warm yellow, red, gray, or relatively neutral. Choose the wood with the largest visible area as the dominant direction. Other woods should either share its general temperature or create enough light-and-dark contrast to look deliberate.

For example, a medium oak floor paired with a slightly darker imitation-oak coffee table often looks like a failed match. Walnut, a painted table, or stone on a metal base may create a clearer relationship. The contrast tells the eye that the difference was chosen.

Use a bridge piece when the room already contains two important woods. A side table might combine a dark top with lighter legs, or a cabinet might connect wood with the black metal seen elsewhere. A rug can also separate a wood table from a similar wood floor, so the finishes no longer compete edge to edge.

Do not rely on online thumbnails to judge undertone. Ask for current production samples.

Homeowner comparing wood finish samples beside oak flooring and a darker walnut living room table
Clear light-and-dark wood contrast often looks more deliberate than several finishes that nearly match.

Combine Upholstery, Pattern, and Texture for Daily Life

Large upholstery decisions should serve the household first. With children, pets, strong sun, or frequent entertaining, ask for fiber content, cleaning guidance, weave information, sample availability, and replaceable covers or components where relevant. “Performance fabric” is too broad to settle those questions by itself.

If the sofa is solid, one chair can carry a pattern. Consider how that pattern reads from the room entrance, not only at sample distance. A large-pattern chair surrounded by several small floral pillows gives the eye no quiet place. Limit pattern scales and use texture to add quieter variation.

Texture is especially useful in a controlled palette. A coarse weave, smooth leather, woven basket, matte wood, and stone can look layered even when their colors are restrained. Aim for contrast that can be felt as well as seen.

Pillows are an adjustment layer, not structural repair. They cannot correct a sofa that overwhelms the room or chairs that sit at the wrong height.

Couple comparing upholstery in a living room with coordinated woven fabric leather wood stone and pattern
Texture and one controlled pattern add depth without turning the furniture into a matched suite.

Let Metals, Stone, Glass, and Paint Repeat—Not Match

A black floor lamp should not be the only black metal object in the room. Repeat it lightly in a frame, table base, or cabinet hardware. That does not mean every metal must be black. One warm metal accent can coexist with a darker neutral metal when the mix is limited and repeated.

Stone and glass change visual weight as well as color. Glass can make a compact room feel lighter, but fingerprints, glare, and hard edges may not suit every household. Before ordering stone, ask about sealing, weight, edge details, and the indoor delivery route. Painted furniture can create a useful pause between several grain patterns.

Use the Rug, Lighting, and Art to Complete the Relationship

The rug is often the largest connecting layer in the seating group. It should make the principal seats read as one arrangement rather than fill only the empty rectangle beneath the coffee table. Tape the full rug size on the floor, including doors and traffic paths, before you order.

Lighting can repeat a line or metal, but each fixture still needs a job. A reading chair needs usable light, not merely a lamp that matches the table. Plan how floor and table lamps receive power. Do not run an extension cord across a walkway; consult a qualified local professional if a new receptacle or floor outlet is needed.

Artwork does not need to match the pillows exactly. A secondary color in the art can appear quietly in textiles, or the frame can repeat the room’s darker line. Protect the artwork’s identity instead of reducing it to a color swatch.

Integrate Inherited, Vintage, and Existing Pieces

Decide whether an older item is a functional asset, an emotional focal point, or simply something you have not reconsidered. A sound chair may justify reupholstery; an awkward cabinet may work better elsewhere.

Do not distort the entire plan around a weak piece. If an item must remain, make it a clear point of contrast rather than asking every new product to chase a finish that cannot be replicated. Give it breathing room and one or two small connections elsewhere.

The tradeoffs in the built-in versus freestanding furniture guide are useful when the existing mix also has to solve storage. A fitted cabinet can control dimensions and finish relationships around irregular walls or media equipment. Freestanding storage is often the better choice for renters or households that expect the layout to change.

Buy and Order in a Lower-Risk Sequence

Complete a scaled floor plan with circulation first. Confirm the lead piece, then test the rug, secondary seating, tables, and storage. Add lighting and accents after the large relationships work. This sequence is flexible, but it prevents a pile of small purchases from dictating an unsuccessful sofa and rug plan.

Tape the sofa, chairs, rug, and tables on the floor at the same time. Add cardboard at the height of a sofa back or cabinet if volume matters. Sit in the positions, set down a drink, open storage doors, and walk the main routes. Photograph at least two arrangements so you can compare the whole room rather than relying on memory.

Review return terms, production lead time, and delivery scope before paying. The safer online custom-furniture ordering process details drawings, samples, approvals, and responsibility boundaries that also improve complex mixed-furniture purchases.

Measure the entry door, elevator, hallway turns, stairs, landings, and ceiling pinch points. Compare those dimensions with the packaged product, not only its installed size. In a condo or apartment building, confirm elevator reservations, delivery hours, insurance rules, and floor protection. Ask who assembles the piece, removes packaging, anchors tall units, and handles touch-ups.

Run a Final Risk Check Before Approval

Review every sample, dimension, and product image on one page. Do not approve pieces only in isolation. Look for multiple almost-matching woods; too many floor-hugging forms; incompatible seat and table heights; stools or corners intruding into circulation; several unrelated metals; and a large item with no proven delivery route.

Count the visual focal points too. Decide what a visitor should notice first and allow supporting pieces to be quieter.

If existing furniture, exact dimensions, or storage requirements make standard products difficult to coordinate, custom living room furniture options can be evaluated against one room-wide brief. With a measured plan, current finish samples, delivery constraints, and a clear list of what must stay, Avrelahome can help align modules, dimensions, finishes, and installation needs without forcing the room into a matched suite.

Custom is not automatically the right answer. Portable standard furniture may be more practical for a rental, a near-term move, or a room that needs frequent reconfiguration.

Frequently Asked Questions

Does living room furniture have to match?

No. Furniture can differ in style, material, and age when a few relationships remain consistent. Coordinate scale, undertone, line, visual weight, or a repeated material. The goal is an understandable whole, not identical pieces.

How many wood tones can you use in one living room?

There is no absolute number, but smaller rooms benefit from restraint. One dominant wood plus one compatible or clearly contrasting secondary wood is easier to manage than several near-matches. Use rugs, paint, metal, or stone to create separation when needed.

Can a modern sofa work with traditional chairs?

Yes. Check seat height, overall mass, and conversation distance first. Then create one bridge through color, visible wood, leg shape, or softened curves. Let the more decorative piece be the accent rather than repeating all of its details.

Should the coffee table and end tables match?

They do not need to be a set. Repeat one material, undertone, geometric idea, or level of visual weight, then size each table for its actual seat and function. A matching pair that is awkward to reach is not a good match in practice.

When is custom furniture useful in a mixed living room?

Custom work can help when irregular walls, shallow depth, precise relationships to existing furniture, media and storage needs, or delivery assembly constraints cannot be addressed together by standard pieces. If the room changes frequently, modular or freestanding products may remain the safer choice.

Final Takeaway

Successful mixing does not hide differences; it gives them order. Protect the layout and daily function first. Then repeat a few relationships—wood temperature, line, metal, color, or visual weight—and allow individual pieces to have their own character.

Approve the living room as one composition, with one floor plan and one set of current samples. If a piece looks beautiful by itself but weakens circulation, balance, comfort, or the hierarchy of the room, it is not the right piece for this mix.

How to Choose Living Room Furniture for an Open Floor Plan

An open floor plan living room shares space with areas like the kitchen or dining room, so furniture needs to support both function and zoning. The right layout can help define the living area, keep traffic flow clear, and make the entire space feel more balanced.

This guide explains how to choose and arrange open floor plan living room furniture, what it typically costs, and how it differs from furnishing a traditional living room.

What Is an Open Floor Plan Living Room?

An open floor plan living room is a living area that connects directly to spaces like the dining room, kitchen, or other shared areas without full walls separating them. Common layouts include a living room connected to the dining area, a living room open to the kitchen, or one large space that combines all three.

This type of layout can make a home feel more spacious and connected, but the boundaries between different areas are less defined. Because of that, living room furniture options such as sofas, area rugs, console tables, dining tables, and storage pieces often help create visual zones within the larger space. 

Open Floor Plan Living Room vs. Traditional Living Room

The biggest difference between an open floor plan living room and a traditional living room is how the space is divided. A traditional living room usually has clear boundaries created by walls, doorways, or hallways, while an open layout relies more on furniture placement, rugs, lighting, and materials to separate different areas.

This means furniture in an open floor plan needs to work with the surrounding kitchen or dining area as well as the living room itself. Size, placement, color, and traffic flow all play a bigger role in keeping the overall space balanced and functional.

Feature Open Floor Plan Living Room Traditional Living Room
Space boundaries Connected to nearby areas Usually defined by walls
Role of furniture Function + space zoning Mainly supports living room use
Layout focus Zoning, traffic flow, overall balance Layout within the room
Furniture size Based on the scale of the full open space Based mainly on the living room
Style coordination Should work with nearby spaces Can be more independent

How to Choose Furniture for an Open Floor Plan Living Room

When choosing furniture for an open floor plan living room, the goal is not just to find pieces that look good on their own. You also need to consider how each piece fits into the larger shared space. Furniture size, placement, and style all affect how well the living room works with nearby dining and kitchen areas.

Start by choosing sofas and larger furniture based on the overall scale of the open space. A living room furniture layout guide can help you determine the usable seating area and major traffic paths before you buy. In a larger layout, a sectional or wider sofa can help define the living area. In a smaller space, a lighter sofa, accent chairs, and a compact coffee table can keep the room from feeling crowded.

It also helps to choose furniture that can create clear zones. The back of a sofa, a console table, an area rug, or an open shelving unit can visually separate the living room from the dining area or kitchen without adding walls.

Traffic flow is another important factor. Keep main walkways, kitchen entrances, and the space around dining chairs clear so large furniture does not interrupt everyday movement. Before ordering larger pieces, measure your room for furniture and include doors, windows, fixed obstacles, and major walkways. 

Finally, furniture in each area does not need to match exactly, but colors, wood tones, metal finishes, or overall design styles should connect visually. This helps each zone feel distinct while keeping the entire open space cohesive.

How Much Does Open Floor Plan Living Room Furniture Cost?

The cost of furnishing an open floor plan living room depends on the size of the space, how many pieces you need, the materials, and the brand. For a basic to mid-range setup that includes a sofa, coffee table, accent chair, area rug, and some storage, a typical budget is around $1,500 to $5,000. Larger sectionals, premium materials, or custom furniture can push the total above $5,000. For a closer look at the factors behind made-to-order pricing, see the custom furniture cost guide. 

Furniture Typical Price Range
Sofa $500–$2,000+
Sectional Sofa $1,000–$3,000+
Accent Chair $125–$600+
Coffee Table $100–$500+
Area Rug $150–$800+
Console or Storage Furniture $200–$1,000+

Open floor plans may also require extra pieces for zoning, such as an area rug, console table, or additional seating. Furniture size, solid wood or leather materials, modular designs, and custom sizing can all increase the final cost.


Common Open Floor Plan Living Room Layout Mistakes

One of the most common mistakes is pushing every piece of furniture against the walls. In an open layout, floating the sofa or using a console table behind it can help define the living area more clearly.

Another issue is choosing furniture that is too large or too small for the overall space. Oversized sectionals can block walkways, while undersized rugs and tables can make the living zone feel disconnected.

It is also important to avoid blocking major traffic paths between the kitchen, dining area, and living room. Furniture should create clear zones without making it harder to move through the space.

Finally, do not make each area look completely unrelated. The living room, dining area, and kitchen do not need to match, but repeating similar colors, materials, or finishes can make the open space feel more cohesive.

FAQ

What furniture works best in an open floor plan living room?

Sofas, sectionals, accent chairs, area rugs, console tables, and open shelving work well because they can provide function while also helping define different zones.

Should a sofa be against the wall in an open floor plan?

Not necessarily. Floating a sofa away from the wall can help separate the living area from the dining room or kitchen and create a clearer seating zone.

How do you separate a living room and dining room in an open floor plan?

You can use furniture placement, area rugs, lighting, console tables, or shelving to create visual boundaries without adding walls.

Should furniture match in an open floor plan?

Furniture does not need to match exactly. However, using related colors, wood tones, fabrics, or finishes can help different areas feel connected.

Is a sectional good for an open floor plan?

Yes. A sectional can help define the living area in a larger open space, but its size and orientation should not block walkways or make the room feel crowded.

Custom Wardrobe Design Guide: Plan the Right Fit Before You Order

A custom wardrobe can turn an awkward wall or crowded closet into storage that feels calm and intuitive. It can also become an expensive source of frustration if the layout is approved before anyone counts the clothes, checks the baseboards, or confirms how the cabinets will reach the room. The best projects begin with use, dimensions, and installation conditions—not a door style.

This guide walks U.S. homeowners through the decisions that matter before production begins. It applies to a fitted wardrobe wall, a reach-in closet replacement, and a walk-in dressing room. The goal is not to maximize the number of shelves. It is to give every frequently used item a practical home while preserving comfortable movement and a realistic installation plan.

Homeowner and wardrobe designer reviewing a fitted wardrobe layout in a bright American bedroom
A useful wardrobe plan begins with the room, the clothing inventory, and the way the homeowner moves through the space.

Start With the Type of Wardrobe You Actually Need

“Custom wardrobe” can describe several different projects. A reach-in conversion works inside an existing closet opening. A fitted wardrobe uses a bedroom wall or alcove and may include doors, trim, and scribe fillers. A walk-in system uses multiple walls and requires more attention to aisle width, corners, lighting, and ventilation.

Begin by naming the problem you want the project to solve. You may need more double-hang space, drawers that replace a dresser, a place for luggage, or a cleaner background in a primary bedroom. That answer should shape the project more than a showroom photo.

Custom work earns its keep when it addresses the room and the household together. The broader benefits of custom furniture are most visible here: a useful wardrobe can respond to a sloped ceiling, an off-center window, a shallow recess, or a clothing collection that does not fit standard modules.

Decide early whether the project should read as part of the architecture or as furniture. A floor-to-ceiling installation with wall-to-wall fillers is visually permanent. A system with its own finished sides and a deliberate gap at the ceiling feels more movable. The comparison between built-in and freestanding custom furniture can help clarify which level of permanence makes sense for your home.

Turn Your Clothing Inventory Into Storage Zones

Before drawing compartments, count what you own. Exact counts are not necessary, but categories are. Separate long-hang garments, short-hang garments, folded clothes, drawers, shoes, bags, jewelry, seasonal bedding, and luggage. Note unusually long coats, tall boots, wide-brim hats, or deep storage bins.

Measure a few representative items. The longest dress determines more than a generic “long-hang” label. A stack of sweaters reveals how wide a shelf can be before the pile becomes unstable. The shoes you wear every week determine shelf spacing better than a catalog rendering.

Place daily items in the easiest reach zone, generally between waist and shoulder height for the person using the wardrobe. Reserve high shelves for luggage and seasonal pieces. Low drawers can work for bulky knits, but very low drawers may be inconvenient for someone with limited mobility. A shared wardrobe should assign clear zones to each person instead of assuming equal halves will work.

Avoid designing for perfect visual symmetry at the expense of capacity. Two identical bays may look orderly in an elevation, but one wider hanging section and one drawer stack may serve the household better. Adjustable shelves create flexibility, while fixed shelves can improve rigidity in tall cabinet sections. Use each deliberately.

For a straightforward wall-based solution, review the custom wardrobe options that correspond to bedrooms and reach-in conditions. If the room has enough area for a dedicated dressing zone, a walk-in closet system needs a separate circulation and corner strategy.

Measure the Room, Obstacles, and Delivery Route

A single width and height are not production measurements. Walls can bow, corners can be out of square, and floors can slope. Measure the opening at several heights and the height at several points. Record the smallest clear dimension as well as the variation. Note baseboards, crown molding, window casing, outlets, switches, supply registers, return grilles, access panels, sprinklers, and door swings.

The finished-floor condition matters. If new flooring is planned, the team must know the final floor height and whether the wardrobe will sit on top of the finished surface or be installed before it. Removing baseboard behind the cabinets, returning it into a side panel, or scribing around it produces different details.

Use the same disciplined approach described in this room-measuring guide, but add the wardrobe-specific conditions: ceiling variation, wall straightness, door clearance, and access to electrical components. Homeowner measurements are excellent for early planning. Final production dimensions should be confirmed by the responsible professional after the room is ready.

Do not stop at the bedroom. Check the path from the delivery vehicle to the installation wall. Measure the front door, tight hall turns, stair landings, elevator opening, and bedroom doorway. Confirm building rules for loading docks, elevator reservations, work hours, insurance certificates, and debris removal. Large end panels or assembled drawer units may dictate how the design is divided into transportable modules.

Homeowners measuring the width of a bedroom recess before ordering a custom wardrobe
Repeated measurements and a documented delivery route reduce avoidable production and installation conflicts.

Choose a Layout That Preserves Comfortable Movement

The cabinet depth has to suit the storage method and the available room. Full-depth hanging sections need enough room for garments and hangers without rubbing the doors. Folded shelves and shoe storage may be shallower. If a room cannot support a standard front-facing hanging depth, pull-out or side-facing hardware may be possible, but it changes capacity and access.

Door type affects both the interior and the room. Hinged doors allow several sections to be visible at once and can support mirrors or accessories, but they need clear swing space. Sliding doors reduce the space required in front, yet one part of the wardrobe remains covered. Pocket or folding systems can improve access, but they add hardware and detailing that should be evaluated for durability and serviceability.

In a walk-in closet, protect the aisle before adding storage to every surface. A layout that looks generous on a plan can feel tight after door and drawer projections are included. Mark the cabinet fronts on the floor with painter’s tape, then simulate opening a drawer, turning, and passing another person. Include a bench or island only after primary circulation works.

Corners deserve an explicit decision. A blind corner can hide capacity that is technically present but hard to use. Sometimes stopping one run short and creating a wider, accessible return is better than forcing cabinets into every inch. Ask the designer to show how each corner opens and what can be reached without moving another door.

Select Materials for Daily Use, Not Just the Sample Board

Wardrobe interiors should be stable, cleanable, and appropriate for the expected load. Engineered panels can provide consistent flatness and finish. Wood veneer offers genuine grain variation. Painted surfaces create a tailored appearance but may show impacts differently from textured laminates. The right choice depends on look, budget, humidity, maintenance expectations, and the details available from the fabricator.

Ask what the core material is, not only what the surface looks like. Confirm the finished thickness of shelves, drawer construction, edge treatment, backing, and how long spans will be supported. A shelf that holds folded shirts is different from one intended for luggage or a dense row of shoes.

Review samples in the bedroom’s actual light. A warm wood can turn orange under one lamp and gray near a north-facing window. Large door surfaces make subtle color and sheen differences more obvious than a small chip. If the wardrobe must coordinate with flooring or a bed, place samples together rather than evaluating each in isolation.

Hardware should be specified by function. Discuss hinge opening angle, soft-close behavior, drawer load, handle projection, hanging-rod support, and the availability of replacement parts. Specialized pull-down rods, valet hooks, belt racks, and jewelry trays are useful only when they solve a real habit. Too many mechanisms can reduce usable space and create unnecessary maintenance.

Plan Lighting and Electrical Work Before Production

Lighting is easiest to integrate before cabinet parts are cut. Top-only light often leaves clothing faces in shadow, especially in deep or dark interiors. Vertical lighting near the front edges can illuminate hanging and folded items more evenly. Diffusers help avoid bright individual LED points reflecting from doors or mirrors.

Confirm switching method, color temperature, driver location, wire path, and service access. Door sensors, motion sensors, and manual switches each behave differently. A driver concealed behind a fixed panel may be difficult to replace, while an accessible location can be serviced without removing cabinetry.

Any outlet relocation, new wiring, or modification to the room should be coordinated with qualified trades and local requirements. The cabinet supplier and electrician should agree on exact rough-in locations before installation. A vague note that says “electrician by owner” is not enough; the drawings should show who provides the channel, wiring, driver, connection, and final testing.

Compare Quotes by Scope, Not by the Bottom Line

Two wardrobe quotes may cover different work even when the renderings look similar. Request an itemized scope that identifies design and field measurement, cabinet boxes, fronts, finished sides, fillers, trim, hardware, lighting, delivery, stairs or elevator handling, installation, protection, removal of existing components, wall repair, paint touch-up, debris disposal, tax, and warranty service.

Separate product decisions from site work. A wall-to-wall fitted project usually needs allowances for irregular walls and a method of closing the gaps. If fillers, scribes, or trim are missing from the quote, ask how the final edges will be finished. If the old closet must be removed, confirm whether patching and painting are included or assigned to another contractor.

Price should also reflect the approval level. A quote based on a rough image is not equivalent to one supported by measured plans, elevations, material specifications, and installation details. Avrela Home recommends comparing the same drawing set and the same assumptions across bidders so a lower number does not simply represent an incomplete scope. The Avrela Home homepage provides an overview of its broader whole-home and custom cabinetry planning approach.

Approve Drawings and Samples With a Written Checklist

Production approval is the point at which casual preferences become costly changes. Review every elevation and plan at a readable scale. Confirm overall dimensions, each opening, hanging heights, shelf spacing, drawer counts, door directions, handle locations, fillers, finished panels, trim, lighting, and interfaces with walls, floors, ceilings, windows, and outlets.

Ask the designer to label adjustable and fixed components. Confirm whether dimensions are clear internal dimensions or outside cabinet dimensions. A drawer front height does not reveal the exact usable drawer depth, and a shelf shown on an elevation may not be adjustable. Questions now are cheaper than assumptions discovered after delivery.

Request physical material and finish samples for final approval. Check edge color, sheen, grain direction, handle finish, mirror tint, and lighting appearance. If a natural material varies, ask what range of variation is normal. Keep a signed or photographed reference sample when possible.

Use a broader list of questions to ask before ordering custom furniture to verify schedule, payment milestones, change procedures, site readiness, warranty boundaries, and after-sales service. The contract should identify which drawing revision controls production and what happens if field conditions change after measurement.

Prepare for Delivery and Check the Installation

Before delivery, empty the work area and move fragile items from adjacent walls. Confirm parking, building access, elevator reservation, and the path to the room. Protect flooring and nearby furniture. Ask whether cutting or scribing will occur indoors and how dust will be contained.

During installation, the team may need to level the bases, join modules, scribe fillers, anchor units, adjust doors, and complete lighting connections. Minor fitting is normal because the room is not factory-square. Unplanned demolition, blocked utilities, or major dimension conflicts are not; those conditions should trigger a documented decision before work continues.

Installer leveling a fitted wardrobe cabinet while the homeowner reviews the work
Field fitting, leveling, anchoring, and final adjustment should be checked before the installation team leaves.

At completion, inspect alignment, consistent reveals, door and drawer movement, shelf support, hanging-rod security, lighting, mirrors, handles, fillers, trim, and wall contact points. Look for floor or paint damage and confirm that protective materials and debris are removed. Photograph any punch-list item and agree on responsibility and timing before the installers leave.

A successful wardrobe should be easy to use on an ordinary weekday, not merely impressive when empty. Load it gradually and adjust shelves after a few weeks. Keep finish-care instructions, hardware information, approved drawings, and warranty contacts together for future service.

Frequently Asked Questions

What is the difference between a custom wardrobe and a modular closet system?

A custom wardrobe is designed around a specific room, storage inventory, finish, and installation condition. A modular system uses predetermined widths, depths, and accessories. Modular products can be faster and easier to reconfigure, while custom work is better able to address irregular walls, exact alignment, coordinated finishes, and specialized storage.

Should a fitted wardrobe go all the way to the ceiling?

Not always. A ceiling-height design can reduce dust collection and add high storage, but it needs a deliberate plan for uneven ceilings, crown molding, ventilation, and installation clearance. A lower cabinet can be easier to install and may feel lighter in the room. Choose the detail that fits the architecture and storage need.

Should flooring be installed before or after the wardrobe?

It depends on the flooring type, the cabinet support method, and whether the installation is intended to be permanent. Coordinate the finished floor height, expansion requirements, baseboard, and installation sequence before final measurement. The cabinet and flooring teams should agree on the interface in writing.

Can a custom wardrobe include lighting and outlets?

Lighting can be integrated when the electrical plan, wire channels, sensors, drivers, and service access are defined early. Outlet changes or new wiring should be completed by qualified professionals in accordance with local requirements. Do not allow cabinetry to conceal required access or ventilation.

How long does a custom wardrobe take?

The total schedule includes consultation, preliminary design, field measurement, drawing approval, material procurement, production, shipping, site preparation, installation, and punch-list work. Ask for milestone dates rather than one production number, and allow additional coordination time for specialty finishes, imported hardware, electrical work, or building access rules.

A Better Wardrobe Begins Before the Factory

The most useful custom wardrobe is not the one with the most compartments. It is the one that reflects real clothing, real movement, and real site conditions. Inventory first, measure thoroughly, protect circulation, specify materials and hardware, coordinate electrical work, and approve a complete drawing set before production.

That preparation gives the design team a clearer target and gives the homeowner a better way to compare scope, schedule, and value. It also makes installation day more predictable—when changes are hardest and most expensive to make.

How to Plan a Living Room Furniture Layout

Why does a living room still feel crowded or awkward even when all the furniture technically fits? In many cases, the problem is not how much furniture you have, but how the sofa placement, spacing, traffic flow, and room proportions work together. 

When planning a living room furniture layout, start by deciding how the space will be used and which layout best supports that purpose, then determine where the sofa and other key pieces should go. A good layout should not only look balanced but also make it easy to move through the room, sit comfortably, talk, and use the space naturally.

What Should You Consider Before Planning a Living Room Layout?

Before deciding where the sofa, accent chairs, or coffee table should go, take a step back and look at the room as a whole. A successful living room layout depends less on how attractive each piece of furniture looks on its own and more on how well the room dimensions, fixed features, daily use, and furniture scale work together.

Start by measuring the room carefully, including its length, width, and the usable space along each wall. Mark the locations of doors, windows, main walkways, outlets, TV connections, and any fixed architectural features such as a fireplace, built-in shelving, columns, or radiators. Pay close attention to door swings and the paths people use most often. A piece of furniture may technically fit in a spot but still block an entrance, interfere with a window, or make it awkward to move between rooms.

Next, think about how the living room is used most of the time. If the space is mainly for watching TV, the sofa and other seating should support comfortable viewing angles. If the room is more focused on conversation and entertaining, seating should make it easy for people to face one another rather than directing every chair toward the same wall. Homes with children, pets, or frequent guests may also need more open floor space, additional seating, or furniture that can be moved and rearranged easily.

Furniture size matters just as much as room size. Do not only ask whether a sofa will fit. Think about how much space will remain once you add a coffee table, accent chairs, side tables, and the clearances needed to walk comfortably. An oversized sectional can quickly overwhelm a smaller room, while furniture that is too small may look scattered and out of proportion in a large living room. It is better to compare the room dimensions and the main furniture dimensions together before finalizing the layout.

You should also identify the room’s main focal point, such as a TV, fireplace, large window, outdoor view, or feature wall. If the room has more than one focal point, decide which one matters most to how you actually use the space. That choice will help determine the direction of the main seating and prevent the room from feeling visually disconnected.

Finally, leave enough open space for people to move, sit down, stand up, and interact comfortably. A good layout should do more than make all the furniture fit. It should make the room feel easy to use, easy to move through, and balanced without feeling crowded. Considering these factors before moving furniture can save a lot of trial and error later.


How to Plan a Living Room Furniture Layout Step by Step

Once you know the room dimensions, window and door locations, and how the space will be used, the next question is much more practical: where should the furniture actually go?

The easiest way to work through the layout is to start with the sofa, since it usually determines the direction of the entire room. Once the sofa is in the right place, you can add seating, a coffee table, and smaller pieces, then test how the room feels in everyday use.

1. Find the Best Place for the Sofa

Ignore the coffee table, accent chairs, and side tables for now. Start with the sofa.

Identify one or two realistic places where it could go, then check each option:

  1. Will the sofa block a doorway or window?
  2. Does it make the room harder to enter?
  3. Is there still enough space in front for a coffee table?
  4. Can people move comfortably around the sides?
  5. Does the seating position work with the TV, fireplace, or main view?

A sofa may technically fit along a wall but still create problems for everything else in the room. If one placement makes the rest of the layout difficult, it is probably not the right one.

In a rectangular living room, for example, the sofa may fit on both a long wall and a short wall. If placing it on the short wall leaves narrow walkways or an awkward viewing distance, the long wall may work better.

In a larger or open-plan living room, the sofa also does not have to sit against a wall. Floating it farther into the room can create a more defined seating area while leaving a walkway behind it.

2. Sit in the Sofa Position and Check the View

Once you have a likely sofa position, sit there before adding more furniture. If the living room is mainly used for watching TV, check whether the screen falls within a comfortable line of sight. You should not have to keep turning your head to one side just to watch comfortably.

Also pay attention to windows. A TV directly opposite a large window may create glare during the day, so you may need to adjust the TV position, sofa angle, or both.

If the TV has not been mounted yet, avoid designing the entire room around a wall that simply happens to have an outlet. In many cases, it makes more sense to find the best sofa position first and then decide where the TV should go.

3. Add Only the Seating You Actually Need

Once the sofa is set, think about how many additional seats the room really needs.

Do not ask, “Can I fit another chair here?”Ask, “How many people actually use this room most of the time?”

A household of three with a three-seat sofa may only need one accent chair. If you entertain regularly, two chairs across from or angled toward the sofa can create a better conversation area.

For a larger household, a sectional may work better than combining a sofa with several separate chairs.

The number of furniture pieces should come from how the room is used, not from how much empty floor space is left.

4. Put Accent Chairs Where People Will Actually Want to Sit

After adding chairs, do not judge their placement only by how balanced the room looks.

Sit in each chair.

A good chair position should support at least one real use:

  1. talking comfortably with someone on the sofa;
  2. watching TV without an awkward angle;
  3. enjoying the fireplace or outside view;
  4. creating a useful reading spot.

If a chair looks good in a corner but no one can comfortably watch TV, join a conversation, or move around it, it is probably filling space rather than improving the layout.

You may not need to move the chair very far. Turning an accent chair slightly toward the sofa can often make the seating arrangement feel much more natural.

5. Add the Coffee Table After the Seating Is Set

The coffee table should work around the seating, not force the seating to work around the table. Place it in front of the sofa and sit down again. Check whether you can reach it comfortably, stand up without hitting your knees, and walk around it without squeezing through a narrow gap.

A common starting point is about 14 to 18 inches between the sofa and coffee table. If the room suddenly feels crowded after adding the table, do not immediately move the sofa. The coffee table itself may simply be too large.

In a smaller living room, a compact round or oval table, nesting tables, or an ottoman with a tray may work better than a large rectangular coffee table.

6. Walk Your Normal Routes Through the Room

Once the main furniture is in place, walk through the room the way you actually use it every day.

Try routes such as:

  • Entry → Sofa
  • Sofa → Kitchen
  • Sofa → Dining Area
  • Sofa → Patio or Backyard
  • Living Room → Hallway

For primary walkways, about 30 to 36 inches is a useful starting point. But the more important test is whether you can move through the room without constantly turning sideways, stepping around furniture, or changing your path.

If you have to walk around an accent chair every time you go to the kitchen, the chair is probably in the wrong place.

If the main route to the patio cuts directly between the sofa and coffee table, the seating area may be sitting in the middle of a traffic path.

A layout can look perfectly balanced and still be frustrating to live with.

7. If the Room Still Feels Crowded, Remove Something

When a living room feels cramped, the instinct is often to push everything closer to the walls.

Sometimes the real problem is simply that there is too much furniture.

Temporarily remove one piece, such as:

  • an accent chair that is rarely used;
  • a side table;
  • an ottoman;
  • a console table;
  • an extra small table.

Then look at the room again.

If the space is easier to move through and you have not lost any important function, that piece may not need to be there.

Not every empty area in a living room needs to be filled.

8. Live With the Layout Before You Finalize It

Before deciding that the layout is finished, actually use the room.

Sit on the sofa and watch TV. Have a conversation from different seats. Reach for the coffee table. Stand up and walk through the space while someone else is sitting down.

Ask yourself:

  1. Is the TV comfortable to watch?
  2. Can people talk without constantly turning around?
  3. Is the coffee table easy to reach?
  4. Can you stand up without bumping into furniture?
  5. Can someone walk through the room without disturbing people who are seated?
  6. Is any piece consistently in the way or rarely used?

If everyday actions feel natural, the furniture placement is probably working.

Planning a living room furniture layout is not about finding the most “correct” arrangement. It is about finding the arrangement that works best for your room and the way your household actually lives. A practical order is: place the sofa first, add only the seating you need, position the coffee table, test your walking paths, remove anything unnecessary, and then live with the layout before making the final call.

What Living Room Furniture Is Worth Buying? 

Once you have a basic living room layout in place, the next step is deciding which furniture is actually worth adding. Not every open spot needs to be filled, and more furniture does not necessarily make a room feel more complete. A better approach is to prioritize pieces that improve seating, everyday convenience, and storage, then add optional furniture based on the size of the room and how your household uses the space. The table below can help you decide which living room pieces are worth buying first.

Furniture

Is It Worth Buying?

Why It’s Useful

Best For

Sofa or Sectional

Essential

It provides the main seating and usually anchors the entire living room layout.

Almost every living room

Coffee Table

Usually worth it

Gives you a convenient surface for drinks, remotes, books, and everyday items.

Medium to large seating areas

Accent Chair

Worth it if needed

Adds flexible seating without taking up as much space as a second sofa.

Entertaining, reading, extra seating

Side Table

Often worth it

Keeps drinks, lamps, and personal items within easy reach of the sofa or chairs.

Most seating areas

TV Stand or Media Console

Depends on your setup

Provides storage for electronics and helps organize the TV area.

Rooms with a TV that is not fully wall-mounted

Ottoman

Worth it for flexibility

Can serve as a footrest, extra seat, or even a coffee table with a tray.

Small or multifunctional living rooms

Storage Cabinet or Console

Worth it if storage is limited

Helps hide clutter while adding useful surface space.

Family rooms and smaller homes

Area Rug

Usually worth it

Visually connects the seating area and helps define the layout.

Open-plan or larger living rooms

Bookshelf

Optional

Adds storage and display space but can take up valuable wall and floor area.

Homes with books or display needs

Extra Sofa

Only in some rooms

Adds seating but can make smaller living rooms feel crowded.

Large, conversation-focused living rooms


Common Mistake You Need to Know when Plan the Living room

Once the sofa, seating, and coffee table are in place, the living room layout may look mostly finished, but that does not always mean it works well in everyday life. Problems often become more obvious after the furniture is actually in the room, such as cramped walkways, an overcrowded feel, or a layout that looks balanced but is not comfortable to use. Before finalizing the arrangement, check for these common mistakes.

1. Choosing Furniture That Is Too Large or Adding Too Much

One of the most common living room layout problems is not necessarily poor placement, but furniture that is too large or simply too much furniture for the available space. A sofa may fit along the wall, but once you add a coffee table, accent chairs, and side tables, the room can quickly start to feel crowded and walkways may become too narrow.

Do not judge a piece only by whether it physically fits. Consider how much usable space will remain around it once the rest of the furniture is added. And remember, not every empty corner needs to be filled.

2. Pushing All the Furniture Against the Walls

Many people push sofas, chairs, and cabinets against the walls because they think it will make the living room feel larger. In some rooms, however, this can leave the seating too far apart and create a large, unused space in the middle.

In a larger living room, try pulling the sofa or chairs slightly toward the center to create a more connected seating area. In an open-concept space, a floating sofa can also help define the living room without adding physical walls.

3. Ignoring Traffic Flow

A furniture arrangement can look neat and still be frustrating to live with. If you constantly have to walk around an accent chair, coffee table, or ottoman to reach the kitchen, hallway, patio, or another room, the furniture is probably interfering with a natural walkway.

After arranging the room, walk through the routes you use every day. If you frequently have to turn sideways, take a longer path, or walk between the sofa and TV, adjust the furniture instead of making the walkway even tighter.

4. Prioritizing Looks Over Everyday Use

A symmetrical layout can look polished, but it is not always the most practical choice. You do not necessarily need two matching chairs, identical side tables on both sides of the sofa, or every seat facing directly toward the TV.

Instead, consider how the furniture actually works in daily life. Can people sitting in different seats talk comfortably? Is the coffee table easy to reach? Is the TV comfortable to watch? Are the seats close enough to feel connected?

A good living room layout should first be comfortable to sit in, easy to move through, easy to socialize in, and practical to use. Visual balance and decoration should come after those basics are working.


FAQ

1. How Much Does It Cost to Furnish a Living Room?

The cost to furnish a living room varies widely based on room size, furniture quality, and how many pieces you need. A basic setup with a sofa, coffee table, side table, and a few accessories may cost around $1,500–$3,000, while a mid-range living room with a sectional, accent chairs, rug, lighting, and storage can easily reach $4,000–$8,000 or more. If you already own some furniture, start by replacing only the pieces that do not fit the new layout well.

2. What Is the Best Furniture Layout for a Small Living Room?

The best small living room layout usually uses one appropriately sized sofa as the main anchor, with only the extra seating and tables you actually need. Keep the main walkway open, avoid oversized furniture, and choose compact pieces such as a small coffee table, nesting tables, or one accent chair instead of several bulky pieces. In many small rooms, a simple sofa + one chair + compact table layout works better than trying to fill every wall.

3. Should You Choose a Sofa or Sectional for a Small Living Room?

A standard sofa is usually more flexible in a small living room because it leaves more room for walkways, chairs, and tables. A small sectional can work well if you need more seating and the room has a clear corner where the chaise or return will not block circulation. Choose based on the actual floor plan, not just seating capacity. If the sectional makes you squeeze around furniture or removes a main walkway, a regular sofa is the better choice.

4. How Do You Arrange Furniture in a Long or Rectangular Living Room?

In a long or rectangular living room, avoid spreading furniture evenly from one end of the room to the other. Instead, create one main seating area around the sofa, TV, or fireplace and keep the furniture visually connected. If the room is especially long, divide it into two useful zones, such as a main seating area and a reading corner, rather than trying to make one furniture group fill the entire room. Placing some furniture perpendicular to the long walls can also help the room feel less narrow.

5. Should You Plan the Living Room Layout Before Buying Furniture?

Yes. Planning the layout before buying furniture helps you avoid choosing pieces that technically fit but leave too little room for walkways, tables, or additional seating. Measure the available space, decide where the sofa and main seating area will go, and estimate the clearances you need around them before shopping. It is usually easier and less expensive to choose furniture around a workable layout than to redesign the room around furniture you have already purchased.


How to Import Custom Furniture From China: A Practical U.S. Guide

Importing custom furniture from China is not simply a matter of finding a lower factory price. It is a project chain that runs through product definition, compliance, production, inspection, international freight, customs clearance, receiving, and installation. A weak handoff at any point can erase the savings created at another.

The process can make sense for a coordinated residential package, retail collection, hotel, development, or multi-unit project. It is less forgiving when dimensions are still changing, the quantity is very small, or the delivery date has no contingency. The safest approach is to assign every important decision to a named party before a deposit turns design questions into production problems.

U.S. buyer and furniture production coordinator reviewing a walnut cabinet sample and shipment materials
A reliable import plan connects the product sample to packaging, freight, customs, receiving, and installation responsibilities.

First, Decide Whether Importing Fits the Project

International sourcing works best when the project has enough volume or design value to absorb development, samples, inspections, freight, and receiving. A guestroom package repeated across many rooms, a coordinated model-home collection, or casegoods for several apartment units may justify that fixed work. One urgent sideboard often does not.

Compare the cost of furniture installed and ready to use, not only the unit price. Include your team’s design and approval time, sample shipping, quality checks, ocean or air freight, duties, broker and destination charges, storage, final-mile delivery, assembly, installation, and a realistic allowance for spares or corrections.

Local or mixed sourcing may be more resilient when the site is unfinished or field conditions are irregular. One hybrid is to import repeatable furniture and use qualified local parties for field-sensitive work. The right boundary depends on what can be frozen before production.

Build a Specification Package Before Requesting Quotes

A supplier cannot price “good quality” consistently. Prepare quantities, overall and internal dimensions, use conditions, substrate, visible finish, hardware, upholstery construction, performance needs, packaging, assembly, and installation responsibility.

Separate nonnegotiable requirements from details open to engineering and areas where you want a recommendation. If a cabinet must fit specified equipment, identify the clear opening, plug clearance, cable route, and ventilation. If a sofa is intended for a rental property, state the cleaning, durability, seat-feel, and replacement considerations rather than relying on a reference photograph.

Add U.S. site information early. Record destination ZIP code, residence or project type, doorway and elevator constraints, loading conditions, room or unit labels, and delivery method. A 96-inch media cabinet that fits the final wall may still need to ship in modules to turn through an apartment corridor. Module joints and carton size are design decisions, not last-mile surprises.

If the product brief is still evolving, use the comparison of OEM and ODM furniture manufacturing to decide which details should be developed from scratch and which can begin with an existing platform.

Assign U.S. Import and Compliance Responsibilities Early

Before paying a deposit, identify the importer of record, customs broker, freight forwarder, product-compliance owner, insurer, and U.S. receiver. State who will confirm classification, value, country-of-origin marking, entry data, bond, estimated duties, and agency documentation. A broker can file an entry, but the commercial parties still need to provide accurate, complete product information.

Do not accept an importer structure you do not understand because a quote says “door to door.” Ask which entity appears as importer, supplies the bond, pays duties and destination charges, and holds records. Document the relationships among seller, exporter, importer, and consignee.

Classification depends on what the furniture is, what it is made from, and sometimes how it functions. Give the broker drawings, photographs, material breakdowns, intended use, and product value. Do not rely on a generic code copied from a prior shipment. Duties and additional trade measures can change, so obtain a current estimate for the actual product instead of treating an online percentage as universal.

Product requirements also vary. Finished goods containing regulated hardwood plywood, medium-density fiberboard, or particleboard may be subject to EPA TSCA Title VI formaldehyde requirements, including applicable certification, labeling, recordkeeping, and import information. Upholstered furniture, children’s furniture, products with electrical components, and contract installations may raise different federal, state, local, or customer standards. Name each applicable requirement and its evidence; a broad statement that the product “meets U.S. standards” is too vague to approve.

Regulated solid-wood pallets, crates, and other wood packaging used to support or protect cargo entering the United States generally need applicable ISPM 15 treatment and marking. Confirm packaging material and marks before loading. Compliant shipping wood does not prove that the furniture itself satisfies product requirements; these are separate checks.

This is operational guidance, not customs or legal advice. A licensed U.S. customs broker and appropriate product or legal specialist should evaluate the specific shipment, especially when classification, origin, regulated materials, children’s use, electrical parts, or high values are involved.

Find and Verify the Right Furniture Manufacturer

Look for evidence relevant to the actual assignment: similar dimensions, materials, construction, quantity, customization depth, and destination. A factory experienced in upholstered seating may not be the right choice for wall-sized casegoods, even if both portfolios look polished.

Verify the legal company name, address, contact details, contract party, and payment beneficiary. Ask the supplier to explain its process from brief through engineering drawings, samples, material control, production, inspection, packaging, and corrective action. The guide to choosing a custom furniture manufacturer provides a deeper capability checklist.

For a meaningful order, consider a live video review, factory audit, paid prototype, or smaller first release. Ask how drawing revisions are controlled and components labeled. A useful manufacturer identifies missing information; an immediate promise that everything is possible is not an engineered answer.

Communication discipline matters across time zones. Use one decision log with the item, version, owner, deadline, and outcome. Consolidate comments rather than sending contradictory notes from several stakeholders. Confirm material names, dimensions, and approvals in a shared written record.

Compare Quotes Using One Scope and One Delivery Point

Every supplier should quote the same quantity, drawing version, material definition, hardware, finish, upholstery, packaging, sample scope, inspection expectation, and delivery point. List optional upgrades and substitutions separately. If a selection is not final, use an explicit allowance.

Write the Incoterm with the named place and the agreed rule version. The term helps allocate specified transport costs and risk, but it does not define product quality, payment milestones, testing responsibility, intellectual property, installation, or every destination fee.

An EXW factory price cannot be compared directly with a quote that includes main freight or destination service. Ask a forwarder and broker to price the same origin, destination, package dimensions, weight, commodity description, and schedule. Clarify whether the destination figure includes port or terminal handling, customs entry, examination risk, chassis or equipment, appointment, residential access, liftgate, inside delivery, and storage.

The pre-order custom furniture checklist can help uncover exclusions before they become change orders.

Calculate Landed Cost, Not Just Factory Price

Build landed cost by shipment and installed unit. Include product, samples, origin handling, main freight, insurance, duties and applicable fees, brokerage, terminal charges, possible examination, receiving, storage, final mile, unpacking, installation, and spare parts.

Use final carton dimensions rather than early product estimates. Upholstered furniture and assembled cabinets can be expensive to move because volume, not only weight, controls the shipment. Flat packing or modular construction may improve loading, but only if assembly quality, instructions, hardware, and site labor remain acceptable.

Run at least three scenarios: expected, delayed, and disrupted. A missed free-time window, site not ready for delivery, customs examination, or late document can produce charges quickly. Contingency is not a prediction that something will fail; it prevents a manageable delay from making the entire sourcing decision uneconomic.

Currency and quote validity also matter. State the currency, validity period, deposit date, and which material or freight assumptions may be revised. Do not hide uncertain costs inside a falsely precise total.

Approve Drawings, Materials, and a Representative Sample

Renderings communicate appearance; production drawings control fabrication. Review overall and internal dimensions, door and drawer swings, shelf spacing, equipment openings, clearances, grain direction, veneer or upholstery seams, hardware locations, module joints, fastening points, and carton breakdown.

Return one consolidated, dated response. Mark the drawing approved, rejected, or approved only with listed corrections. After a revision, confirm the new sheet rather than assuming the comments were transferred. Changes to dimensions, materials, finish, hardware, quantity, or delivery should produce a written cost and schedule effect.

Use physical finish and material samples when color, texture, sheen, or touch matters. View them in the intended room lighting. Natural wood, stone, and leather require an acceptable range because a small sample cannot guarantee identical pattern or tone over an order.

A representative sample should be checked for dimensions, comfort, stability, joints, surface quality, hardware, assembly, labeling, and packaging. Connect the approved sample to a drawing and specification version. A sample is not useful as a control if no one records what was accepted or changed.

Product buyer and furniture engineer measuring an upholstered lounge chair sample before batch production
A representative sample turns dimensions, comfort, finish, joinery, and packaging into evidence before volume production.

Put Quality Control at Measurable Gates

Choose inspection points where correction is still practical. Depending on the product, these may include material verification, frame or cabinet assembly, pre-finish review, upholstery preparation, hardware installation, final function testing, and packaging.

For larger orders or a new supplier, consider an independent pre-shipment inspection. The inspection brief should reference the approved documents, quantities, sampling approach, critical dimensions, finish range, operation checks, packaging, labels, and pass/fail rules. “Looks good” is not an acceptance standard.

Leave time for correction and reinspection. If inspection occurs on the day cargo must reach a consolidation warehouse, the buyer may face a false choice between shipping known defects and missing the booking. Put the inspection window into the production calendar.

The Avrelahome furniture quality checklist illustrates how product, finish, function, packaging, and documentation can be reviewed as separate evidence rather than one general impression.

Write the Order and Payment Terms Clearly

The purchase documents should identify both parties, products, quantities, referenced drawings and samples, packaging, price and currency, Incoterm and named place, milestones, change procedure, inspection rights, spare parts, claim timing, delay handling, and dispute terms.

Payment milestones should correspond to verifiable progress and leave a reasonable opportunity to address problems before final release. Pay the verified contract party through a traceable method. Independently confirm any change in beneficiary or bank account through a previously established channel; do not rely only on a reply inside the same email thread.

State who owns design files, production drawings, tooling, and approved samples, and who may use them. For a high-value or commercially important program, appropriate legal review can cost much less than resolving ambiguous ownership or remedy terms after production.

Plan Freight, Customs Clearance, and U.S. Receiving

Before completion, coordinate the commercial invoice, packing list, bill of lading instructions, country-of-origin marks, required product or agency documents, insurance, and entry data. Give the broker enough time to review descriptions and supporting information before arrival.

Confirm full-container or less-than-container service using the final packing list. A smaller shipment is not automatically simpler; consolidation can add handling points, minimum charges, deconsolidation, and warehouse coordination. A full container may reduce handling but requires the receiving site to unload safely within the appointment and equipment window.

The U.S. receiver needs the arrival range, equipment type, package count, unloading plan, storage map, and installation sequence. Hotels and multi-unit projects should label cartons by room, unit, floor, or phase before shipping. Sorting at a U.S. jobsite wastes skilled time.

For buyers organizing the full remote approval path, the guide to ordering custom furniture online shows how to control drawings, samples, payments, and receiving across distance.

Inspect Arrival and Manage Claims

At delivery, confirm the container seal where applicable, package count, and visible condition before unloading. Photograph the container or truck, pallets, labels, punctures, crushed corners, water marks, and shifted cargo. Follow the carrier and insurer process for noting exceptions.

After unpacking, verify item identity, orientation, quantity, dimensions, finish, hardware, and basic operation. Use the room or unit labeling plan to move each package once. Keep packaging and do not make improvised repairs until the seller, carrier, or insurer has confirmed the claim process.

Connect arrival evidence to the pre-shipment inspection and loading record. When package numbers, loading photographs, and destination photographs align, it is easier to distinguish a manufacturing issue from packaging failure or transit damage.

Receiving team documenting packaging condition while unpacking an imported walnut cabinet
Package labels and condition photographs create a traceable record before imported furniture enters installation.

Red Flags That Should Stop the Shipment

Pause if a supplier gives a final price without dimensions or quantity, refuses production drawings or a representative sample, cannot define materials or packaging, requests payment to an unexplained third party, or offers a vague door-delivered arrangement without identifying the importer and customs responsibilities.

Also pause if several files show different dimensions, the sample differs from the approved specification, required documents cannot be tied to the actual product, wood packaging marks are missing, or a failed inspection has no documented corrective action. These may be solvable, but a vessel booking should not force acceptance.

For a coordinated import program, Avrelahome can help define the product package, samples, production checkpoints, packing logic, and project handoffs. Its custom furniture manufacturing scope provides a starting point for residential, hospitality, and project categories. U.S. import, legal, tax, and product-compliance roles should still be assigned to the appropriate qualified parties for the actual shipment.

Frequently Asked Questions

Is importing custom furniture from China always cheaper?

No. Quantity, customization, package volume, duties, inspections, freight, storage, final mile, and installation all affect the result. Compare landed and installed cost at the required date, not only factory price.

Do I need a customs broker?

A licensed U.S. customs broker is often valuable for a commercial furniture shipment, classification, entry preparation, and agency coordination. Using a broker does not eliminate the need to provide accurate product information or understand the importer structure.

How do I determine the duty rate?

Duty depends on correct classification, value, origin, and current applicable measures. Give a broker product photographs, materials, construction, function, and value. Do not assume every type of furniture has the same rate.

Should I use a full container or a shared shipment?

It depends on volume, weight, schedule, routing, handling, and destination charges. Compare options using the final packing list and include consolidation, deconsolidation, storage, and final-mile costs.

Can I skip the sample and go directly to production?

That may be reasonable for a stable repeat order tied to an approved sample and strong records. For a new design, comfort-sensitive seating, unfamiliar material, or high-value order, skipping a representative sample converts a controllable development risk into a batch risk.

Final Takeaway

A successful furniture import is not built on one factory promising to handle everything. It is built by dividing product, customs, compliance, quality, transport, and installation responsibilities among parties equipped to own them.

Define the specification and landed-cost model before choosing a supplier. Confirm the importer and product requirements before paying a deposit. Approve drawings and a representative sample before releasing volume production. This sequence matters more than any single price, trade term, or sailing date.